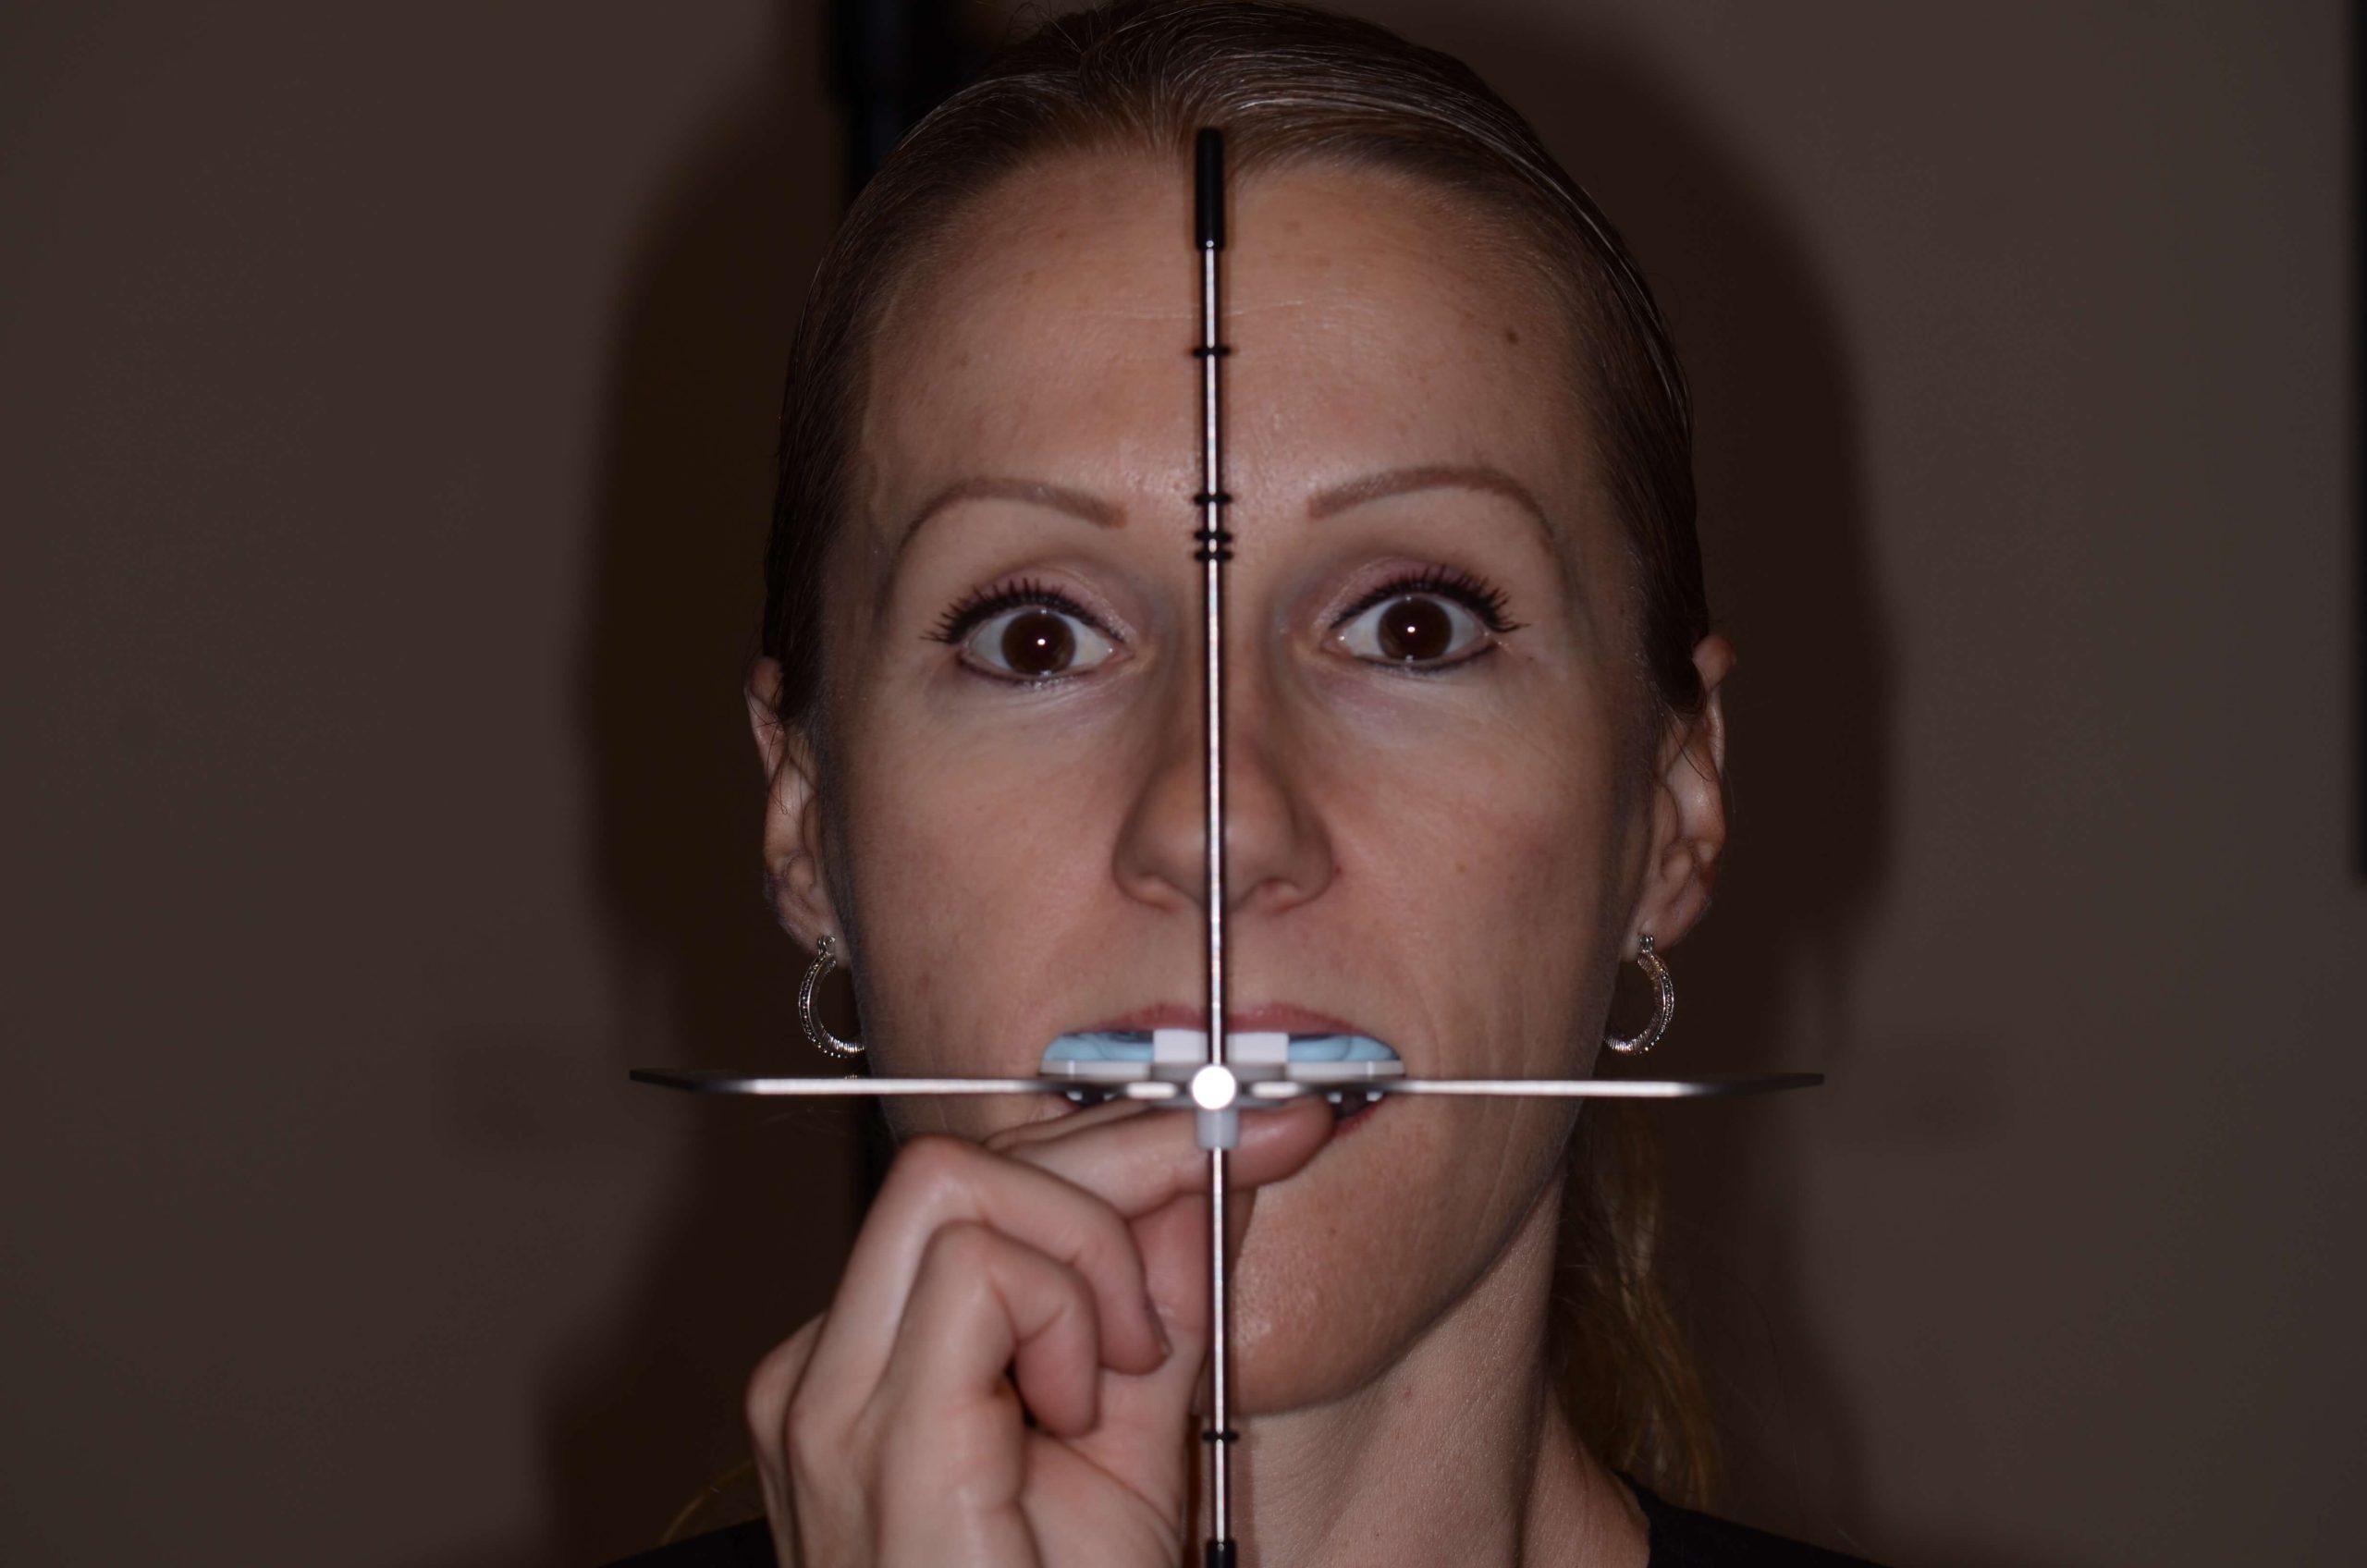
Fleximount To Stabilize Lower Model

February 18, 2019 Lee Ann Brady DMD

Learning from one another is one of the top benefits of dental continuing education.

One of the things that I value about continuing dental education is the opportunity to spend time with other dentists.  I always learn something I can bring back to my office. Recently while lecturing at Midwestern Dental School to the faculty, on of the faculty members told me about a new way to stabilize lower models when mounting, and was even kind enough to give me some samples.

Stabilizing a lower model during mounting with centric relation records is critical to the accuracy of the mounting.

Over the years I have tried about every idea possible to optimize mounting the lower model. If the model moves in the bite registration due to pressure during mounting, tipping or shrinkage of the stone it interferes with the accuracy of the mounting. To overcome this I have tried hot glue, compound, rubber bands, hanger wire bent into a V and probably many more.

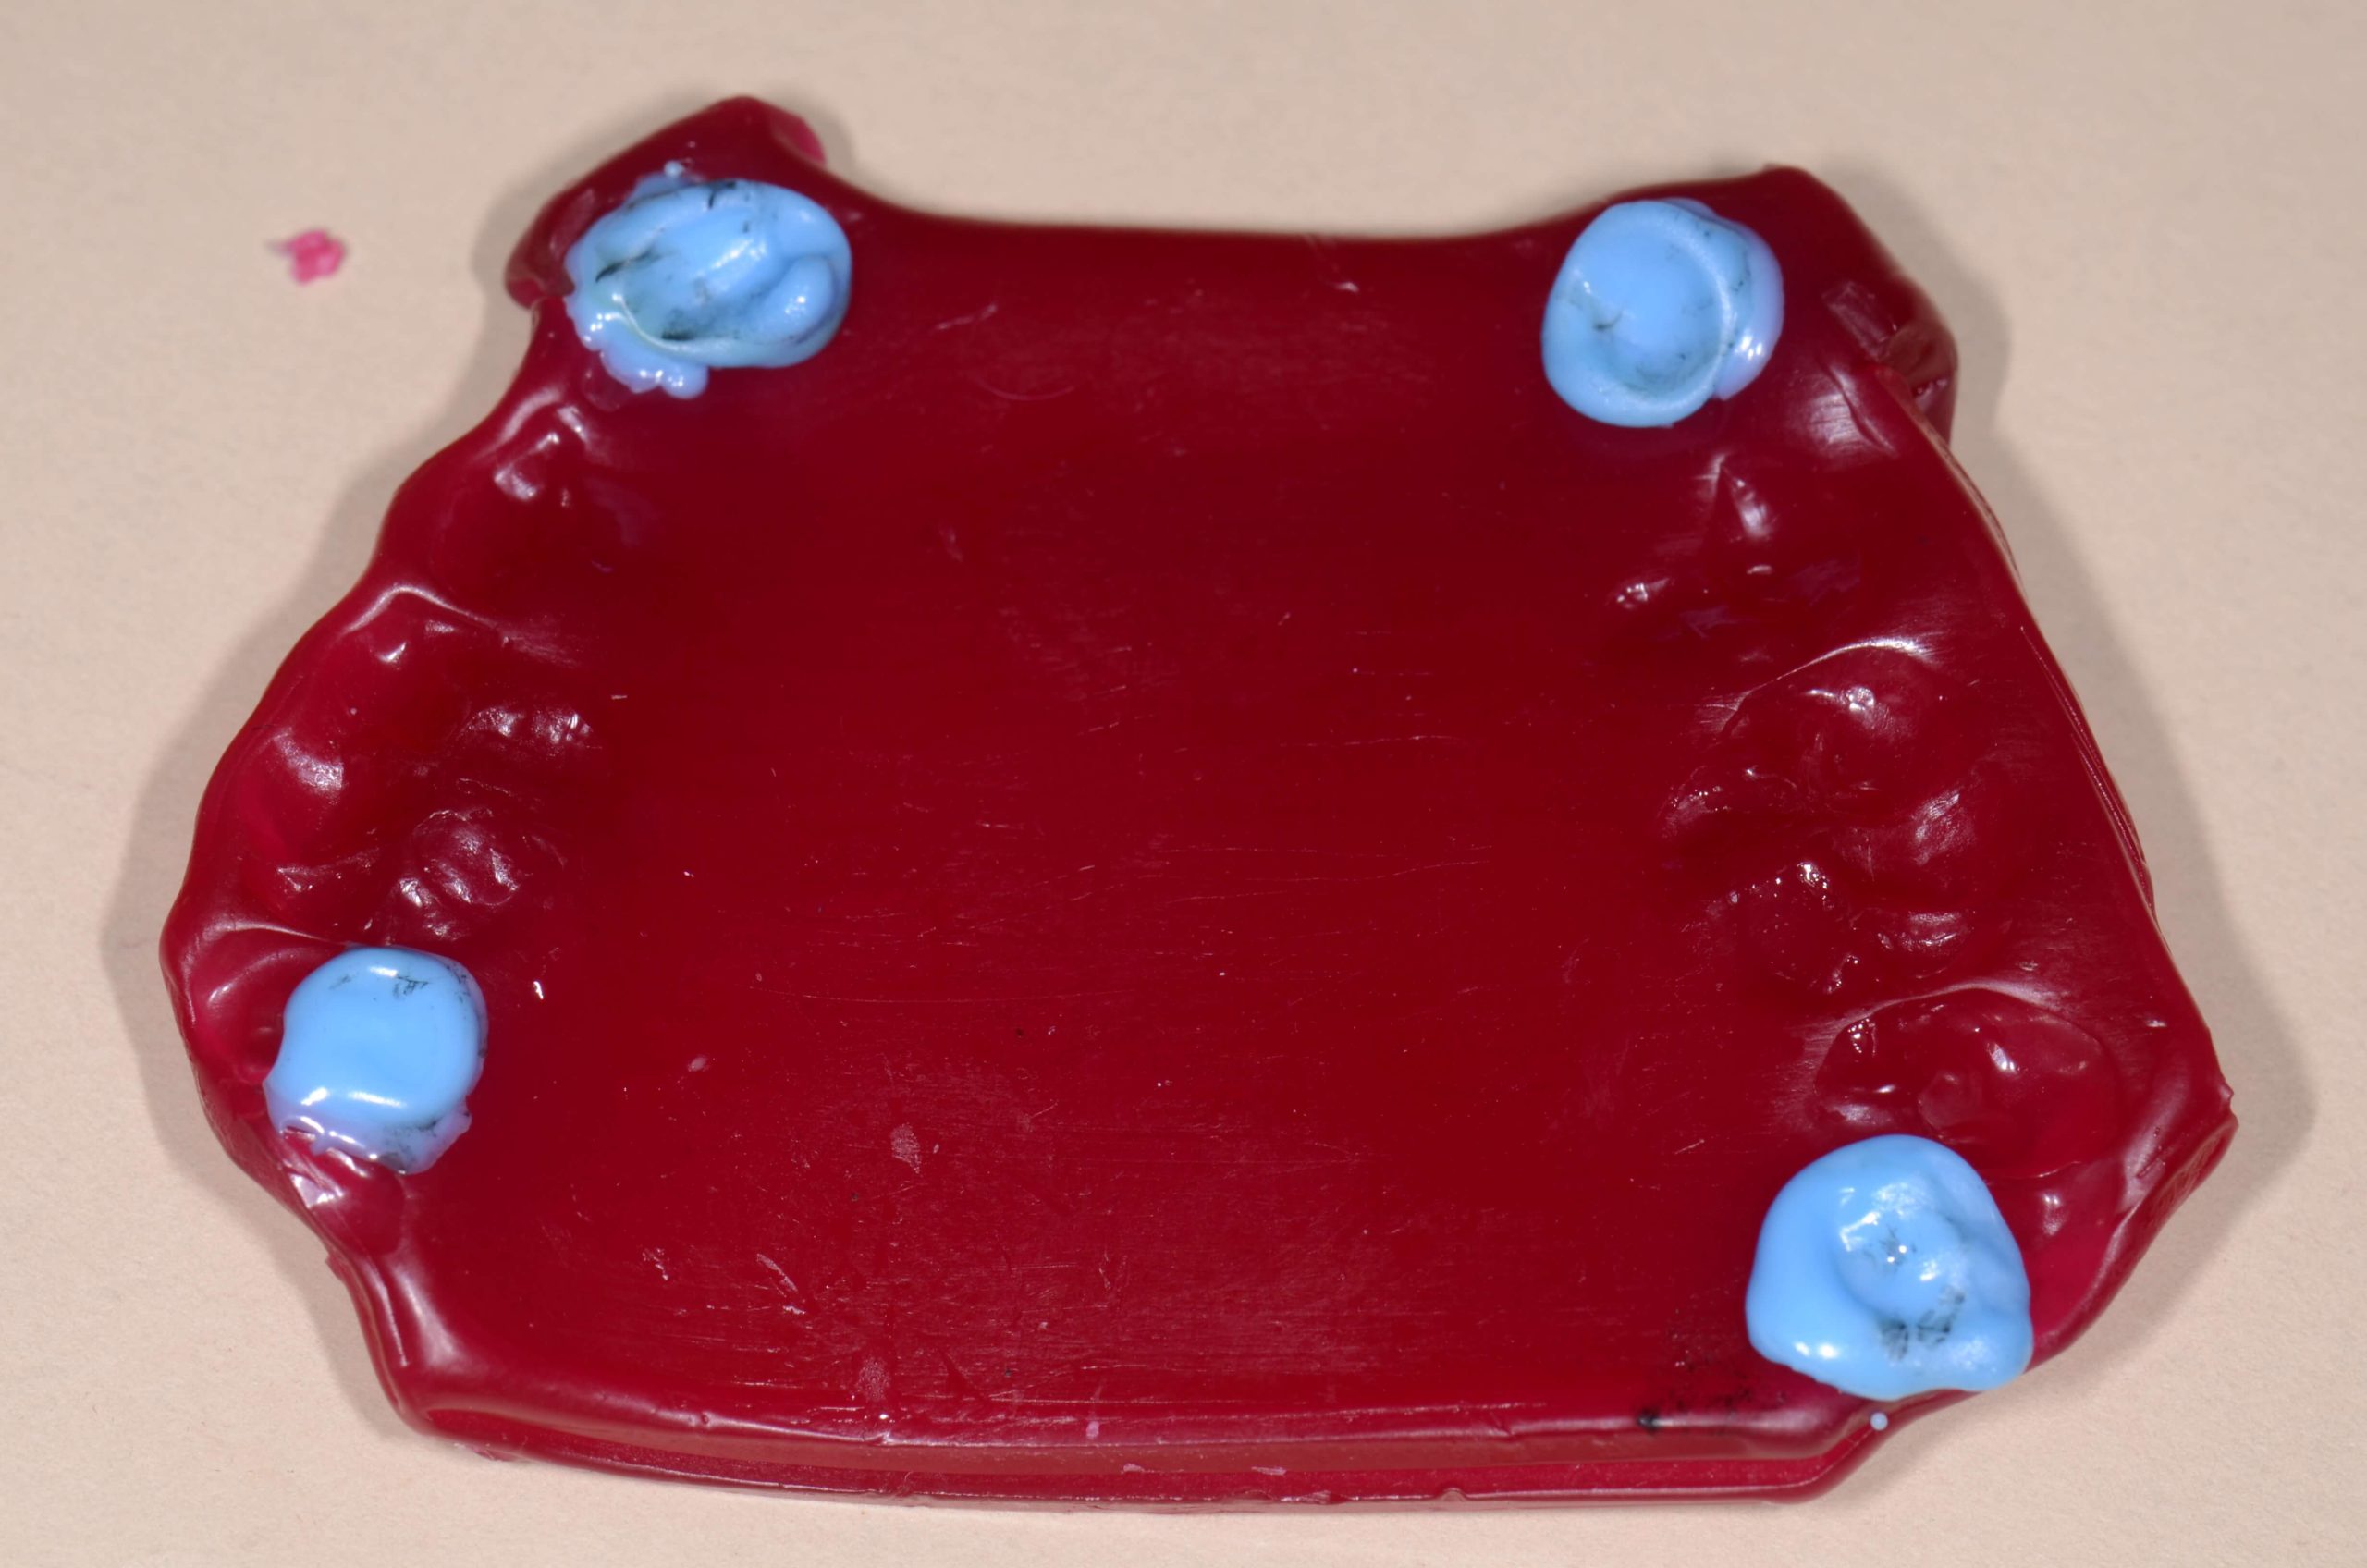
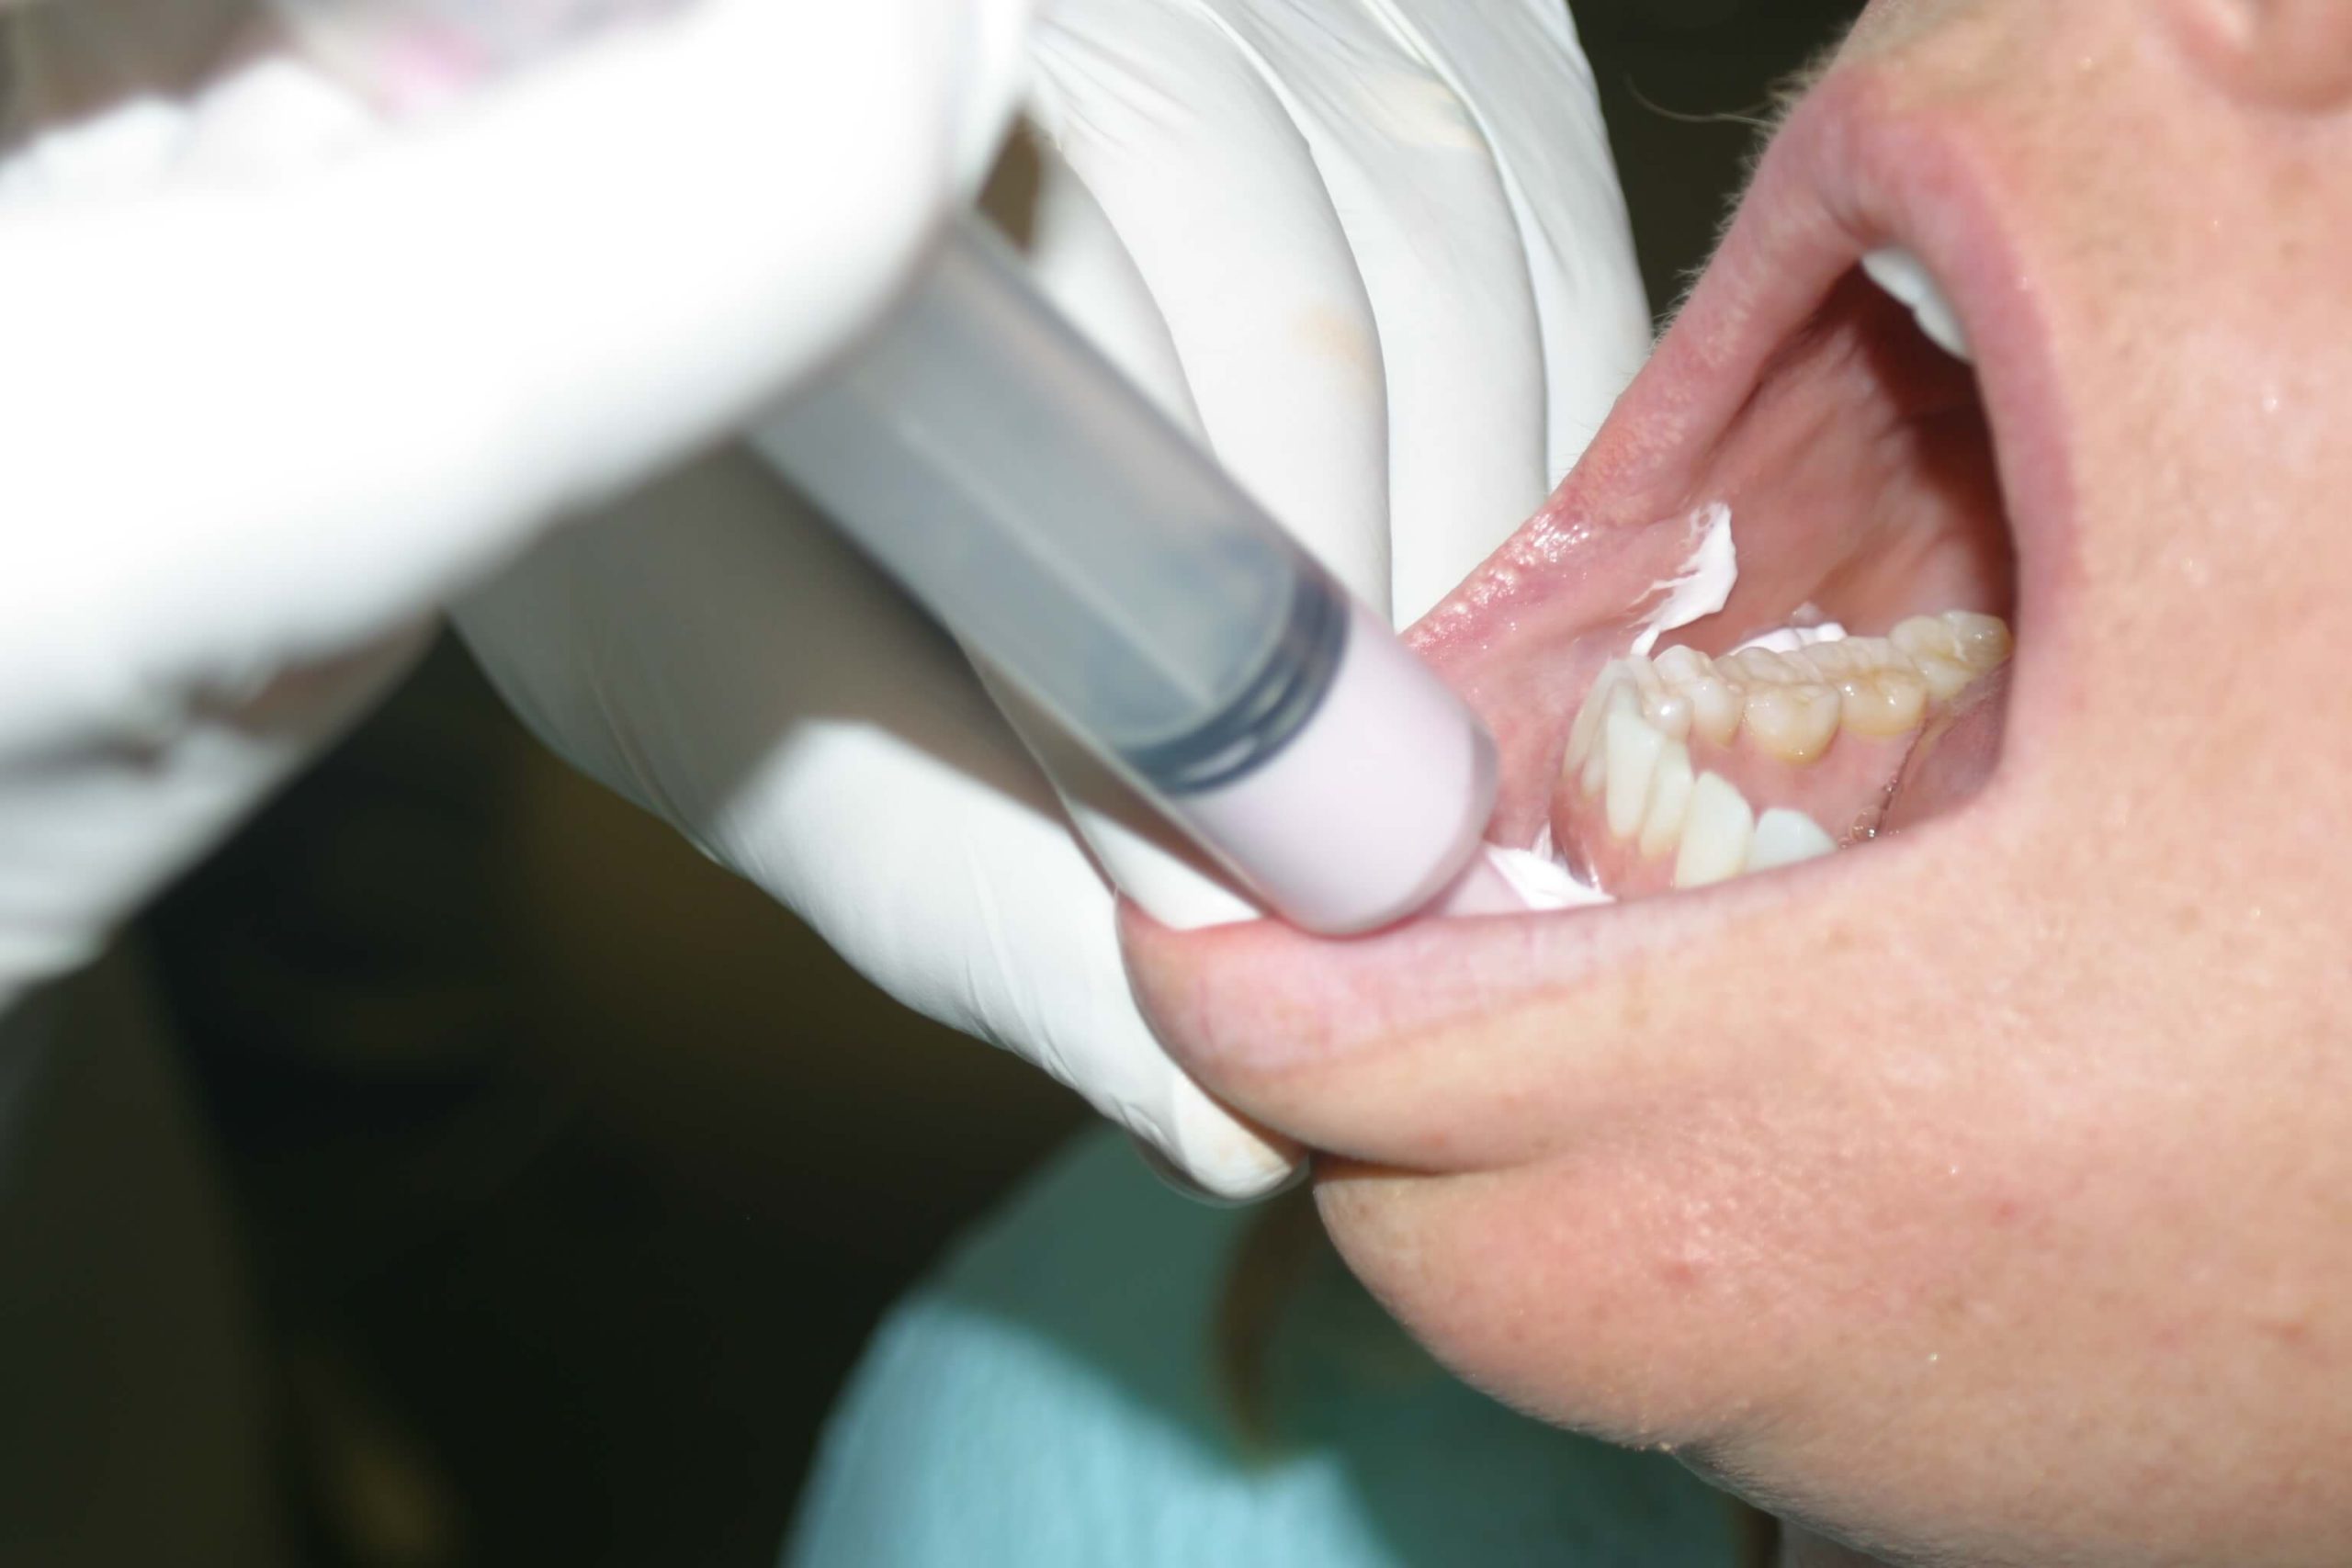
We realized the Fleximount was incredible the first time we used it. Sold by WhipMix and developed for their articulator systems, I will say I have used it on other systems, and as long as there is a knob on the upper member of the articulator it works fantastic. The Fleximount is trapped inside the stone, so they are disposable. The lower model is held with even pressure directly against the upper( if mounting in MIP) or the bite record, therefore no tipping forces are present as with other stabilizer systems. Because it stays in the stone, you can walk away and let it come to a complete set, instead of having to stand and remove the stabilizer while the mounting stone is still somewhat soft. Both of these features result in a very accurate mounting.

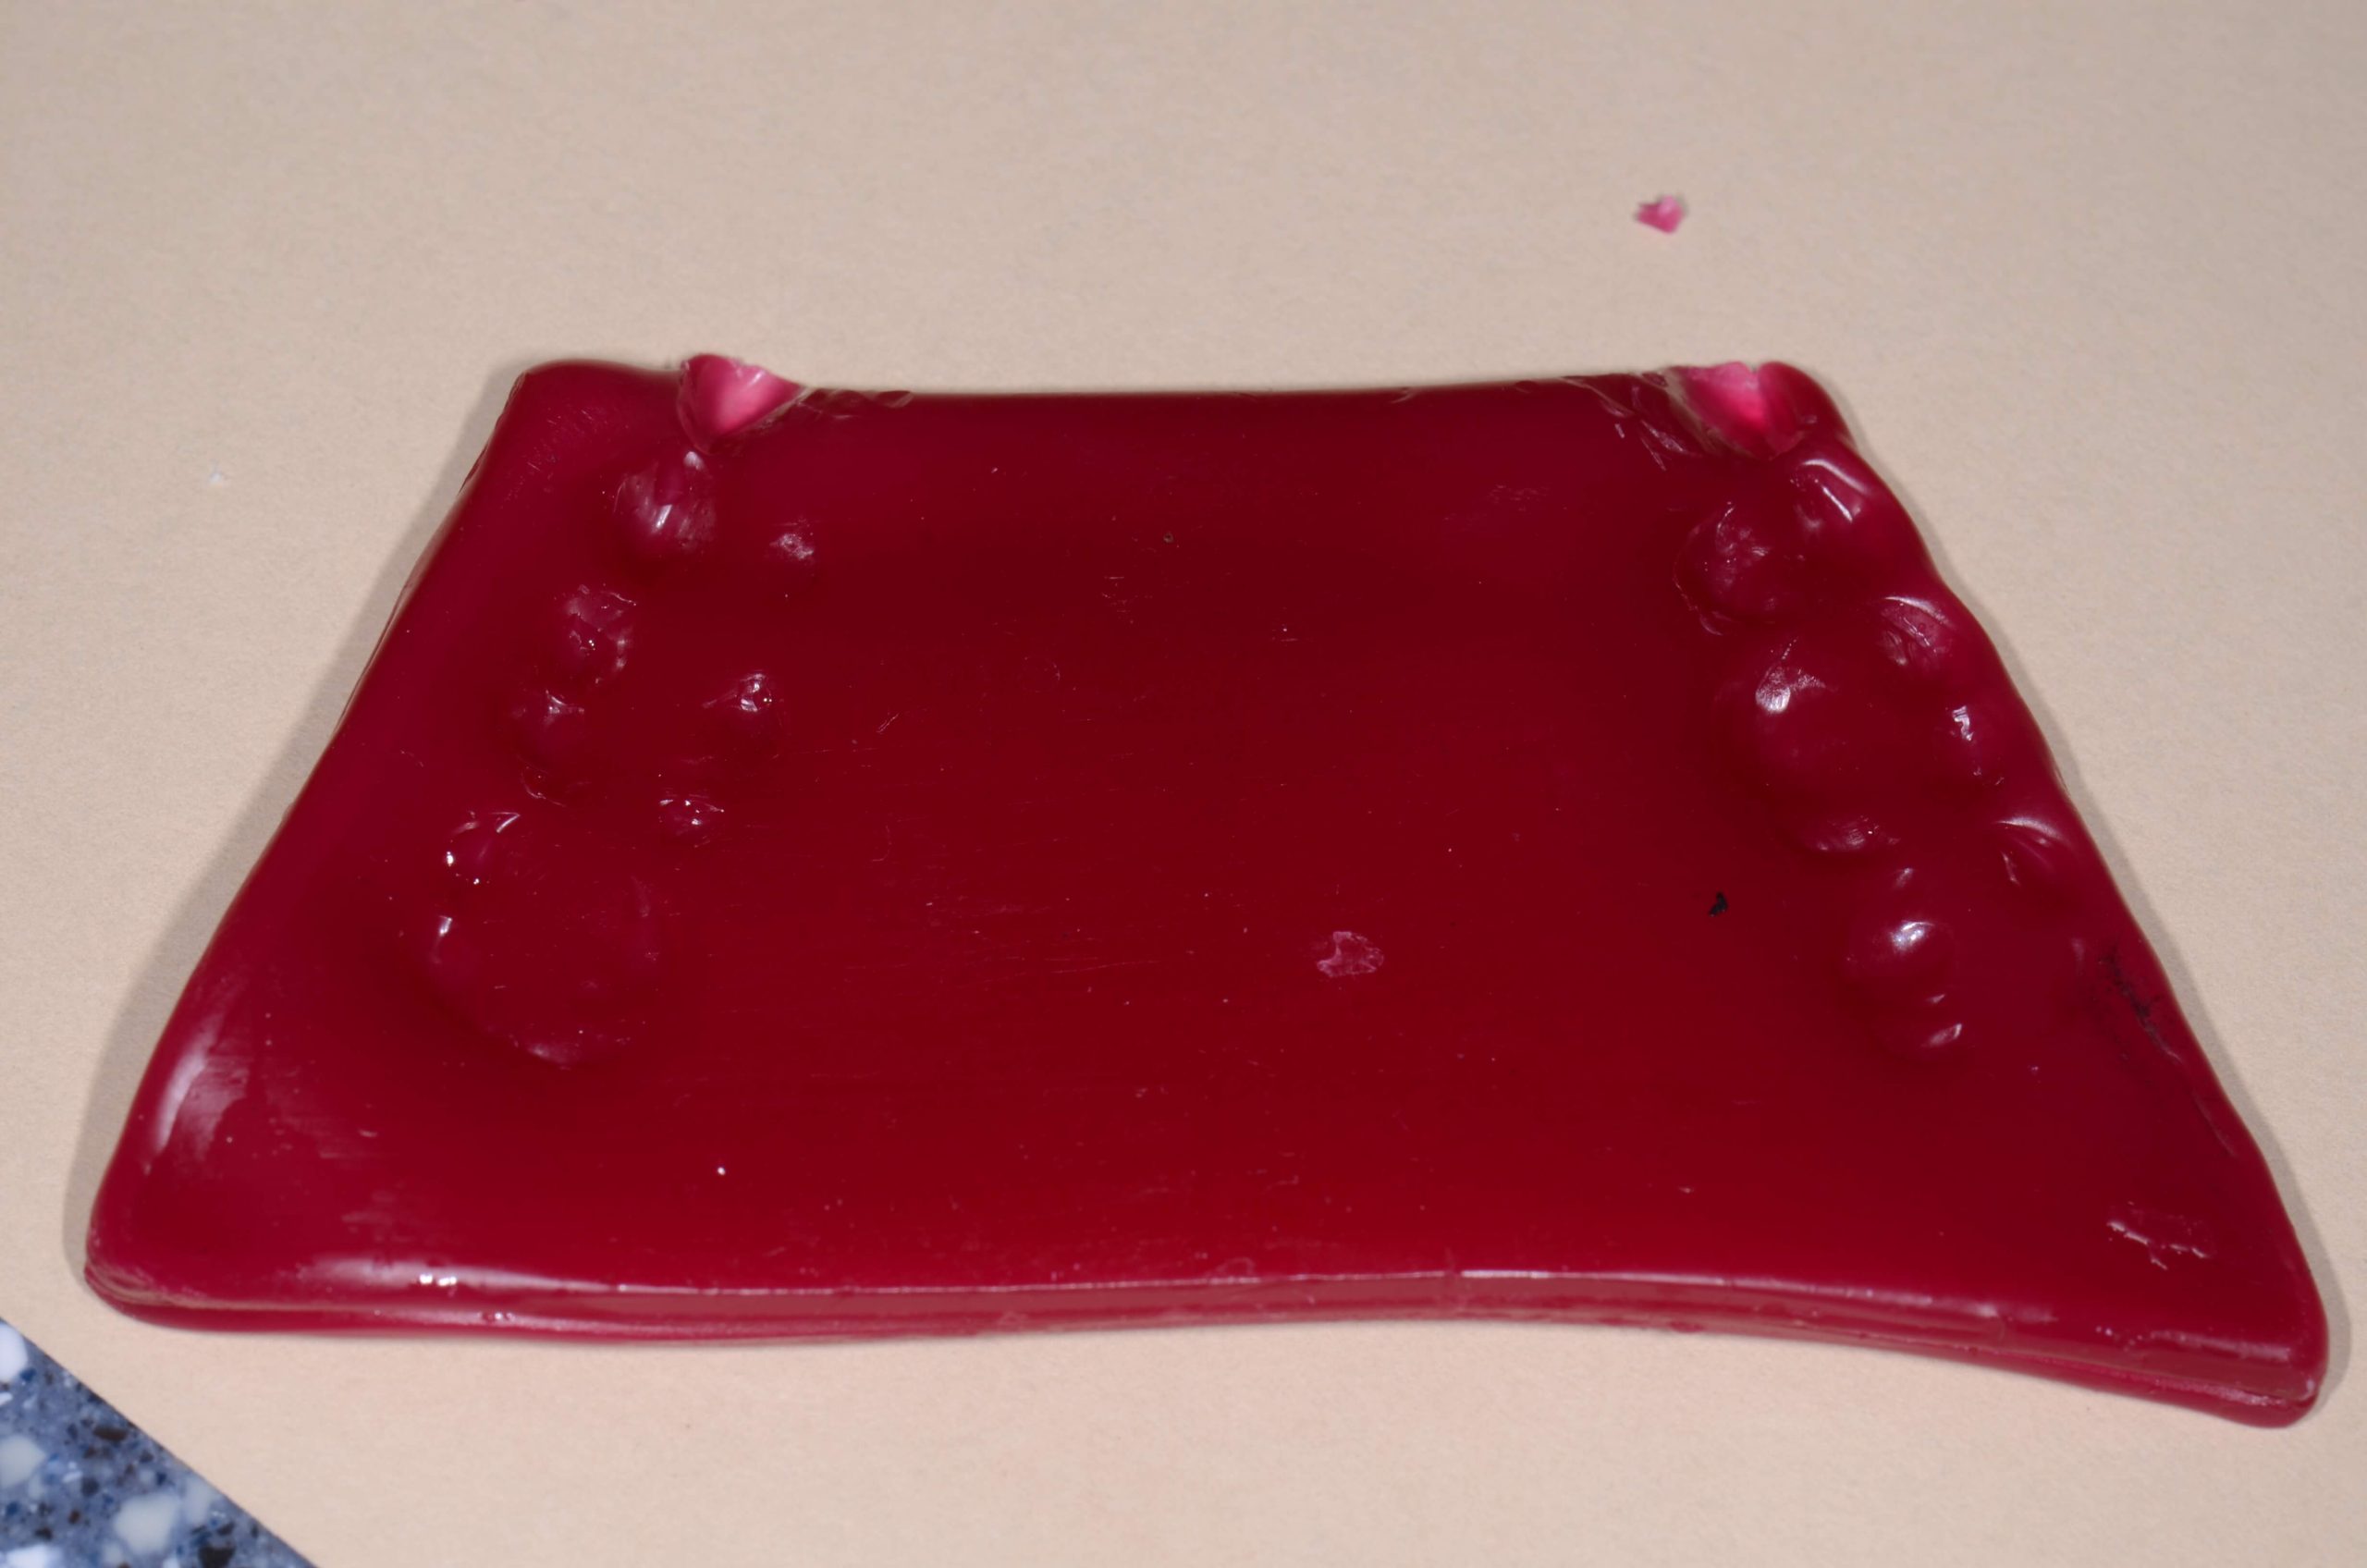
Once the stone is set you simply cut away the rubber band material that is not inside the mounting stone. Now you can finish and groom the lower mounting.

Related Course

Direct Composite: Predictable, Easy and Beautiful

DATE: October 25 2024 @ 8:00 am - October 26 2024 @ 4:00 pm

Location: The Pankey Institute

CE HOURS: 14

Regular Tuition: $ 2195

Single Occupancy with Ensuite Private Bath (per night): $ 290

Achieving Predictable and Stunning Anterior Results Direct composite is something we do every day in our practices. Yet, they can sometimes be frustrating when we don’t get a tight contact…

Learn More>

About Author

User Image
Lee Ann Brady DMD

Dr. Lee Ann Brady is passionate about dentistry, her family and making a difference. She is a general dentist and owns a practice in Glendale, AZ limited to restorative dentistry. Lee’s passion for dental education began as a CE junkie herself, pursuing lots of advanced continuing education focused on Restorative and Occlusion. In 2005, she became a full time resident faculty member for The Pankey Institute, and was promoted to Clinical Director in 2006. Lee joined Spear Education as Executive VP of Education in the fall of 2008 to teach and coordinate the educational curriculum. In June of 2011, she left Spear Education, founded leeannbrady.com and joined the dental practice she now owns as an associate. Today, she teaches at dental meetings and study clubs both nationally and internationally, continues to write for dental journals and her website, sits on the editorial board of the Journal of Cosmetic Dentistry, Inside Dentistry and DentalTown Magazines and is the Director of Education for The Pankey Institute.

FIND A PANKEY DENTIST OR TECHNICIAN

I AM A
I AM INTERESTED IN

VIEW COURSE CALENDAR

Master Wax Centric Relation Bite Record 2

October 15, 2018 Pankey Gram

Now that you have fabricated the platform, the next step is to capture the record with the patient. You will need a heat source and a blue Delar wax Pencil.

The first step is to heat the sides of the Master Wax Platform so they are tempered. Take the wax to the patient’s mouth and place it over the maxillary teeth. The anterior edge of the wax should be at the embrasure between the canine and the lateral. Bend the corners over the canines to help with retention. Press the wax against the teeth and ask the patient to close gently into the wax. Cool the wax with your air water syringe, have the patient open, and continue to cool the platform before removing from the mouth.

Using blue delar wax created a small bead where the lower canines have left an impression. Reseat the platform over the maxillary teeth and using bimanual guidance bring the lower canine cusp tips up until they just touch the blue wax. Have your assistant cool the wax with air. After removing the platform from the mouth add Delar wax where the second molars have left a cusp imprint. Then return the platform to the mouth and using bimanual guidance arc the patient into the wax so the lower molar cusp touches, then cool with air.

Your record should now be dropped into cool water. A disposable plastic container from the grocery works great. Write the patients name on it with sharpie marker and add it to their lab pan.


Related Course

E1: Aesthetic & Functional Treatment Planning

DATE: March 13 2025 @ 8:00 am - March 16 2025 @ 2:30 pm

Location: The Pankey Institute

CE HOURS: 39

Dentist Tuition: $ 6800

Single Occupancy with Ensuite Private Bath (Per Night): $ 345

Transform your experience of practicing dentistry, increase predictability, profitability and fulfillment. The Essentials Series is the Key, and Aesthetic and Functional Treatment Planning is where your journey begins.  Following a system of…

Learn More>

About Author

User Image
Pankey Gram

FIND A PANKEY DENTIST OR TECHNICIAN

I AM A
I AM INTERESTED IN

VIEW COURSE CALENDAR

Master Wax Centric Relation Bite Record 1

October 12, 2018 Pankey Gram

Analyzing a patient’s occlusion is key to providing optimal care. There are multiple ways to take a centric relation bite record, but one of the classics at Pankey has to be utilizing master wax. Easily mounting models in the laboratory is one of the main advantages of this method.

Although a slightly more challenging technique from a chairside perspective, it can still be accomplished with ease. Here is where to start:

Intro to the Master Wax Centric Relation Bite Record

Begin by gathering your necessary tools and materials. Start with a red master wax that looks just like baseplate wax from a standpoint of the size of the wax sheets, although it is different because it’s both softer and tackier. You will also need a blue wax pencil, scissors to cut the wax, a heat source such as an alcohol torch, and a way to light the heat source.

Take a single sheet of wax and temper it in the middle with the intention of being able to bend it in half. Once it is thoroughly tempered, bend it in half without cracking or breaking the wax. Make sure the bend is fairly crisp. After the wax has cooled a little bit, open it back up and cut it in half. Out of every sheet of wax, you should be able to generate two platforms for wax records.

Once again temper the wax halfway in the middle with the heat source. Tempering refers to heating to flexibility but not dripping. Again, fold the wax in half so you have a double thickness sheet. Then, cut the wax into the shape of the platform …

Look for the second part in this series about our master wax technique coming soon. And did you get a chance to read this Pankey Gram blog on enjoying Miami while you visit Pankey? Let us know what you think!

Related Course

E3: Restorative Integration of Form & Function

DATE: October 13 2024 @ 8:00 am - October 17 2024 @ 2:30 pm

Location: The Pankey Institute

CE HOURS: 41

Cost: $ 7200

night with private bath: $ 290

This Course Is Sold Out! Understanding that “form follows function” is critical for knowing how to blend what looks good with what predictably functions well. E3 is the phase of…

Learn More>

About Author

User Image
Pankey Gram

FIND A PANKEY DENTIST OR TECHNICIAN

I AM A
I AM INTERESTED IN

VIEW COURSE CALENDAR

Panadent Dento-Facial Analyzer Technique: Introduction

September 21, 2018 Lee Ann Brady DMD

The Dento-Facial Analyzer is a marvelous tool I use in the practice to mount maxillary models. It has made a huge difference in my practice of dentistry and is one of my favorite tools to teach.

Introduction to the Dento-Facial Analyzer

For the critical aspects of diagnostics and sending info to the lab for the completion of a restorative case, mounting models appropriately is so important. They must be mounted in three planes of space referenced to hinge access to capture esthetic information including incisal plane and occlusal plane relative to the horizon.

Traditionally, this has been accomplished by utilizing a Facebow, Earbow, or by actually capturing hinge access position. Now, we have the option of using the Kois Dento-Facial Analyzer to capture both functional information and esthetic information that we would normally get with a Fox’s bite plane or stick bite. All of this functionality is managed with one simple device.

The Kois Dento-Facial Analyzer was designed based on scientific information gathered by Dr. John Kois, which shows that the distance from the incisal edge position of the maxillary central incisors to hinge access on average is 100 mm. Most people fall within a range of 5 mm to the average, therefore this is the assumption made when the device takes a record.

The armamentarium for record capturing with the Panadent instrument includes the analyzer, bite registration silicone in a gun with a tip, VPS adhesive used in an impression tray, and disposable bite plates that snap onto the analyzer (from the device manufacturer Panadent).

You can use bite registration silicone, Panadent bite tabs, wax, or VPS heavy body impression material to capture the record …

I’ll continue this review of the Dento-Facial Analyzer technique in Part 2, coming soon! And don’t miss one of my recent Pankey Gram favorites from Dr. Bill Gregg on an occlusion-focused hygiene exam. Read it here for his insightful tips.

For an in-person, hands-on lesson in the Dento-Facial Analyzer, check out our Essentials 1 Pankey course. You can also watch this video for a quick refresher.  

Related Course

E1: Aesthetic & Functional Treatment Planning

DATE: May 16 2024 @ 8:00 am - May 19 2024 @ 2:30 pm

Location: The Pankey Institute

CE HOURS: 39

Dentist Tuition: $ 6500

Single Occupancy Room with Ensuite Bath (Per Night): $ 290

This Course Is Sold Out! Transform your experience of practicing dentistry, increase predictability, profitability and fulfillment. The Essentials Series is the Key, and Aesthetic and Functional Treatment Planning is where your journey…

Learn More>

About Author

User Image
Lee Ann Brady DMD

Dr. Lee Ann Brady is passionate about dentistry, her family and making a difference. She is a general dentist and owns a practice in Glendale, AZ limited to restorative dentistry. Lee’s passion for dental education began as a CE junkie herself, pursuing lots of advanced continuing education focused on Restorative and Occlusion. In 2005, she became a full time resident faculty member for The Pankey Institute, and was promoted to Clinical Director in 2006. Lee joined Spear Education as Executive VP of Education in the fall of 2008 to teach and coordinate the educational curriculum. In June of 2011, she left Spear Education, founded leeannbrady.com and joined the dental practice she now owns as an associate. Today, she teaches at dental meetings and study clubs both nationally and internationally, continues to write for dental journals and her website, sits on the editorial board of the Journal of Cosmetic Dentistry, Inside Dentistry and DentalTown Magazines and is the Director of Education for The Pankey Institute.

FIND A PANKEY DENTIST OR TECHNICIAN

I AM A
I AM INTERESTED IN

VIEW COURSE CALENDAR

Exquisite Alginate Impressions

August 26, 2017 Jeff Baggett DDS

Improving the quality of alginate impressions for diagnostic models requires a fine-tuned technique based on specific materials. These materials are used in conjunction with clever steps that lead to a minimization of voids and bubbles.

Dr. Baggett explains his exact procedure for achieving drastically improved alginate impressions. With these recommendations, you’ll find your confidence and efficiency soaring. Impressions are one part of the treatment puzzle that must be as precise as possible to avoid problems down the road.

How to Improve Alginate Impressions for Diagnostic Models

At my practice, we still use alginate impressions as our main impression material for diagnostic models. I generally take them. A very helpful tip to improve the quality of your impressions is to use a 35 ml monoject plastic syringe (from your local dental supplier) and Ivoclar Accudent XD Pre-Sure Tip applicators (Ivoclar Reorder number 67891 Soft Flex Tips).  

By placing the flexible tips on the end of the 35 ml plastic syringes, you are able to squirt excess alginate loaded into the syringe onto the teeth at a 90 degree angle starting at the distals of the second molars. You can do this instead of wiping alginate on the teeth with your fingers before you seat the alginate loaded tray.

This technique results in a lot less bubbles and minimizes the chance for voids distal to the most posterior teeth. The flexible tips are autoclavable, the monoject syringes can be cold sterilized, and petroleum jelly can be applied to the rubber plungers so they can be used again.   

This tip – combined with the use of 1-inch medical tape along the posteriors of our maxillary trays as a post-dam seal – has improved the impressions taken at my practice tremendously.

What aspect of impressions do you find the most challenging and why? We’d love to hear from you in the comments!


Related Course

E1: Aesthetic & Functional Treatment Planning

DATE: October 3 2024 @ 8:00 am - October 6 2024 @ 2:30 pm

Location: The Pankey Institute

CE HOURS: 39

Dentist Tuition: $ 6500

Single Occupancy Room with Ensuite Bath (Per Night): $ 290

Transform your experience of practicing dentistry, increase predictability, profitability and fulfillment. The Essentials Series is the Key, and Aesthetic and Functional Treatment Planning is where your journey begins.  Following a system of…

Learn More>

About Author

User Image
Jeff Baggett DDS

Dr. Jeff D. Baggett attended Oklahoma State University where he received his undergraduate degree and attended professional school at the University of Oklahoma College of Dentistry. After obtaining his Doctorate of Dental Surgery degree, Dr. Baggett received postgraduate training at the L.D. Pankey Institute, recognized worldwide for its excellence in advanced technical dentistry. He was accredited as a Pankey Scholar. Practicing for over 30 years, Dr. Baggett is also a visiting faculty member at the L.D. Pankey Institute. He lectures various dental study clubs and dental meetings. He is a guest speaker of the Victim's Impact Panel Against Drunk Driving. A published author, Dr. Baggett wrote sections in the book Photoshop CS3 and PowerPoint 2007 for the Dental Professional. Dr. Baggett is also the team dentist for the Oklahoma City Thunder with his partner, Dr. Lembke. An esteemed member of the dental community, Dr. Baggett is a member of many professional organizations including the American Dental Association, the Oklahoma Dental Association, the Oklahoma County Dental Society, the Southwest Academy of Restorative Dentistry, the McGarry Study Club, the University Oklahoma College of Dentistry Alumni Association and the Oklahoma State University Alumni Association. He also served on the Board of Directors of the Oklahoma County Dental Society.

FIND A PANKEY DENTIST OR TECHNICIAN

I AM A
I AM INTERESTED IN

VIEW COURSE CALENDAR