Understanding Bulk Fill Composites (Part 2)

April 25, 2022 Lee Ann Brady DMD

Dentists love the handling of self-leveling bulk-fill composites because we do not need to move the tip around, which can introduce voids, and we do not need to use a condenser to reduce voids.

A lot of science has gone in today’s bulk fill composites.

  • As manufacturers have advanced the science of composites, they have had to balance the percentage of filler content and the viscosity of the material so it flows and has good handling properties.
  • We now see bulk fill composites that are relatively translucent when they are non-polymerized, and when they are polymerized, they become opaquer. To increase the depth of cure, manufacturers came up with new photo initiators that require less light to activate an equal amount of polymerization.

Cap Layers

The percentage of filler content in the bulk fill composite determines whether you must do a traditional high fill cap layer. A traditional high fill, nano composite cap layer (veneer) is going to have superior physical properties, including wear resistance, esthetics, and flexural stress. When a cap layer is optional, my decision is based on whether the restoration is in a visible place, how fussy the patient is about esthetics, and if the patient is at high risk for functional wear.

A cap layer should be only 1-2 mm in thickness because our traditional high fill composites have a depth of cure of 1-2 mm. In my practice, I use a perio probe to measure the depth of the prepared cavity. When I do a class I filling, where the prep cavity does not descend beyond 4 mm, I can make the decision to fill the cavity partially with bulk fill and add a cap layer or to completely fill the cavity with a high fill bulk fill composite like SonicFill or G-aenial BULK Injectable (discussed below).

When I do a class II filling, I often place a bulk fill layer and then a cap layer. If the cavity is 6-8 mm or greater in depth, two increments of bulk fill composite can be used before adding a cap layer.

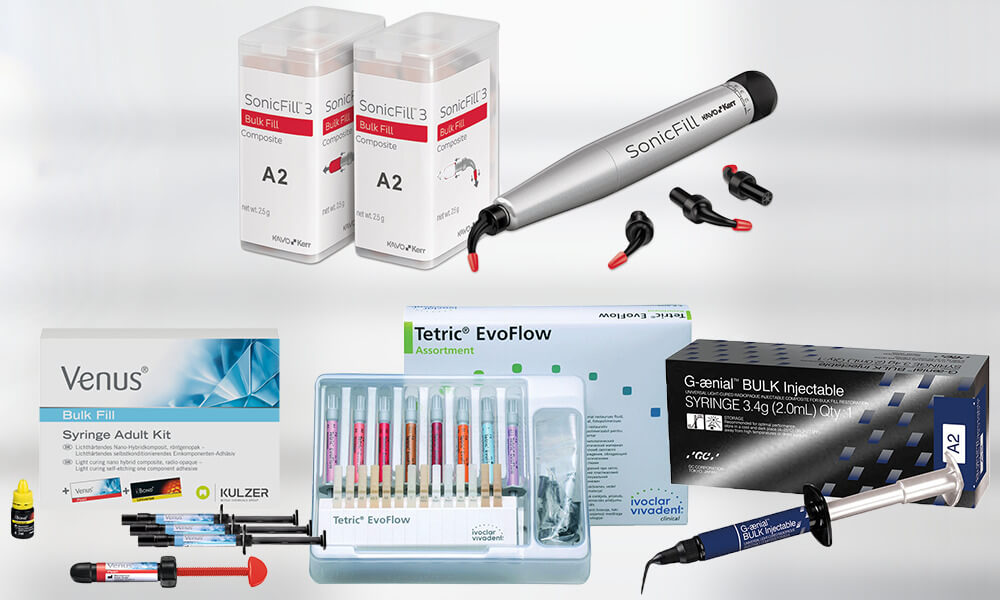
Bulk Fill Composites I Use

Personally, I prefer radiopaque materials. On radiographs, I want to easily see any voids and be able to distinguish the composite from the dentin, the enamel, and possible decay.

I’ve tried SonicFill™ by Kerr. A special handpiece injects a high filler composite while delivering sonic vibration. This composite has a higher percentage of filler content than the bulk fill “flowable” composites. The high percentage improves the physical properties of the composite, so you do not need to add a cap layer unless esthetics are important. The sonic kinetic energy temporarily lowers the viscosity of the composite so it optimally flows. This filler has a 6 mm depth of cure because it is very translucent.

Most manufacturers have a flowable composite. For these to flow, they have a lower percentage of filler content. The flowable composites self-level and have a 4 mm depth of cure. All manufacturers’ versions of flowable require a cap layer because they have lower physical properties to withstand occlusal wear.

I’ve used both Venus® Bulk Fill by Kulzer and Tetric EvoFlow® by Ivoclar in my practice. Both allow me to easily fill class I and II cavities in increments of up to 4mm. I classically use Tetric EvoFlow for my class II boxes because it is radiopaque and nicely self-levels. There are many versions of advanced bulk fill composites and veneer systems on the market, like the Tetric EvoFlow® and Tetric EvoCeram® that I use.

G-aenial™ BULK Injectable by GC is different because it has a higher percentage of filler content. This injectable bulk filler is radiopaque and can be used without a cap layer. I’ve used this in my practice to do some small class I and some class IV restorations.

There are even “condensable,” bulk fill deposits on the market with high percentage fill materials that do not require a cap layer and are highly durable. If you use these, you will have the challenge of placing more viscous materials and condensing them.

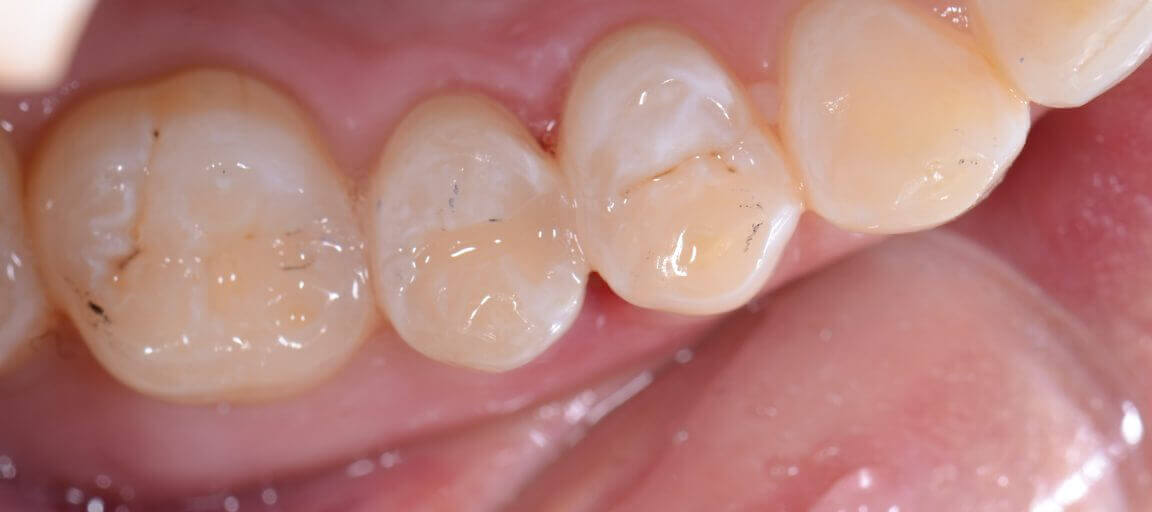
My Bulk Fill Technique

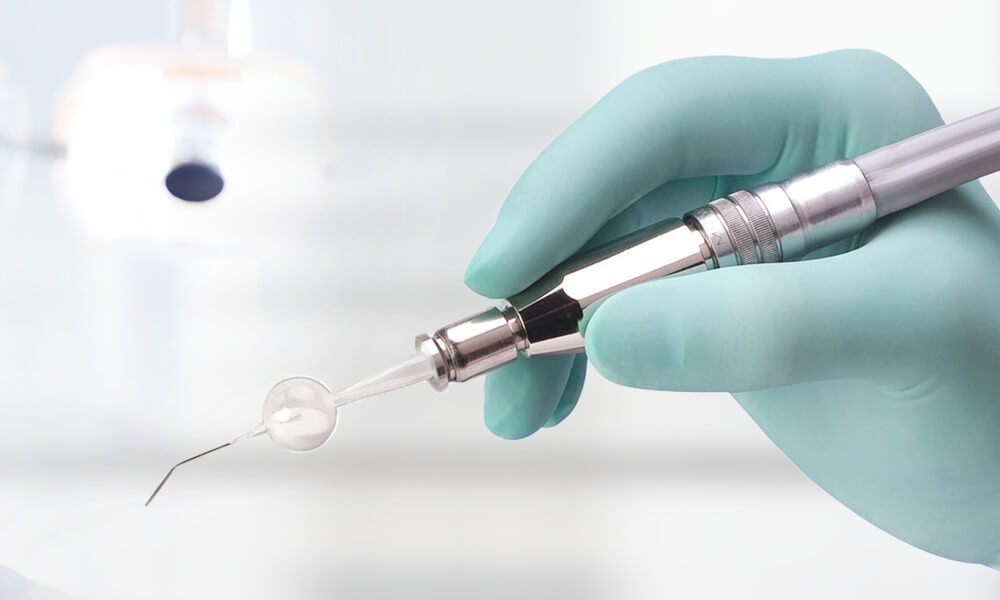
What I like to do is inject flowable material in a central position, for example, in the center of my class II box, and move the tip of the syringe as little as possible. I watch for the flow to reach the buccal, lingual, and axial walls of the cavity prep, and then I slowly lift the tip of the syringe as the occlusal is filling. I strive to not lift the tip prematurely and put it back in, because this introduces “stuck back” porosities. I do not play with the composite with an explorer or condenser because this creates “stuck back” porosities. I wait 10 full seconds to allow the composite to self-level before I begin light cure polymerization.

Related Course

E2: Occlusal Appliances & Equilibration

DATE: April 6 2025 @ 8:00 am - April 10 2025 @ 2:30 pm

Location: The Pankey Institute

CE HOURS: 44

Dentist Tuition: $ 7400

Single Occupancy with Ensuite Private Bath (per night): $ 345

What if you had one tool that increased comprehensive case acceptance, managed patients with moderate to high functional risk, verified centric relation and treated signs and symptoms of TMD? Appliance…

Learn More>

About Author

User Image
Lee Ann Brady DMD

Dr. Lee Ann Brady is passionate about dentistry, her family and making a difference. She is a general dentist and owns a practice in Glendale, AZ limited to restorative dentistry. Lee’s passion for dental education began as a CE junkie herself, pursuing lots of advanced continuing education focused on Restorative and Occlusion. In 2005, she became a full time resident faculty member for The Pankey Institute, and was promoted to Clinical Director in 2006. Lee joined Spear Education as Executive VP of Education in the fall of 2008 to teach and coordinate the educational curriculum. In June of 2011, she left Spear Education, founded leeannbrady.com and joined the dental practice she now owns as an associate. Today, she teaches at dental meetings and study clubs both nationally and internationally, continues to write for dental journals and her website, sits on the editorial board of the Journal of Cosmetic Dentistry, Inside Dentistry and DentalTown Magazines and is the Director of Education for The Pankey Institute.

FIND A PANKEY DENTIST OR TECHNICIAN

I AM A
I AM INTERESTED IN

VIEW COURSE CALENDAR

Understanding Bulk Fill Composites (Part 1)

April 15, 2022 Lee Ann Brady DMD

For years and years, we were trained to not use bulk fill composites. We were well trained to layer composites to improve the success of their longevity. For years, it was smaller layers and angled layers. What was that about? The primary issue we were trying to overcome was the shrinkage of the composite material. Shrinkage stress could destroy adhesion and fracture enamel. Another issue was depth of cure. Traditional composites couldn’t be cured in bulk. Between shrinkage and polymerization, layering became important. We would also layer to ensure we condensed the fill.

In time, scientists and manufacturers looking at this were able to alter the chemistry of the composite to alter the impact of polymerization shrinkage. When bulk fill composites first came on the market, despite what the manufacturers told me, I felt some internal resistance and it took me a while to step into the bulk fill arena. What drove me to take that leap of faith was looking into the science behind bulk fill composites.

The Science

I spoke with different scientists, from different manufacturers, and with independent scientists who created these materials. What I came to understand is that bulk fill composites are an improvement in composite technology.

The manufacturers learned how to direct shrinkage away from the bonded interface. Across the category of bulk fill materials, all these materials have a lower shrinkage stress numbers than the categories of composites that came before them. They do better at maintaining the integrity of the interfaces between the composite and dentin adhesive and the dentin adhesive and the walls of the cavity preparation.

The manufacturers increased translucency to increase the depth of cure. In general, when a manufacturer says they have a bulk fill composite, what they mean is that the depth of cure is somewhere between 4 to 6 mm. I often hear the complaint that bulk fill composites are not as esthetic as traditional composites. Each of us must answer individually for ourselves how exact and perfect we want to make the match of the composite to the surrounding tooth. Manufacturers have attempted to address this and now offer bulk fill composites that become opaquer as they cure.

Multiple Choices

Like everything else in dentistry, there are many choices. There are multiple types of bulk fill composite, even from single manufacturers, with variances in the specific depth of cure they recommend. When evaluating bulk fill composites, consider these questions:

  • What is recommended depth of cure for that specific composite?
  • Is the composited graded high enough to withstand occlusal loading and wear, or does the manufacturer recommend you use a different composite to create a 1 to 2 mm cap layer (typically, a more traditional nano category of composite)? The silver lining is that this provides an option when esthetics are of high concern.
  • Is the composite condensable, requiring you to use condensing instruments, or is the composite more flowable and referred to as self-leveling, because it flows perfectly across to perfectly fill the preparation cavity? Self-leveling composites have a chemistry that allows them to have less initial viscosity and then thicken after they have flowed.
  • Among your choices are bulk fill composites that come in small containers to go in composite guns, compules, and syringes. The less viscous, flowable composites come in a syringe that looks like a flowable and you can put a flowable tip on it.

I’ll be back with Part 2 of this blog to present more about bulk fill composites. To leap ahead, you may want to visit the Pankey YouTube channel to view the webinar I presented on this topic in 2020. You can view it here.

Related Course

Mastering Business Essentials

DATE: August 7 2025 @ 8:00 am - August 15 2025 @ 12:00 pm

Location: The Pankey Institute

CE HOURS: 22

Regular Tuition: $ 3295

Single Bed with Ensuite Bath: $ 345

The Blueprint for Running a Practice with Long-Term Growth Dr. Pankey’s original philosophy encouraged dental professionals to be proficient in 3 specific areas: technical mastery, behavioral excellence and business savvy….

Learn More>

About Author

User Image
Lee Ann Brady DMD

Dr. Lee Ann Brady is passionate about dentistry, her family and making a difference. She is a general dentist and owns a practice in Glendale, AZ limited to restorative dentistry. Lee’s passion for dental education began as a CE junkie herself, pursuing lots of advanced continuing education focused on Restorative and Occlusion. In 2005, she became a full time resident faculty member for The Pankey Institute, and was promoted to Clinical Director in 2006. Lee joined Spear Education as Executive VP of Education in the fall of 2008 to teach and coordinate the educational curriculum. In June of 2011, she left Spear Education, founded leeannbrady.com and joined the dental practice she now owns as an associate. Today, she teaches at dental meetings and study clubs both nationally and internationally, continues to write for dental journals and her website, sits on the editorial board of the Journal of Cosmetic Dentistry, Inside Dentistry and DentalTown Magazines and is the Director of Education for The Pankey Institute.

FIND A PANKEY DENTIST OR TECHNICIAN

I AM A
I AM INTERESTED IN

VIEW COURSE CALENDAR

Using Air Abrasion for Composite Repair

March 28, 2022 Lee Ann Brady DMD

A while ago, I had the opportunity to repair a small bubble in an old composite restoration, and I got to thinking you might like to know how I use air abrasion to do this type of repair.

I don’t know how many times you see this, but I frequently see small holes in old composite restorations. In many cases, the margins look good. Everything looks good about the restoration except where there was an air bubble when the composite was placed and now there is a little hole on the occlusal surface. Food can get trapped and staining can occur in the hole, but the hole doesn’t descend into the tooth. And sometimes I see a little gap on the margin of an old composite with staining or early decay. In both cases, I don’t want to remove the entire restoration.

I use a lot of air abrasion in my practice, and in particular, I find it is wonderful for repairing old composite. I have the EtchMaster® from Groman. It’s a little handpiece that is super easy and convenient. It makes using air abrasion chairside something you will want to do every day.

Use 50-micron aluminum oxide air abrasion to clean out the stain, etch the old composite, and etch the tooth. If any tooth structure is to be etched, this air abrasion is a replacement for phosphoric acid. So, in one easy step, you have prepped the tooth and the composite. A plus of this technique is that local anesthetic is not needed if the hole does not extend into the tooth.

Now you can go in and use your dentin adhesive and replace your repair composite. Today, dentin adhesives contain MDP or PMMA which is the chemistry we need for the new composite to bond to the old composite. If I were to repair a composite restoration with a handpiece and a burr, I would not get the same bonded interface between the new resin and the old resin.

For both ease, patient comfort, and the best bond, I choose to treat previously polymerized resin with air abrasion and then some sort of resin that contains either MDP or PMMA.

Related Course

E1: Aesthetic & Functional Treatment Planning

DATE: May 1 2025 @ 8:00 am - May 4 2025 @ 2:30 pm

Location: The Pankey Institute

CE HOURS: 39

Dentist Tuition: $ 6800

Single Occupancy with Ensuite Private Bath (Per Night): $ 345

Transform your experience of practicing dentistry, increase predictability, profitability and fulfillment. The Essentials Series is the Key, and Aesthetic and Functional Treatment Planning is where your journey begins.  Following a system of…

Learn More>

About Author

User Image
Lee Ann Brady DMD

Dr. Lee Ann Brady is passionate about dentistry, her family and making a difference. She is a general dentist and owns a practice in Glendale, AZ limited to restorative dentistry. Lee’s passion for dental education began as a CE junkie herself, pursuing lots of advanced continuing education focused on Restorative and Occlusion. In 2005, she became a full time resident faculty member for The Pankey Institute, and was promoted to Clinical Director in 2006. Lee joined Spear Education as Executive VP of Education in the fall of 2008 to teach and coordinate the educational curriculum. In June of 2011, she left Spear Education, founded leeannbrady.com and joined the dental practice she now owns as an associate. Today, she teaches at dental meetings and study clubs both nationally and internationally, continues to write for dental journals and her website, sits on the editorial board of the Journal of Cosmetic Dentistry, Inside Dentistry and DentalTown Magazines and is the Director of Education for The Pankey Institute.

FIND A PANKEY DENTIST OR TECHNICIAN

I AM A
I AM INTERESTED IN

VIEW COURSE CALENDAR

Two Tips for Placing Screw-Retained Implant Crowns

August 23, 2021 Kelley Brummett DMD

Most of us are placing implant crowns, using screw retained crowns. If the crown needs to be recovered, or the screw needs to be changed or tightened, the restoration can be removed by accessing the screw through the screw channel.

One of the main advantages of screw-retained crowns is the ease of retrieval. I have discovered two ways to make retrieval easier for myself, which involve the colors of the Teflon tape and composite I use.

  1. Now I have colored Teflon tape on hand, and when I place the screw, I put colored tape on top of the screw instead white tape. If I need to remove the composite, I more readily see my gray or yellow tape than I would white tape.
  2. I also like to use a composite color that is not be an exact match with the implant crown. This way I can easily see the material to be removed to access the screw channel… if I need to remove the crown.

If you plan ahead to have colored Teflon tape on hand, you can do what I do. Teflon tape is available in multiple colors at Home Depot and other hardware stores.

Related Course

E1: Aesthetic & Functional Treatment Planning

DATE: June 20 2024 @ 8:00 am - June 23 2024 @ 2:30 pm

Location: The Pankey Institute

CE HOURS: 39

Dentist Tuition: $ 6500

Single Occupancy Room with Ensuite Bath (Per Night): $ 290

THIS COURSE IS SOLD OUT Transform your experience of practicing dentistry, increase predictability, profitability and fulfillment. The Essentials Series is the Key, and Aesthetic and Functional Treatment Planning is where your journey…

Learn More>

About Author

User Image
Kelley Brummett DMD

Dr. Kelley D. Brummett was born and raised in Missouri. She attended the University of Kansas on a full-ride scholarship in springboard diving and received honors for being the Big Eight Diving Champion on the 1 meter springboard in 1988 and in 1992. Dr. Kelley received her BA in communication at the University of Kansas and went on to receive her Bachelor of Science in Nursing. After practicing nursing, Dr Kelley Brummett went on to earn a degree in Dentistry at the Medical College of Georgia. She has continued her education at the Pankey Institute to further her love of learning and her pursuit to provide quality individual care. Dr. Brummett is a Clinical Instructor at Georgia Regents University and is a member of the American Academy of Cosmetic Dentistry. Dr. Brummett and her husband Darin have two children, Sarah and Sam. They have made Newnan their home for the past 9 years. In her free time, she enjoys traveling, reading and playing with her dogs. Dr. Brummett is an active member of the ADA, GDA, AGDA, and an alumni of the Pankey Institute.

FIND A PANKEY DENTIST OR TECHNICIAN

I AM A
I AM INTERESTED IN

VIEW COURSE CALENDAR

Composites & Wear

December 19, 2019 Lee Ann Brady DMD

All restorative materials have wear properties. We need to understand both how they wear and survive in the oral environment and how they impact opposing natural teeth.  

The wear of enamel is the basis for comparison.

Despite what we sometimes see clinically, enamel is highly resistant to wear (attrition and abrasion), with average annual wear rates of 30-40 microns. The range is from as low as 15 microns to as high as 100+ microns, and there is variability depending on the tooth position in the arch.  

Unlike enamel, which basically all has the same structure and properties, composites come in many different formulas. The chemical and physical properties of the material have a direct impact on its wear resistance and impact on other teeth. Some examples of this include: 

  • Size, shape, and hardness of filler particles 
  • Quality of the bond between filler particles and polymer matrix 
  • Polymerization dynamics of the polymer 

These same properties affect the other physical and handling properties of the material and have to be balanced to create a composite that works clinically.  

Creating improvements in the physical properties of composites has eliminated the high degree of wear in non-contact areas we witnessed years ago. The loss of restorative material gave the appearance of fillings losing their shape and contour. Today our primary concern is in areas of direct occlusal contact.  

One approach might be to avoid using composite that has direct occlusal contact.

I would say this is not only not practical but not necessary. We have a variety of materials available today, with a range of handling and physical properties, and wear rates that are between 30-200 microns a year.  

We need to choose a composite based on things like wear versus polishability, anterior versus posterior, and the properties of the particular material we are using. In addition, we can manage the occlusion to maximize the success of the natural teeth as well as the composite. 

Related Course

E2: Occlusal Appliances & Equilibration

DATE: March 23 2025 @ 8:00 am - March 27 2025 @ 2:30 pm

Location: The Pankey Institute

CE HOURS: 44

Dentist Tuition: $ 7400

Single Occupancy with Ensuite Private Bath (per night): $ 345

What if you had one tool that increased comprehensive case acceptance, managed patients with moderate to high functional risk, verified centric relation and treated signs and symptoms of TMD? Appliance…

Learn More>

About Author

User Image
Lee Ann Brady DMD

Dr. Lee Ann Brady is passionate about dentistry, her family and making a difference. She is a general dentist and owns a practice in Glendale, AZ limited to restorative dentistry. Lee’s passion for dental education began as a CE junkie herself, pursuing lots of advanced continuing education focused on Restorative and Occlusion. In 2005, she became a full time resident faculty member for The Pankey Institute, and was promoted to Clinical Director in 2006. Lee joined Spear Education as Executive VP of Education in the fall of 2008 to teach and coordinate the educational curriculum. In June of 2011, she left Spear Education, founded leeannbrady.com and joined the dental practice she now owns as an associate. Today, she teaches at dental meetings and study clubs both nationally and internationally, continues to write for dental journals and her website, sits on the editorial board of the Journal of Cosmetic Dentistry, Inside Dentistry and DentalTown Magazines and is the Director of Education for The Pankey Institute.

FIND A PANKEY DENTIST OR TECHNICIAN

I AM A
I AM INTERESTED IN

VIEW COURSE CALENDAR

Four Great Reasons For Prep Scrubs

May 30, 2018 Lee Ann Brady DMD

One of the most common questions I get is about the use of a category of materials we refer to as prep scrubs, prep wetting agents or desensitizers.  The question is usually do they actually make a difference, and are they worth the cost. The answer is “yes” and “yes”.

There are 4 things we are trying to accomplish: prevent sensitivity, antimicrobial activity, moisten dentin for bonding, reduce bond degradation over time. The prevention of sensitivity is caused in two ways. The first is the inclusion of HEMA in products like Gluma from Kulzer. The HEMA occludes the dentinal tubules and prevents fluid movement that triggers a pulpal response. The second is the anti-microbial activity of either glutaraldehyde (GLUMA) or chlorhexidine (Consepsis by Ultradent). Fewer bacteria left behind int he dentin means lower chances of a pulpitis that causes sensitivity or the ultimate need for a root canal.

Both chlorhexidine and glutaraldehyde also minimize the production of MMP’s (Matrix Metal Proteinases) the biologic process responsible for bond degradation. This means our bonded restorations last longer before we see marginal breakdown, leakage and secondary caries. The last function is to moisten the dentin to allow optimal penetration of the primer in our dentin adhesives. This means better hybrid zone development and better bonds and sealing of dentinal tubules.

So the answer to do they have benefit is a resounding yes. I have used Gluma on every tooth I have prepared for many years. I consider it extremely cost effective as I am not sure how to put a price on greater restorative longevity and less patient dissatisfaction due to sensitivity or post operative issues. The true cost should be about $2 a prepared tooth if dispensed properly, so that’s hard to argue with.

Related Course

E2: Occlusal Appliances & Equilibration

DATE: April 6 2025 @ 8:00 am - April 10 2025 @ 2:30 pm

Location: The Pankey Institute

CE HOURS: 44

Dentist Tuition: $ 7400

Single Occupancy with Ensuite Private Bath (per night): $ 345

What if you had one tool that increased comprehensive case acceptance, managed patients with moderate to high functional risk, verified centric relation and treated signs and symptoms of TMD? Appliance…

Learn More>

About Author

User Image
Lee Ann Brady DMD

Dr. Lee Ann Brady is passionate about dentistry, her family and making a difference. She is a general dentist and owns a practice in Glendale, AZ limited to restorative dentistry. Lee’s passion for dental education began as a CE junkie herself, pursuing lots of advanced continuing education focused on Restorative and Occlusion. In 2005, she became a full time resident faculty member for The Pankey Institute, and was promoted to Clinical Director in 2006. Lee joined Spear Education as Executive VP of Education in the fall of 2008 to teach and coordinate the educational curriculum. In June of 2011, she left Spear Education, founded leeannbrady.com and joined the dental practice she now owns as an associate. Today, she teaches at dental meetings and study clubs both nationally and internationally, continues to write for dental journals and her website, sits on the editorial board of the Journal of Cosmetic Dentistry, Inside Dentistry and DentalTown Magazines and is the Director of Education for The Pankey Institute.

FIND A PANKEY DENTIST OR TECHNICIAN

I AM A
I AM INTERESTED IN

VIEW COURSE CALENDAR

Top 5 Clinical and Career Tips of 2017 for Dentists

December 31, 2017 Pankey Gram

The end of 2017 is wrapping up a solid year of incredible dental blogs from our talented Pankey contributors. Our posts featured everything from techniques for occlusion and orthodontics to practice management and leadership.

There are tons of useful tips and plenty of information for dentists at every stage of their career on the Pankey Gram. Here, we’re compiling five pieces of sound advice from blogs in 2017 that are sure to get you excited for another year of practicing dentistry your way.

As Pankey dentists, we continue to strive for greater learning and growth in our professional and personal lives. Revitalize your hunger for education with these thought-provoking tips:

5 Clinical Tips From 2017 Pankey Blogs

1. Consider physiologic changes that occur over a lifetime when planning restorative dentistry.

In his blog on ‘Adult Growth of the Dental Arch,’ Dr. Roger Solow explored the slow craniofacial growth that can affect dentistry throughout a patient’s life.

2. Set splint therapy fees in such a way that you can actually make money off them.

In his blog, ‘How to Set Splint Therapy Fees,’ Dr. James Otten described how to individualize splint therapy fees and more accurately estimate therapeutic time.

3. Think like an orthodontist when advising patients on post-ortho care.

In her blog, ‘How Long Should Patients Wear Their Retainers Post-Ortho?’, Dr. Lee Ann Brady laid out important considerations for dealing with questions about retainers.

4. Recognize when patients are in denial and practice empathy toward them.

In her blog on communication, ‘From Denial to Acceptance and Action,’ Mary Osborne RDH enlightened with a description of patient denial in dentistry.

5. Improve you protocol for restorations by adding another dental assistant.

In his blog, ‘6-Handed Bonding,’ Dr. Mike Crete made his case for why an extra dental assistant can benefit dentists dealing with adhesive dentistry and tricky restorations.

And there you have it folks. Best wishes for 2018! 

Related Course

Functional Esthetic Excellence Utilizing 100% Digital Workflow

DATE: June 13 2024 @ 8:00 am - June 15 2024 @ 2:00 pm

Location: The Pankey Institute

CE HOURS: 25

Regular Tuition: $ 2995

night with private bath: $ 290

This Course Is Sold Out! Embracing Digital Dentistry This course will introduce each participant to the possibilities of complex case planning utilizing 100% digital workflows. Special emphasis will be placed…

Learn More>

About Author

User Image
Pankey Gram

FIND A PANKEY DENTIST OR TECHNICIAN

I AM A
I AM INTERESTED IN

VIEW COURSE CALENDAR

6-Handed Bonding

August 22, 2017 Mike Crete DDS

How an Extra Dental Assistant Can Improve Your Protocol for Restorations

Restorations and adhesive dentistry have rapidly advanced over the past few decades. Changes in materials necessitate corresponding changes in protocol. Read on to learn the adjustment that drastically improved Dr. Mike Crete’s bonding process.

30 Years of Significant Advances in Clinical Dentistry

I have been practicing for a little over 30 years and often find myself looking back amazed at how many advances have occurred in clinical dentistry. Dental school requirements were focused on metal restorations that were either: (1) condensed into place (amalgam and gold foil) with “retention form” the key to success, or (2) cemented with the likes of zinc phosphate. Ah, the good ‘ol days of mixing on a cool glass slab!

My favorite general advancement over the years has been the concept of adhesive dentistry.  Not a day goes by in my practice where I don’t either bond a direct composite, bond a crown or two, or place an entire arch of bonded porcelain veneers.

Why 4-Handed Dentistry Fell Short for My Restorations

I must admit when I first started placing bonded restorations I was gun shy and felt like I would never be as adept as I was at carving amalgams or burnishing exquisite gold margins. I fumbled through bonded porcelain and composite like it was the same as metal restorations. I had mastered working with one chairside assistant. I could almost do dentistry blindfolded and 4-handed dentistry made me look great.

After about 3 years of really not liking treatment that involved bonding and finding myself justifying in my head how amalgam and gold were better, I finally had an aha moment when a mentor told me, ”You can’t do something new the old way.” I was a bit puzzled and asked, ”Why not?” My colleague then introduced me to the concept of 6-handed bonding.

6-Handed Dentistry Makes For a Better Bonding Protocol

Every time I do either a single unit or multiple indirect bonded restorations, I utilize both a chairside assistant and a “tray-side” or tertiary dental assistant. The tertiary assistant has the 5th and 6th hands.

The tertiary assistant helps by efficiently preparing the restorations for bonding (cleaning, silane, etch, prime, bond, resin adhesive, etc.) while the chairside assistant helps me keep the teeth isolated, etch the teeth, and place the restorations with precision and a very high level of accuracy. The chairside assistant can be totally focused on me and the patient, while the tertiary assistant prepares and hands me the indirect restorations.

Consider modifying your protocol to include a 3rd pair of hands and make 6-handed bonding part of your daily routine.

What is the most significant change in clinical dentistry you’ve noticed over the years? We’d love to hear from you in the comments!

Related Course

E2: Occlusal Appliances & Equilibration

DATE: April 6 2025 @ 8:00 am - April 10 2025 @ 2:30 pm

Location: The Pankey Institute

CE HOURS: 44

Dentist Tuition: $ 7400

Single Occupancy with Ensuite Private Bath (per night): $ 345

What if you had one tool that increased comprehensive case acceptance, managed patients with moderate to high functional risk, verified centric relation and treated signs and symptoms of TMD? Appliance…

Learn More>

About Author

User Image
Mike Crete DDS

Dr. Mike Crete lives and practices in Grand Rapids, MI. He graduated from the University of Michigan dental school over 30 years ago. He has always been an avid learner and dedicated to advanced continuing education., After completing the entire curriculum at The Pankey Institute, Mike returned to join the visiting faculty. Mike is an active member of the Pankey Board of Directors, teaches in essentials one and runs two local Pankey Learning Groups in Grand Rapids.

FIND A PANKEY DENTIST OR TECHNICIAN

I AM A
I AM INTERESTED IN

VIEW COURSE CALENDAR

Choosing Value First

July 1, 2017 Lee Ann Brady DMD

Why You Should Determine Value Before Chroma and Hue When Matching Shades for Composites

The true artistry of the dental profession tends to show itself in many of the more challenging requirements of cosmetic dentistry. One of these areas where we can express our esthetic skills is in shade matching for composites. The struggle arises in understanding the various properties of natural-looking teeth and determining what visual aspects to match first.

 Composites 101: Defining ‘Shades’ and Their Components

Before you can begin to choose which aspects of a natural ‘shade’ to preference, it’s integral to delve into the nature of these complex components.

Reflectiveness and translucence combined determine the appearance of a tooth. Reflective properties are especially important for shade matching because this is the true definition of ‘value.’ Value tends to be defined as the coloring on a range of white to grey, but it’s actually a measure of tooth reflectiveness.

Other esthetic qualities of dentin and enamel include ‘chroma’ and ‘hue.’ A classic numeric scale of 1 (lowest) to 4 (highest) is used to judge chroma, which simply refers to the intensity of a color. Hue, on the other hand, is generally deconstructed into the letters A, B, C, and D. These indicate the names of color.

‘Shade’ is simply the end result when all three parameters of value, intensity, and hue are viewed together. The key lesson here is that these parameters must be matched separately. To achieve the best case outcome, you must rank them according to importance.

Should You Shade Match for Value, Chroma, or Hue First?

This is where things get tricky and we start to juggle multiple considerations at once.

Layering is paramount because dentin shades and light properties differ in composites versus real dentin. This is also true for enamel shades. Added to these differences is the fact that dentin and enamel do not have the same amounts of reflectiveness and translucence. Basically, you have dentin and enamel discrepancies between composites and real teeth in addition to the discrepancies that exist between dentin and enamel.

Precision will impact the final appearance of the tooth, so it’s important that you layer composites to get around these discrepancies. The composite materials selected should match for value before chroma and chroma before hue. Because final value is a blend of the individual values of every composite layer, you must consider that each layer is not going to be representative of your intended value. They build on one another to create life-like reflectiveness and translucency.

A Method You Can Use for Determining Value in Composites

My favorite method for constructing an esthetically superior value is to start the appointment with layering. I plan what composite shades I want to combine ahead of time and work efficiently so that inevitable teeth dehydration doesn’t affect my results.

I layer the materials on the labial of the adjacent tooth in their final thicknesses and photograph the outcome. This allows me to see if my chosen combinations match my esthetic goals and troubleshoot if the composite doesn’t disappear against the tooth. When I’m not happy with the look, I easily pop the composite off the tooth and re-do the process. I only begin to contemplate chroma and hue once I’ve matched the value.

How do you troubleshoot shade matching issues in your esthetic cases? We’d love to hear your perspective in the comments!

Related Course

Creating Financial Freedom

DATE: March 6 2025 @ 8:00 am - March 8 2025 @ 2:00 pm

Location: The Pankey Institute

CE HOURS: 16

Dentist Tuition: $ 2795

Single Occupancy with Ensuite Private Bath (per night): $ 345

Achieving Financial Freedom is Within Your Reach!   Would you like to have less fear, confusion and/or frustration around any aspect of working with money in your life, work, or when…

Learn More>

About Author

User Image
Lee Ann Brady DMD

Dr. Lee Ann Brady is passionate about dentistry, her family and making a difference. She is a general dentist and owns a practice in Glendale, AZ limited to restorative dentistry. Lee’s passion for dental education began as a CE junkie herself, pursuing lots of advanced continuing education focused on Restorative and Occlusion. In 2005, she became a full time resident faculty member for The Pankey Institute, and was promoted to Clinical Director in 2006. Lee joined Spear Education as Executive VP of Education in the fall of 2008 to teach and coordinate the educational curriculum. In June of 2011, she left Spear Education, founded leeannbrady.com and joined the dental practice she now owns as an associate. Today, she teaches at dental meetings and study clubs both nationally and internationally, continues to write for dental journals and her website, sits on the editorial board of the Journal of Cosmetic Dentistry, Inside Dentistry and DentalTown Magazines and is the Director of Education for The Pankey Institute.

FIND A PANKEY DENTIST OR TECHNICIAN

I AM A
I AM INTERESTED IN

VIEW COURSE CALENDAR