Creating Dental Anatomy in Composite with Disposable Tips
One of my goals with composite restorations is to do as much of the forming and shaping prior to picking up a curing light as I can.
The material is easy to sculpt before it is cured, and access to the surface of the tooth is easier with hand instruments. Once I have placed all the composite and have a dense fill, I remove as much of the excess sitting above the final occlusal surface as I can. With this step accomplished, I turn my attention to creating the occlusal anatomy.
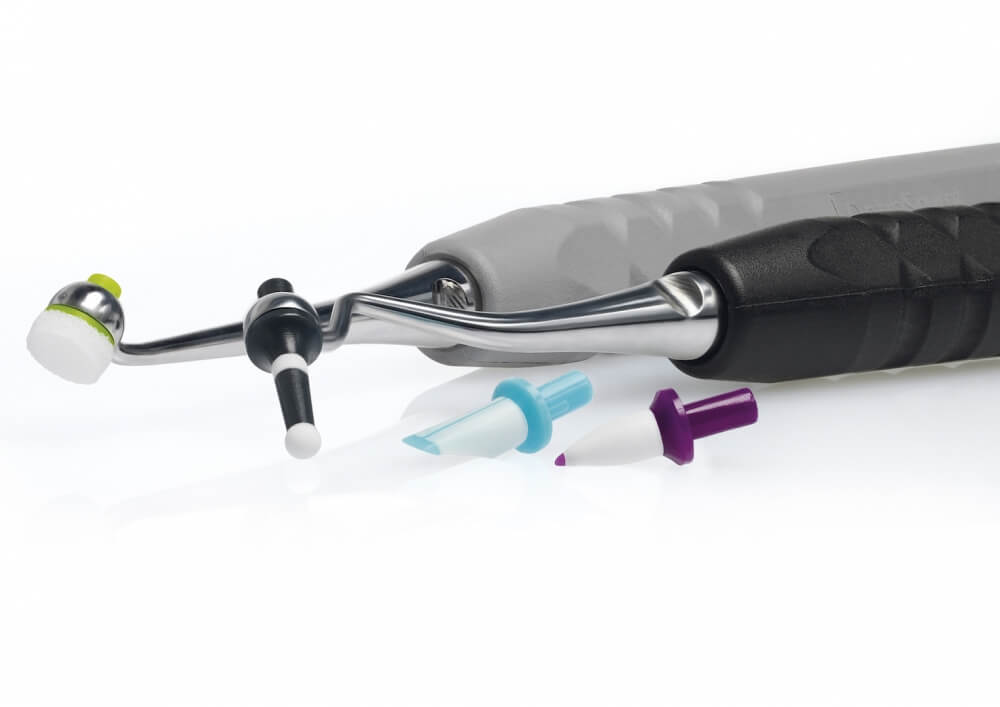
My OptraSculpt handle and disposable tips from Ivoclar Vivadent are perfect for this. The various tip shapes allow me to create incline planes, occlusal grooves and the curve of the marginal ridges into the occlusal embrasures. This process often removes and shapes the composite. My assistant holds a two by two that has been moistened with rubbing alcohol to remove the excess off the end of the instrument. I can place a different shape on each end of the instrument, or I can interchange them as I need them.
Using a series of disposable tips enables me to work without the composite sticking. This has reduced the necessity for meticulous management of expensive instruments which frequently need replacement. And, I resist the desire to use dentin adhesive or an unfilled resin on the instrument to reduce sticking.


Related Course
The Pankey Assistant’s Experience
DATE: July 11 2024 @ 8:00 am - July 13 2024 @ 3:00 pmThis “can’t miss” course will empower Dental Assistants to bring their skills to excellence! During this dynamic hands-on course, led by Pankey clinical team member, Sandra Caicedo, participants will learn…
Learn More>
About Author
Dr. Lee Ann Brady is passionate about dentistry, her family and making a difference. She is a general dentist and owns a practice in Glendale, AZ limited to restorative dentistry. Lee’s passion for dental education began as a CE junkie herself, pursuing lots of advanced continuing education focused on Restorative and Occlusion. In 2005, she became a full time resident faculty member for The Pankey Institute, and was promoted to Clinical Director in 2006. Lee joined Spear Education as Executive VP of Education in the fall of 2008 to teach and coordinate the educational curriculum. In June of 2011, she left Spear Education, founded leeannbrady.com and joined the dental practice she now owns as an associate. Today, she teaches at dental meetings and study clubs both nationally and internationally, continues to write for dental journals and her website, sits on the editorial board of the Journal of Cosmetic Dentistry, Inside Dentistry and DentalTown Magazines and is the Director of Education for The Pankey Institute.
I like this instrument for occlusal shaping. I prefer the C-Shape-It instrument with the flat fin shape for smooth surfaces like class IV and V restorations.
https://cshapeit.com/