Understanding Bulk Fill Composites (Part 2)
Dentists love the handling of self-leveling bulk-fill composites because we do not need to move the tip around, which can introduce voids, and we do not need to use a condenser to reduce voids.
A lot of science has gone in today’s bulk fill composites.
- As manufacturers have advanced the science of composites, they have had to balance the percentage of filler content and the viscosity of the material so it flows and has good handling properties.
- We now see bulk fill composites that are relatively translucent when they are non-polymerized, and when they are polymerized, they become opaquer. To increase the depth of cure, manufacturers came up with new photo initiators that require less light to activate an equal amount of polymerization.
Cap Layers
The percentage of filler content in the bulk fill composite determines whether you must do a traditional high fill cap layer. A traditional high fill, nano composite cap layer (veneer) is going to have superior physical properties, including wear resistance, esthetics, and flexural stress. When a cap layer is optional, my decision is based on whether the restoration is in a visible place, how fussy the patient is about esthetics, and if the patient is at high risk for functional wear.
A cap layer should be only 1-2 mm in thickness because our traditional high fill composites have a depth of cure of 1-2 mm. In my practice, I use a perio probe to measure the depth of the prepared cavity. When I do a class I filling, where the prep cavity does not descend beyond 4 mm, I can make the decision to fill the cavity partially with bulk fill and add a cap layer or to completely fill the cavity with a high fill bulk fill composite like SonicFill or G-aenial BULK Injectable (discussed below).
When I do a class II filling, I often place a bulk fill layer and then a cap layer. If the cavity is 6-8 mm or greater in depth, two increments of bulk fill composite can be used before adding a cap layer.
Bulk Fill Composites I Use
Personally, I prefer radiopaque materials. On radiographs, I want to easily see any voids and be able to distinguish the composite from the dentin, the enamel, and possible decay.
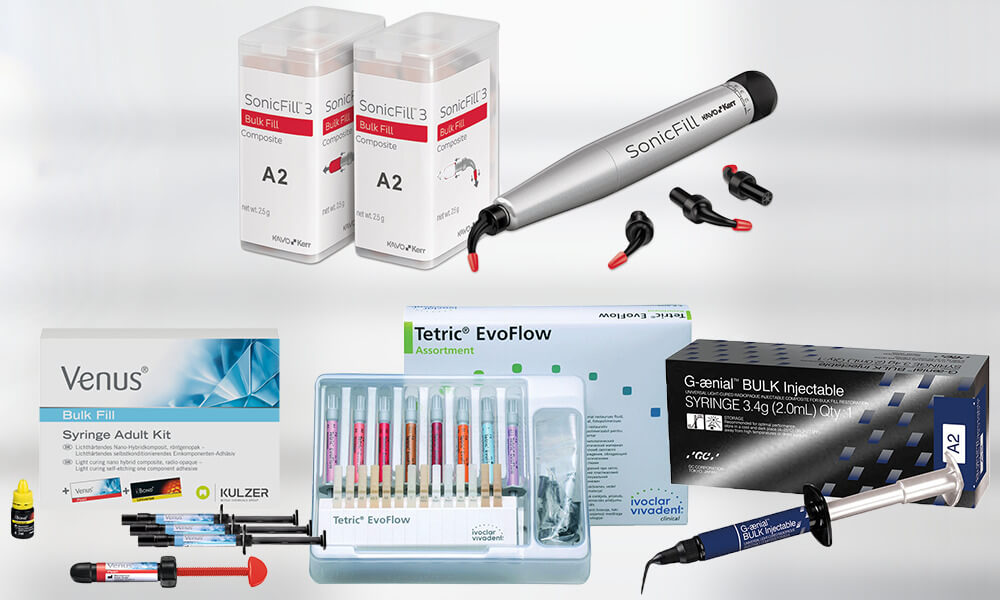
I’ve tried SonicFill™ by Kerr. A special handpiece injects a high filler composite while delivering sonic vibration. This composite has a higher percentage of filler content than the bulk fill “flowable” composites. The high percentage improves the physical properties of the composite, so you do not need to add a cap layer unless esthetics are important. The sonic kinetic energy temporarily lowers the viscosity of the composite so it optimally flows. This filler has a 6 mm depth of cure because it is very translucent.
Most manufacturers have a flowable composite. For these to flow, they have a lower percentage of filler content. The flowable composites self-level and have a 4 mm depth of cure. All manufacturers’ versions of flowable require a cap layer because they have lower physical properties to withstand occlusal wear.
I’ve used both Venus® Bulk Fill by Kulzer and Tetric EvoFlow® by Ivoclar in my practice. Both allow me to easily fill class I and II cavities in increments of up to 4mm. I classically use Tetric EvoFlow for my class II boxes because it is radiopaque and nicely self-levels. There are many versions of advanced bulk fill composites and veneer systems on the market, like the Tetric EvoFlow® and Tetric EvoCeram® that I use.
G-aenial™ BULK Injectable by GC is different because it has a higher percentage of filler content. This injectable bulk filler is radiopaque and can be used without a cap layer. I’ve used this in my practice to do some small class I and some class IV restorations.
There are even “condensable,” bulk fill deposits on the market with high percentage fill materials that do not require a cap layer and are highly durable. If you use these, you will have the challenge of placing more viscous materials and condensing them.
My Bulk Fill Technique
What I like to do is inject flowable material in a central position, for example, in the center of my class II box, and move the tip of the syringe as little as possible. I watch for the flow to reach the buccal, lingual, and axial walls of the cavity prep, and then I slowly lift the tip of the syringe as the occlusal is filling. I strive to not lift the tip prematurely and put it back in, because this introduces “stuck back” porosities. I do not play with the composite with an explorer or condenser because this creates “stuck back” porosities. I wait 10 full seconds to allow the composite to self-level before I begin light cure polymerization.
Related Course
Early Orthodontics: A Guide For General Dentists
DATE: December 6 2024 @ 2:00 pm - December 6 2024 @ 4:00 pmLocation: Online
CE HOURS: 2
Course Description: This course is designed for general dentists who do not necessarily have any orthodontic training or knowledge. It focuses on helping practitioners to develop a holistic and…
Learn More>


