Are Your Temporaries a Practice Builder or Simply Temporary? 

April 10, 2024 Gary DeWood, DDS

Gary M. DeWood, DDS, MS 

Many dentists believe that provisional restorations don’t really matter. After all, they are not really a stand-in for the final restoration. I would respectfully disagree. I am a proponent of creating functional, durable, and highly esthetic provisional restorations, every time. They have the potential to impact your dental practice a lot more than you might think. Whether you print them, form them, or free-hand them, a GREAT temporary is a great billboard for your practice. 

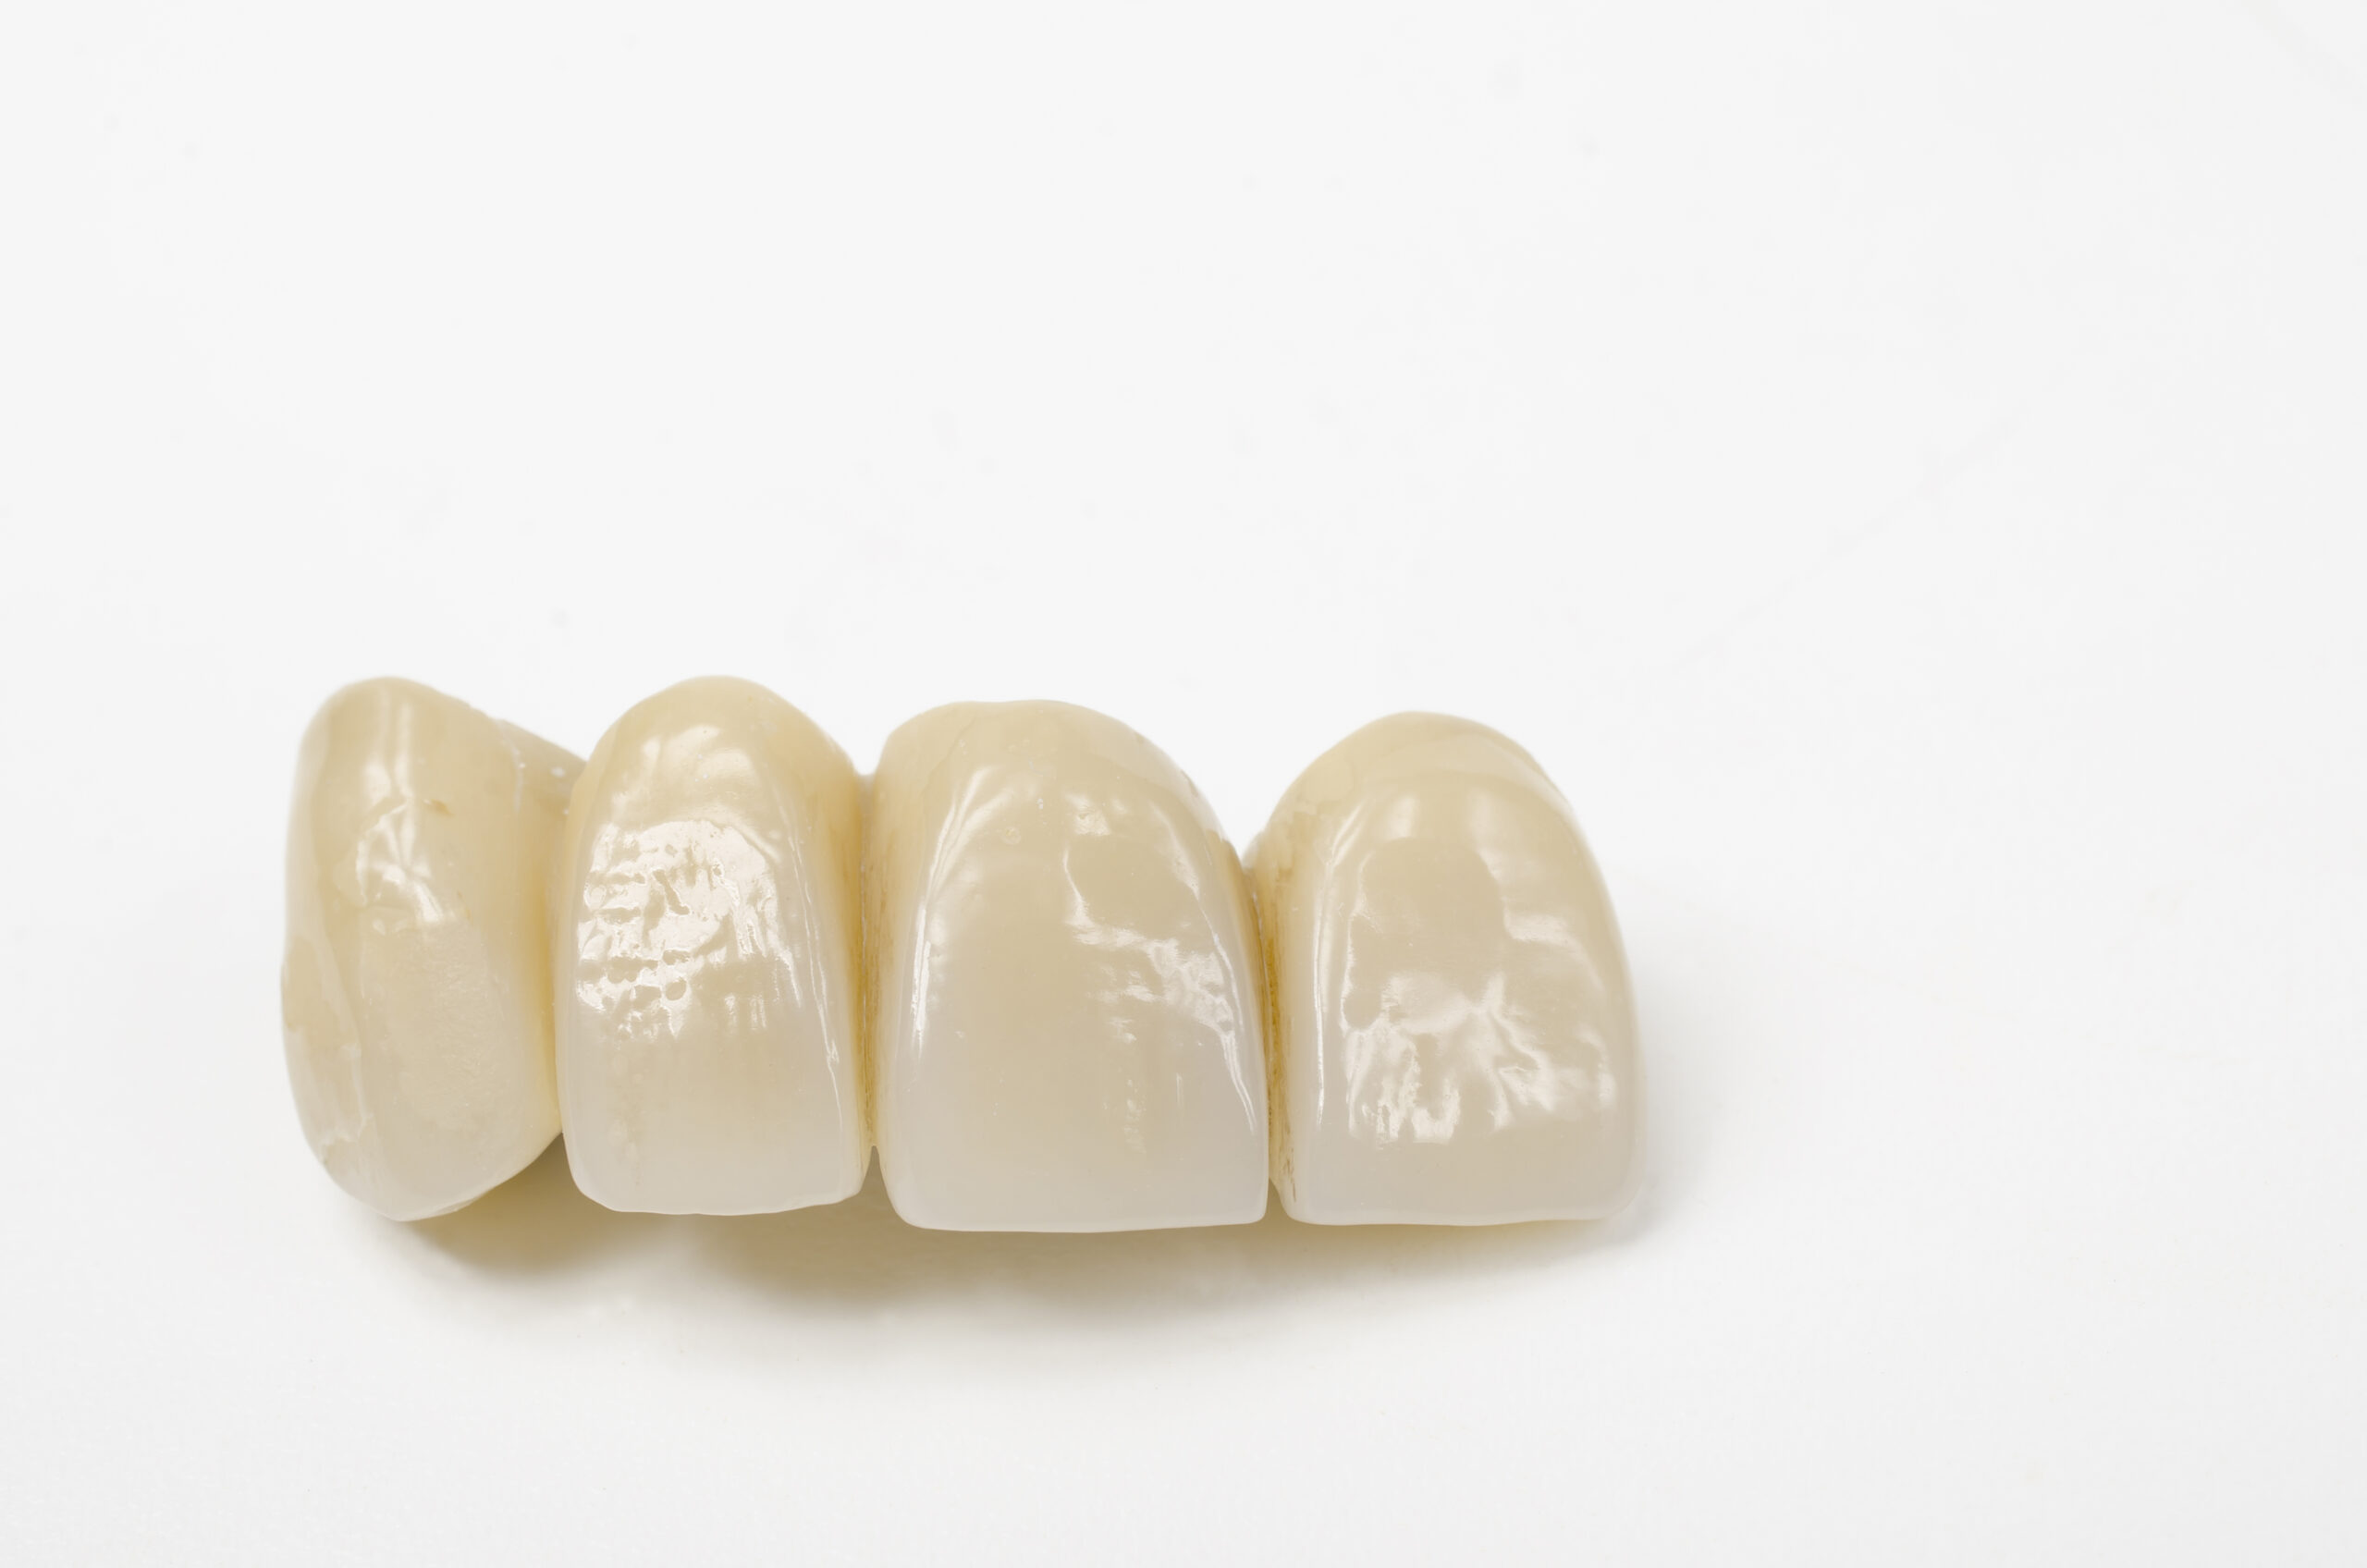
  1. Make the provisional as Esthetic as the final restoration.

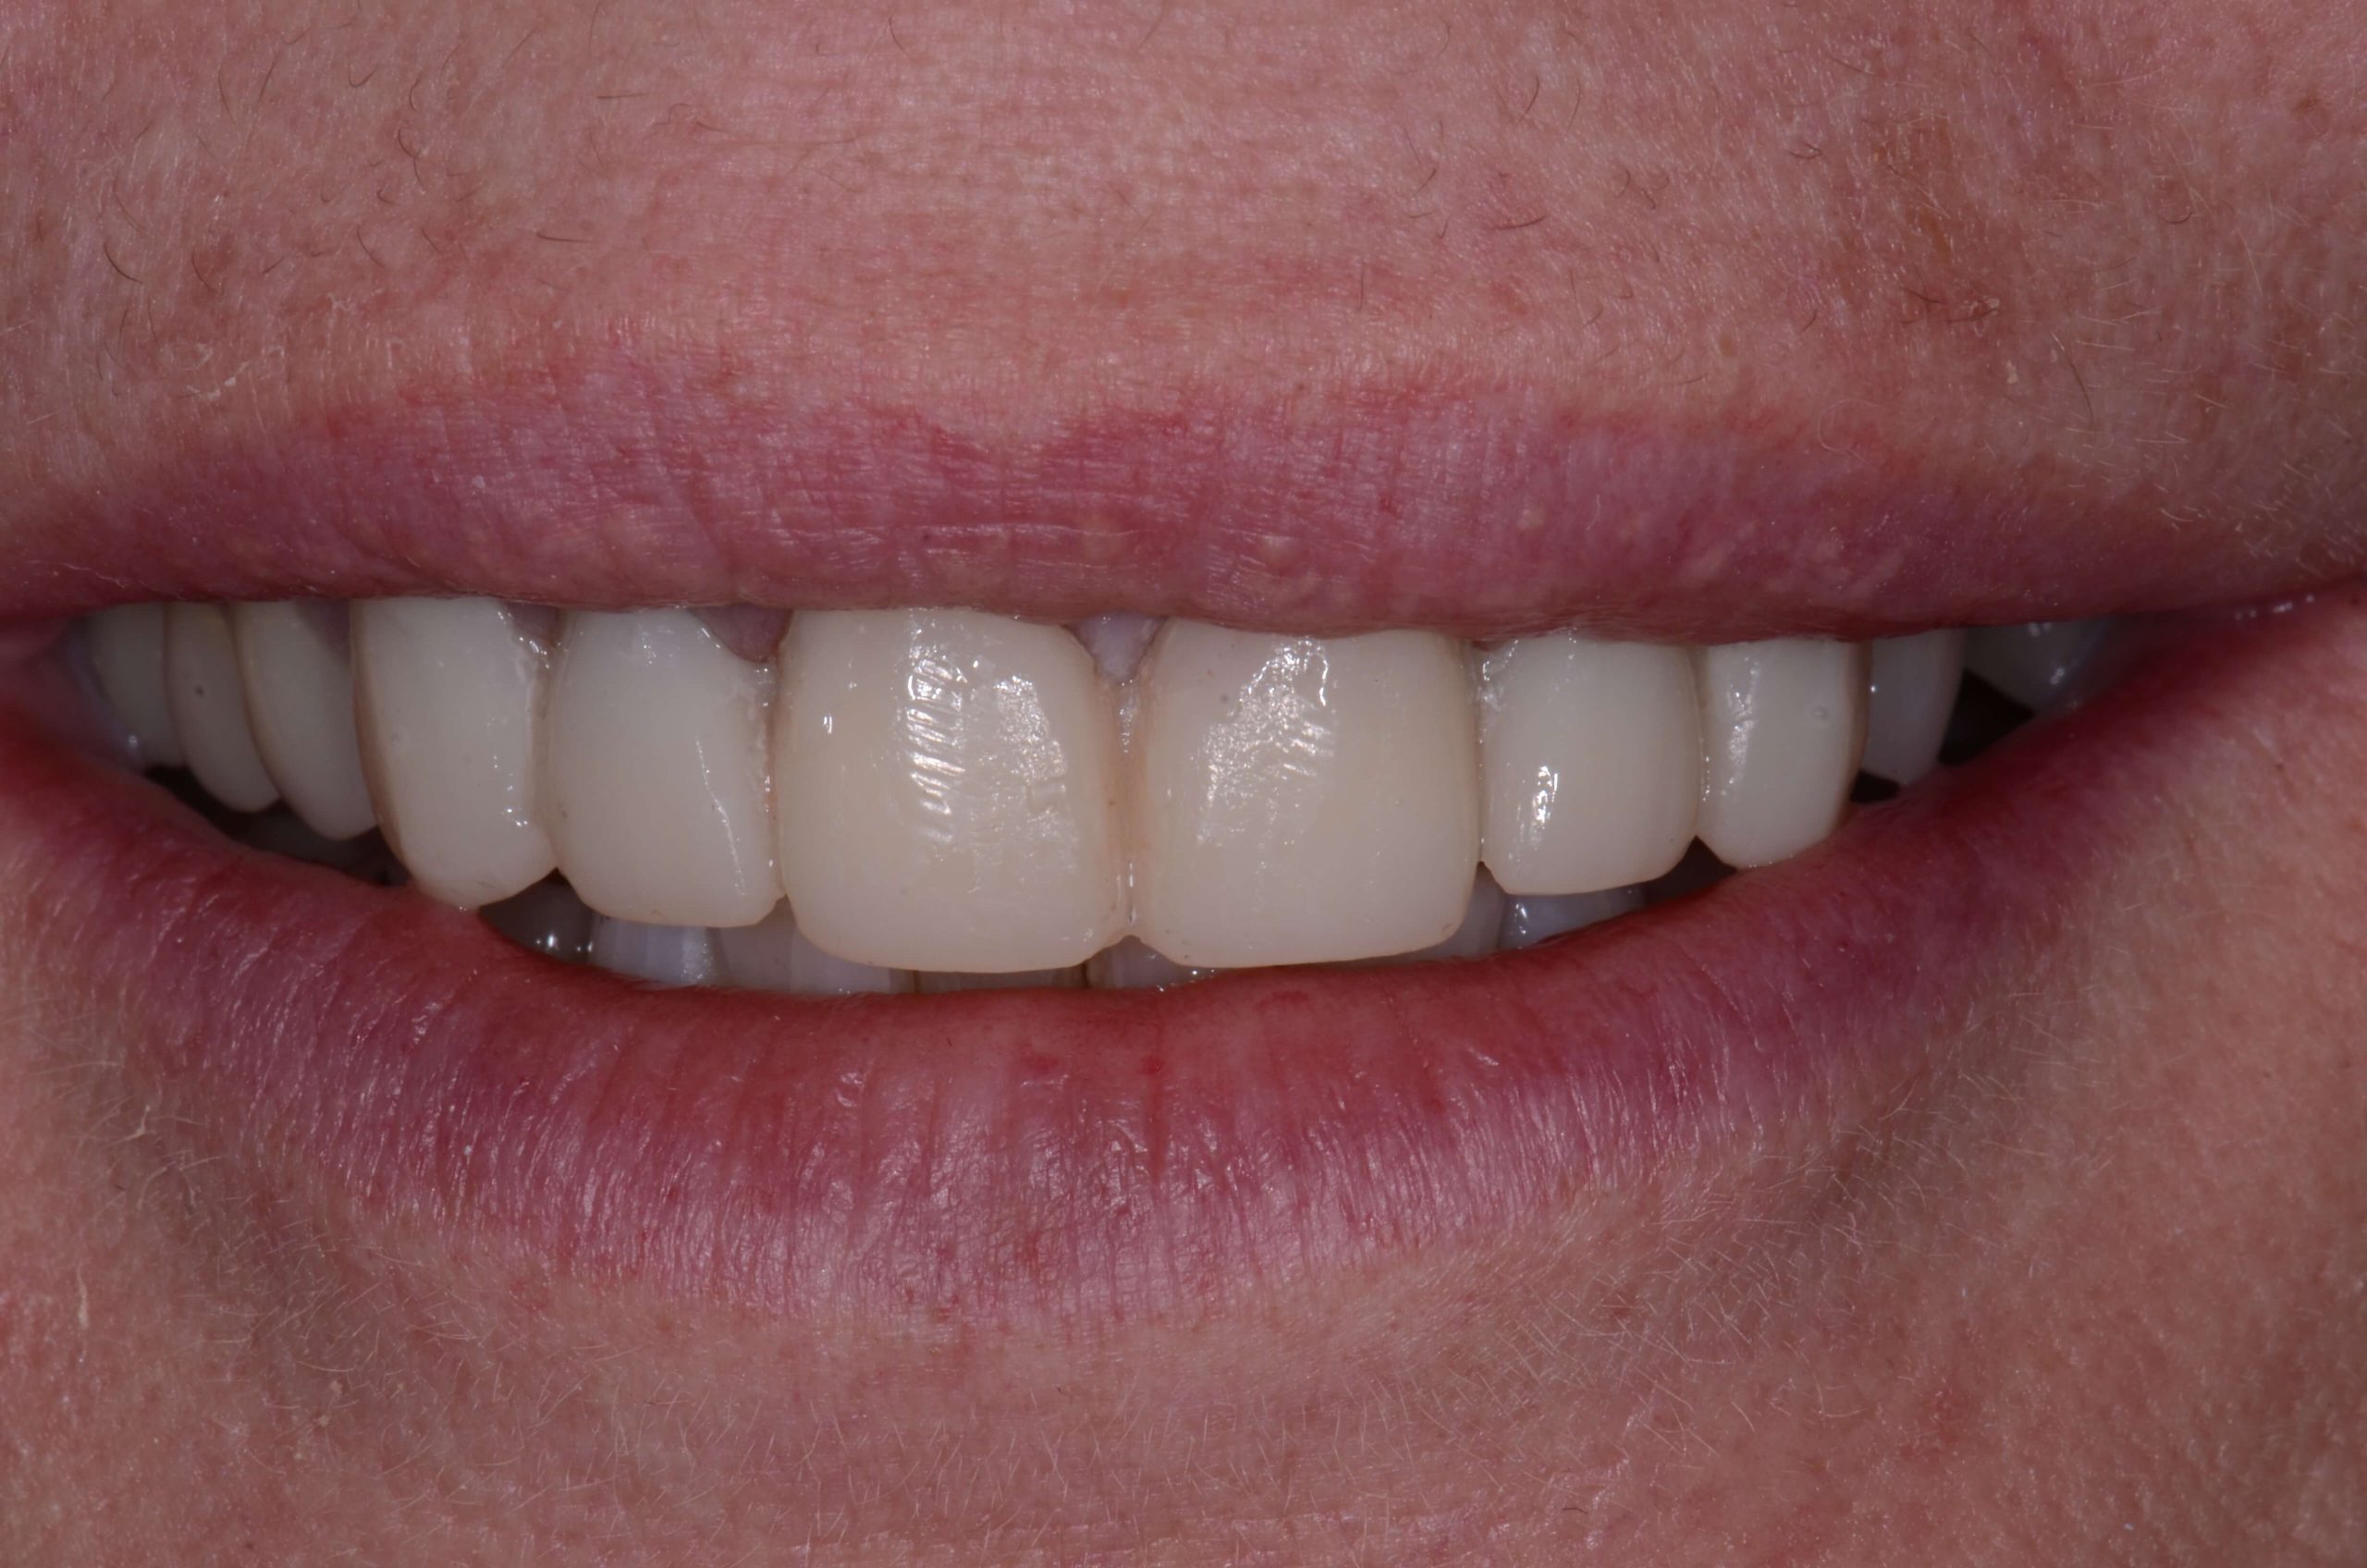
I contend that the more your provisionals look like what you are hoping for when you seat the final restorations, the more people will talk about them, AND you. 

I was able to build a referral restorative practice by creating provisionals that made patients want to come to my practice and specialists want to send people. For much of our career, almost the entire team of the oral surgery office we worked with, and many of the team members from the other specialty practices we worked with, were our patients in Pemberville, Ohio. 

Front teeth or back teeth, when you make them look like teeth, people will like it and they will show and tell other people. “This is just the temporary?!” was not an uncommon question or exclamation from our patients.  

  1. A GREAT guide makes a GREAT provisional restoration.

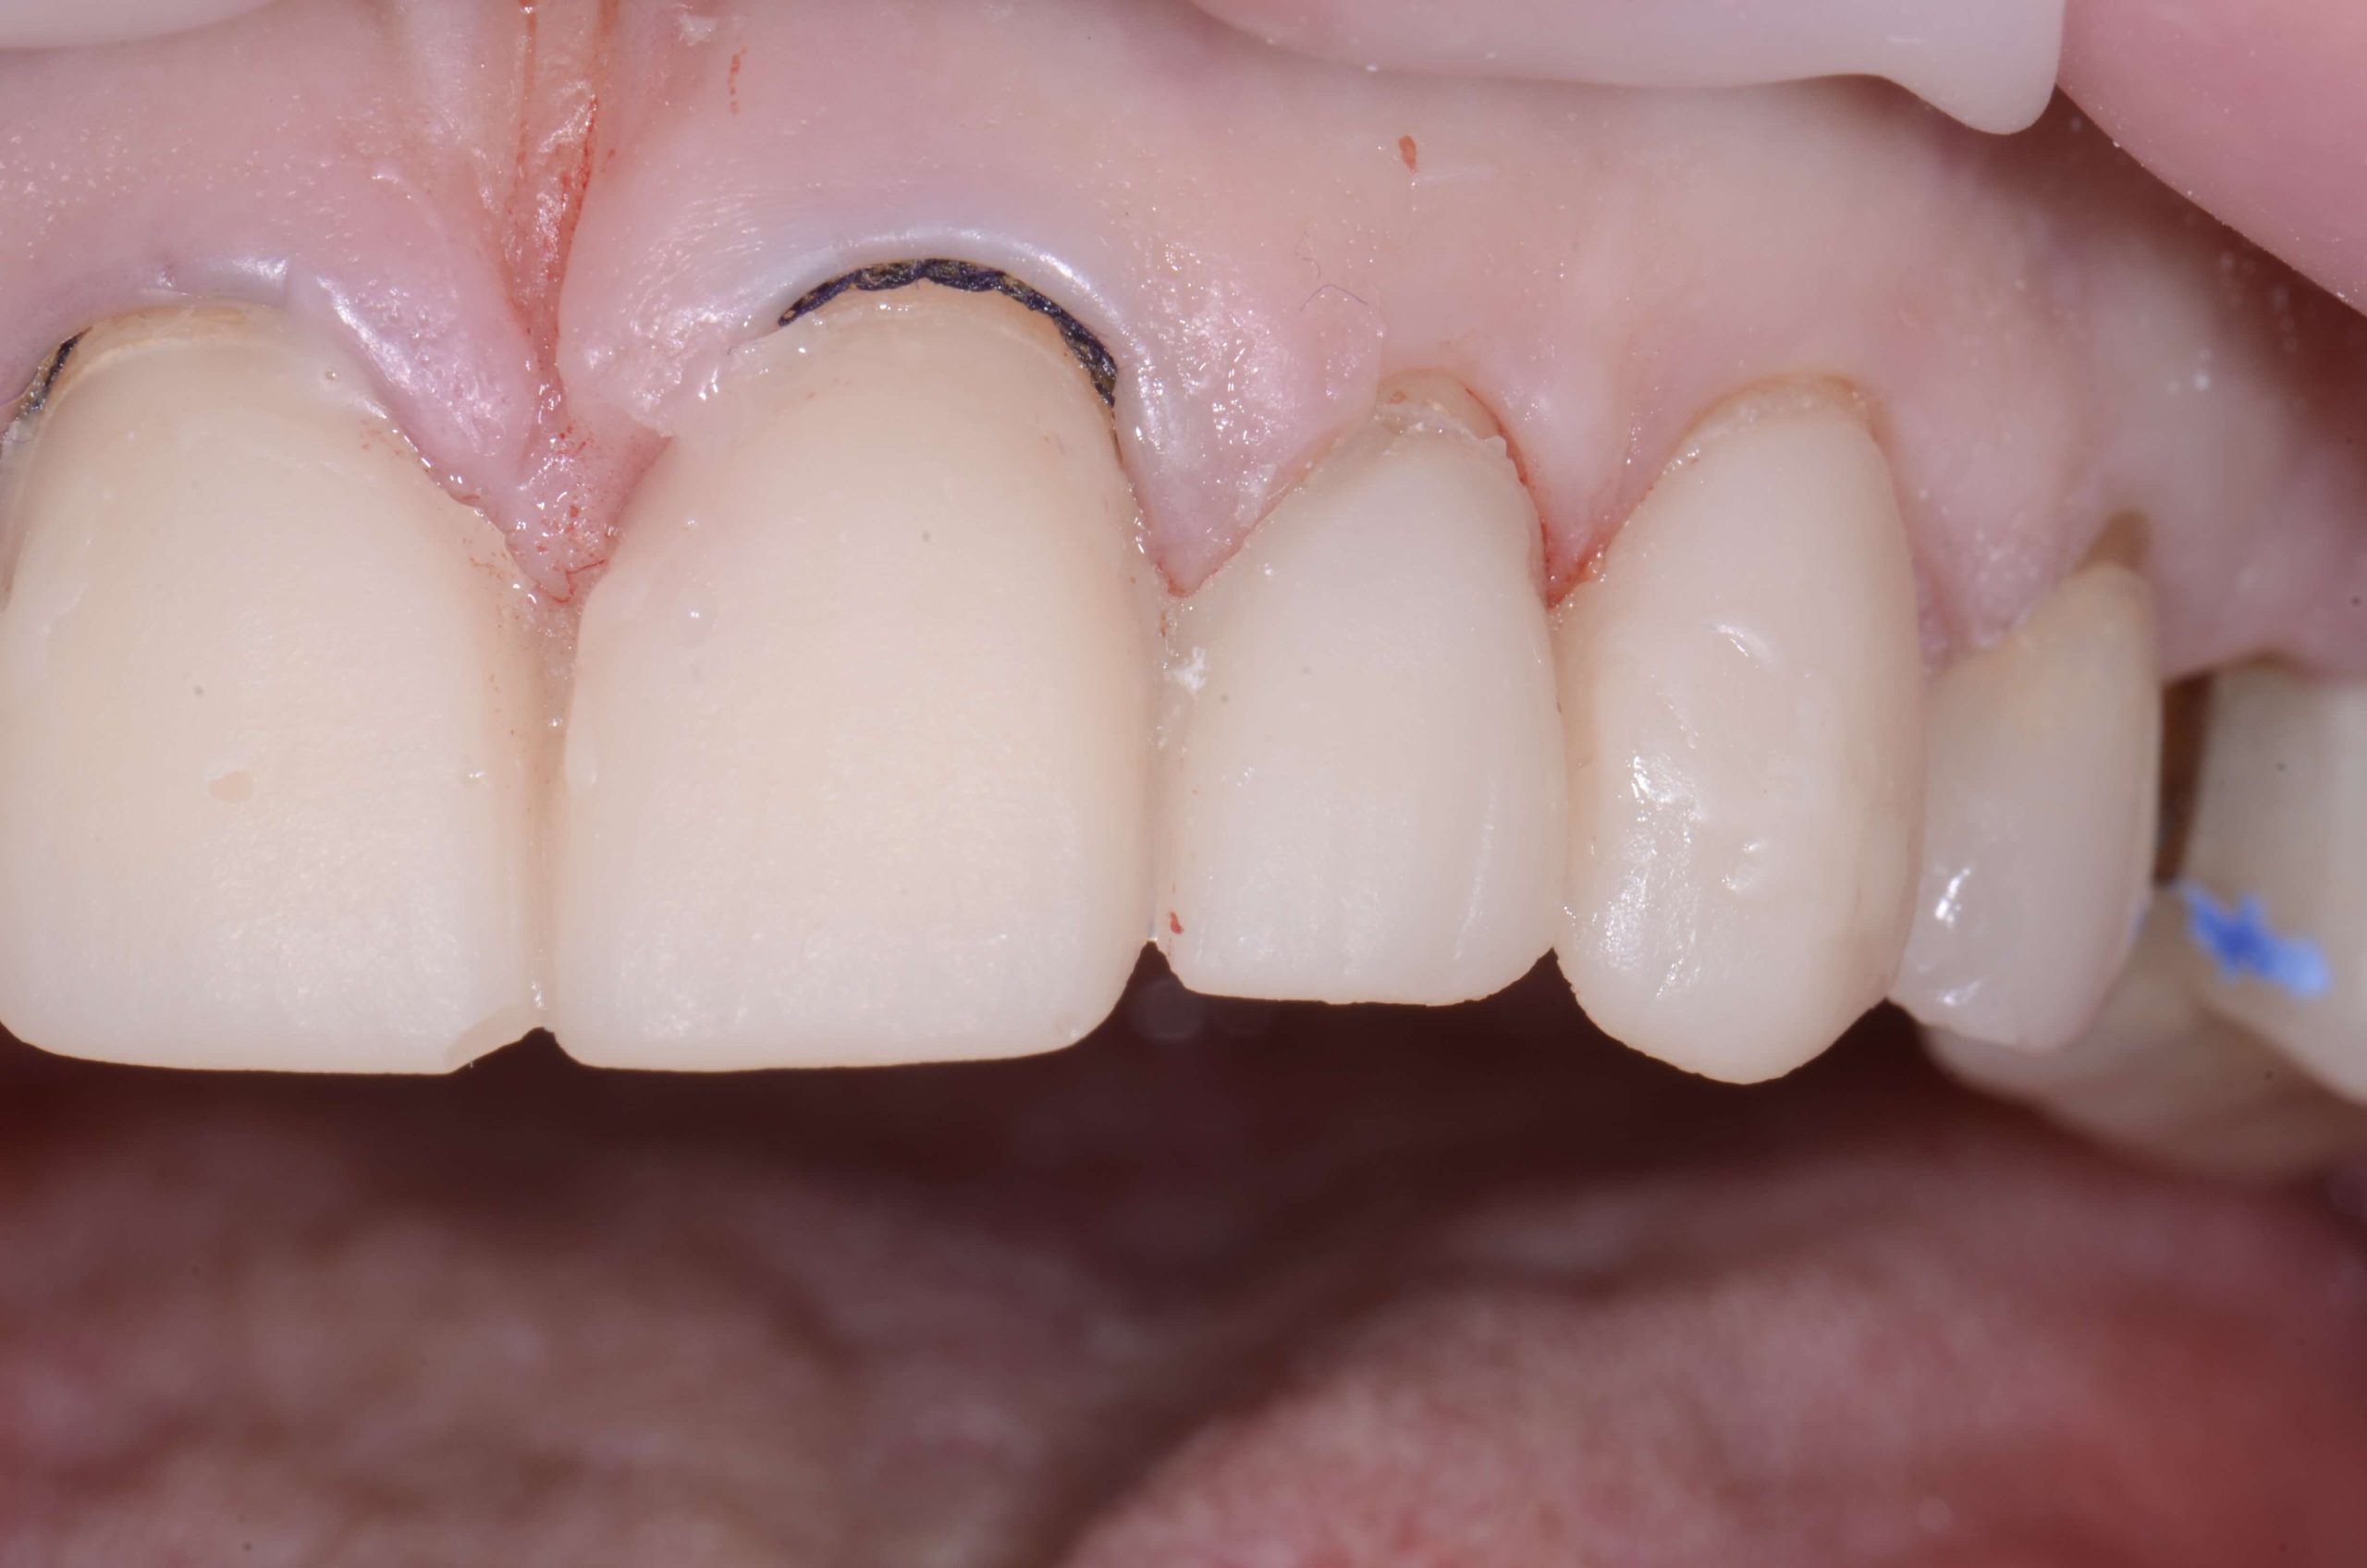
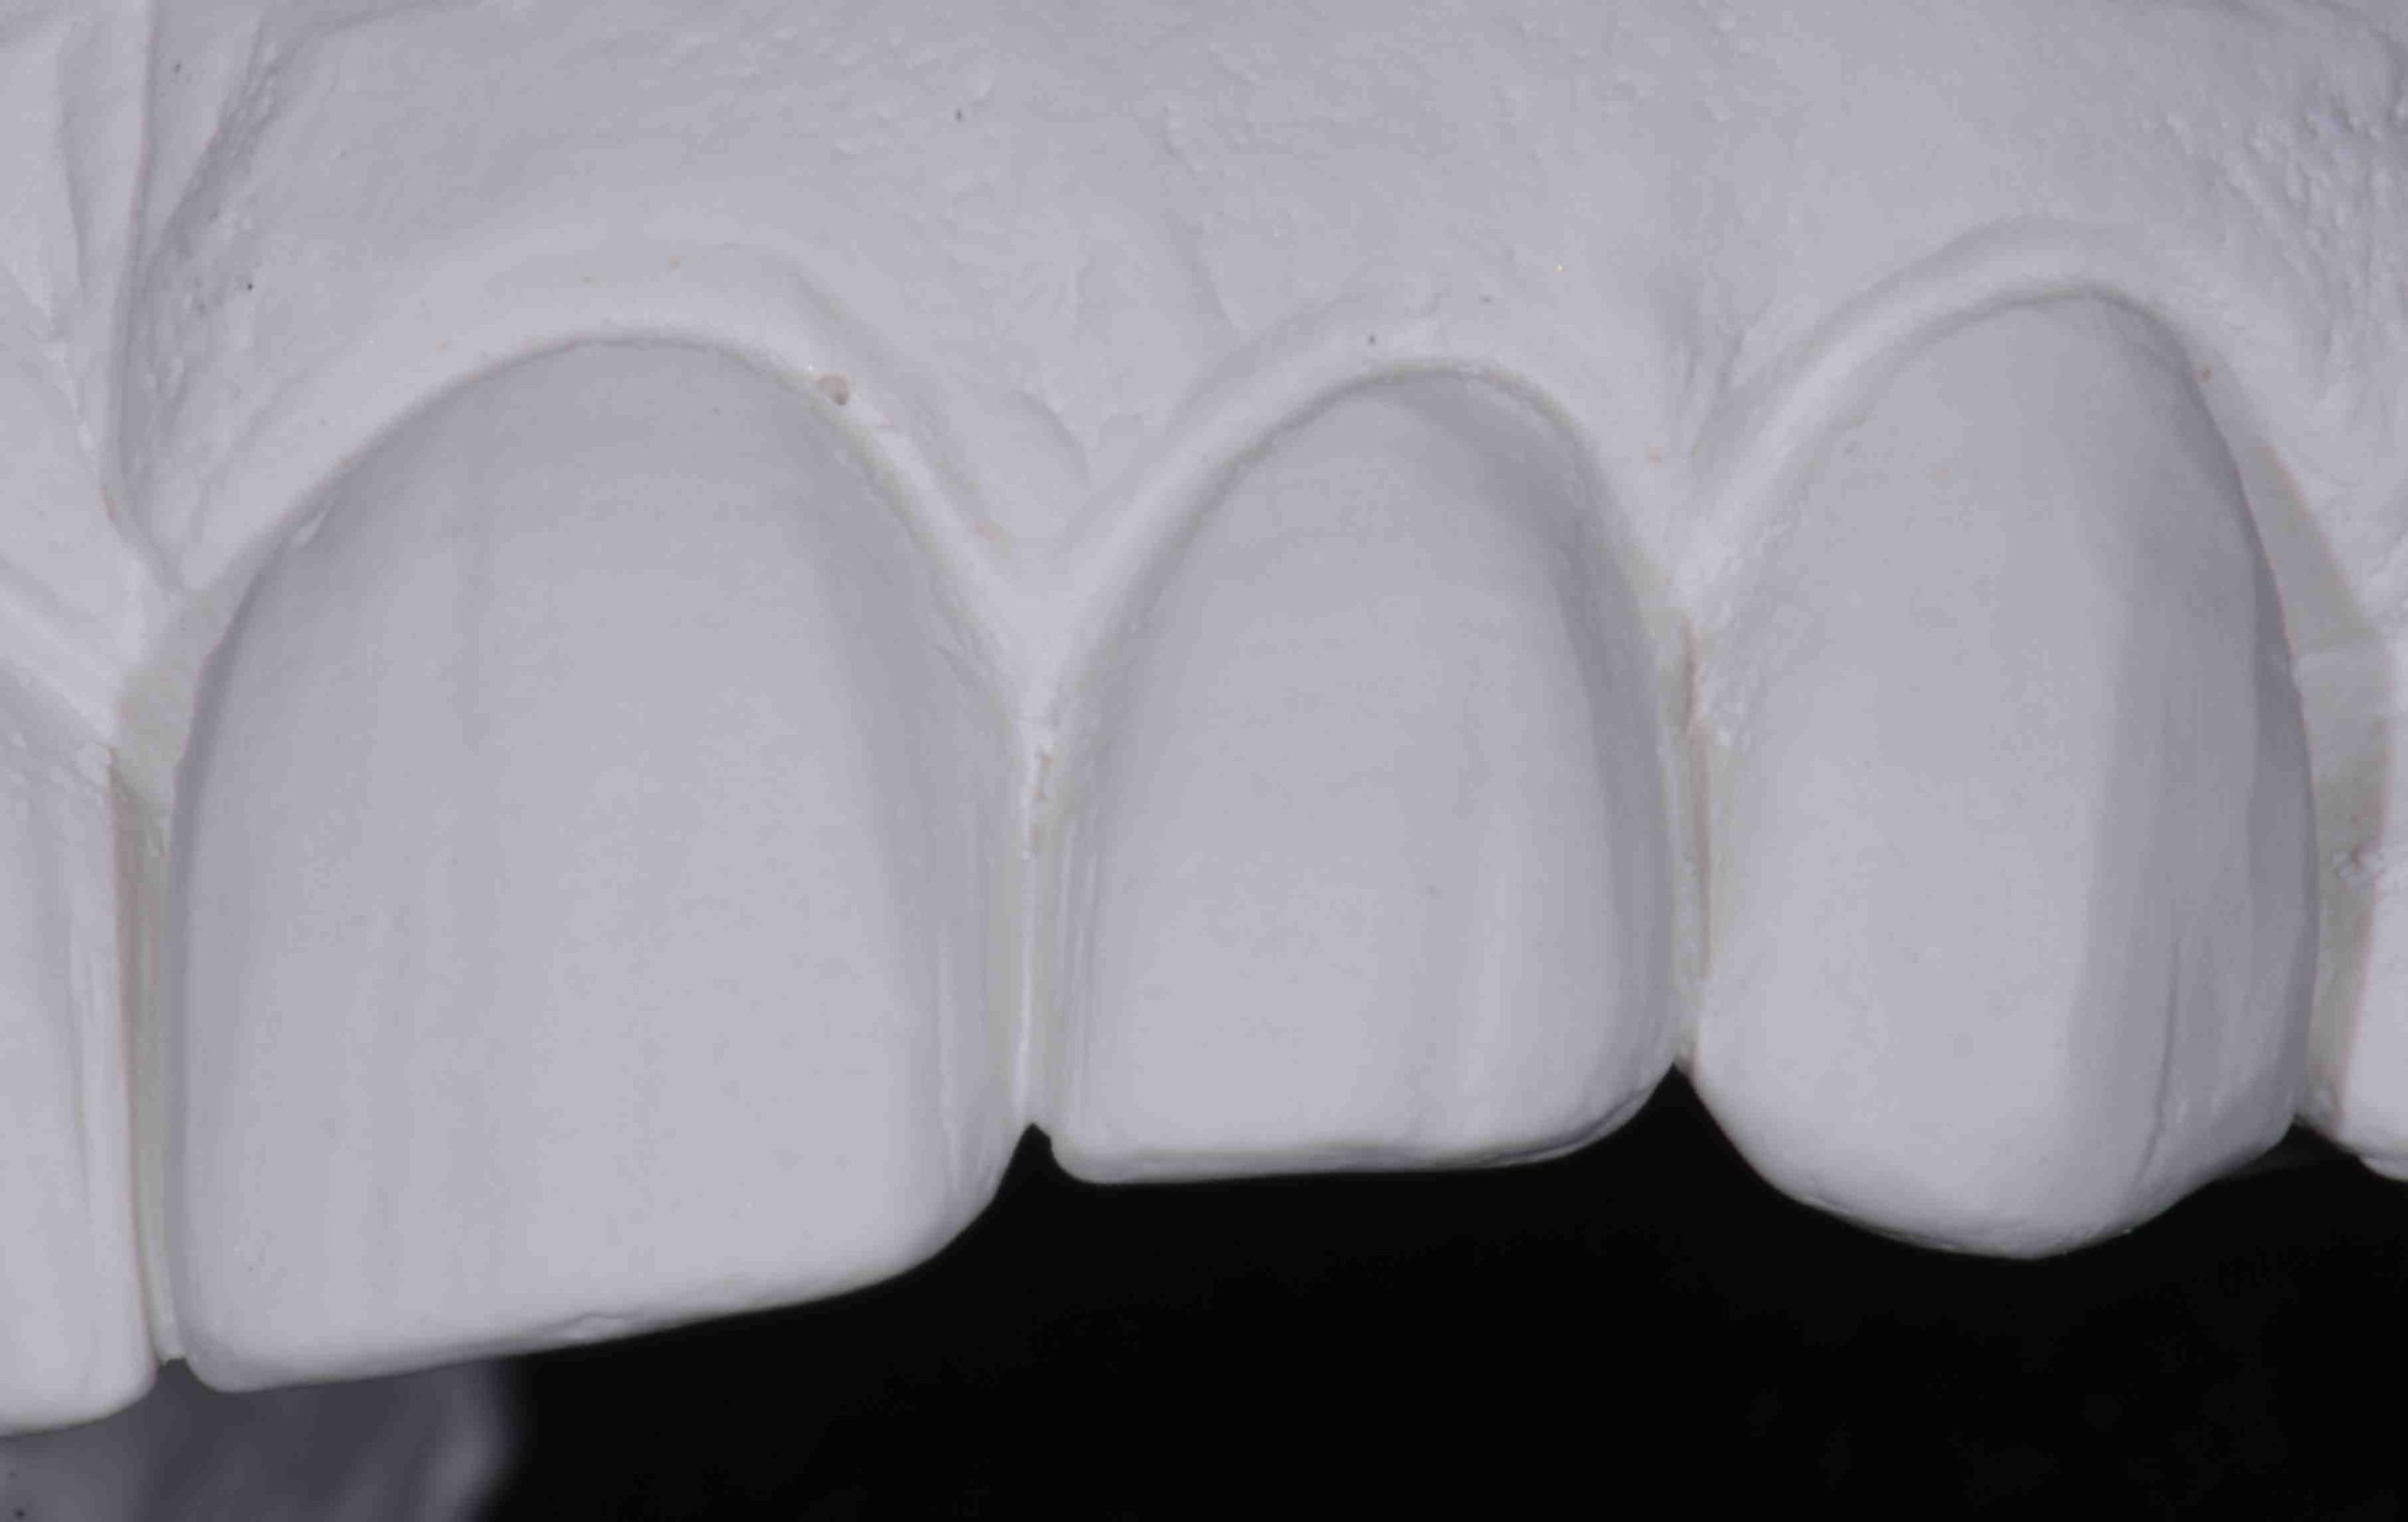
Your wax-up** cast/model serves as your vision, as your preparation guide fabrication device, and as your provisional former. When the preparation is appropriately reduced for the material selected, the temporary can mimic the restoration. 

** The wax-up might be created with wax then duplicated with impression material and stone to create a cast, or it might be scanned to be duplicated with resin and printed or milled to create a model. 

  1. 3. Use that provisional to highlight the talents of your team members.

You might LOVE to make those provisionals, but if your assistant is equally excited when it comes to recreating nature for the patient to appreciate, then it could be an opportunity for patients to see that your assistant does much more than set-up, clean up, and hand you an instrument. My dental partner, Cheryl, (who is also my wife) and I actively sought out things that could help our patients experience our team as much more than our helpers. 

As we all know, dental assistants are an integral and vital part of what the practice is and are a powerful force in how and why patients ask for dentistry. Assistants who fabricate provisionals have an opportunity to be seen differently, and we were always looking for ways to create partnership with them in our treatment. 

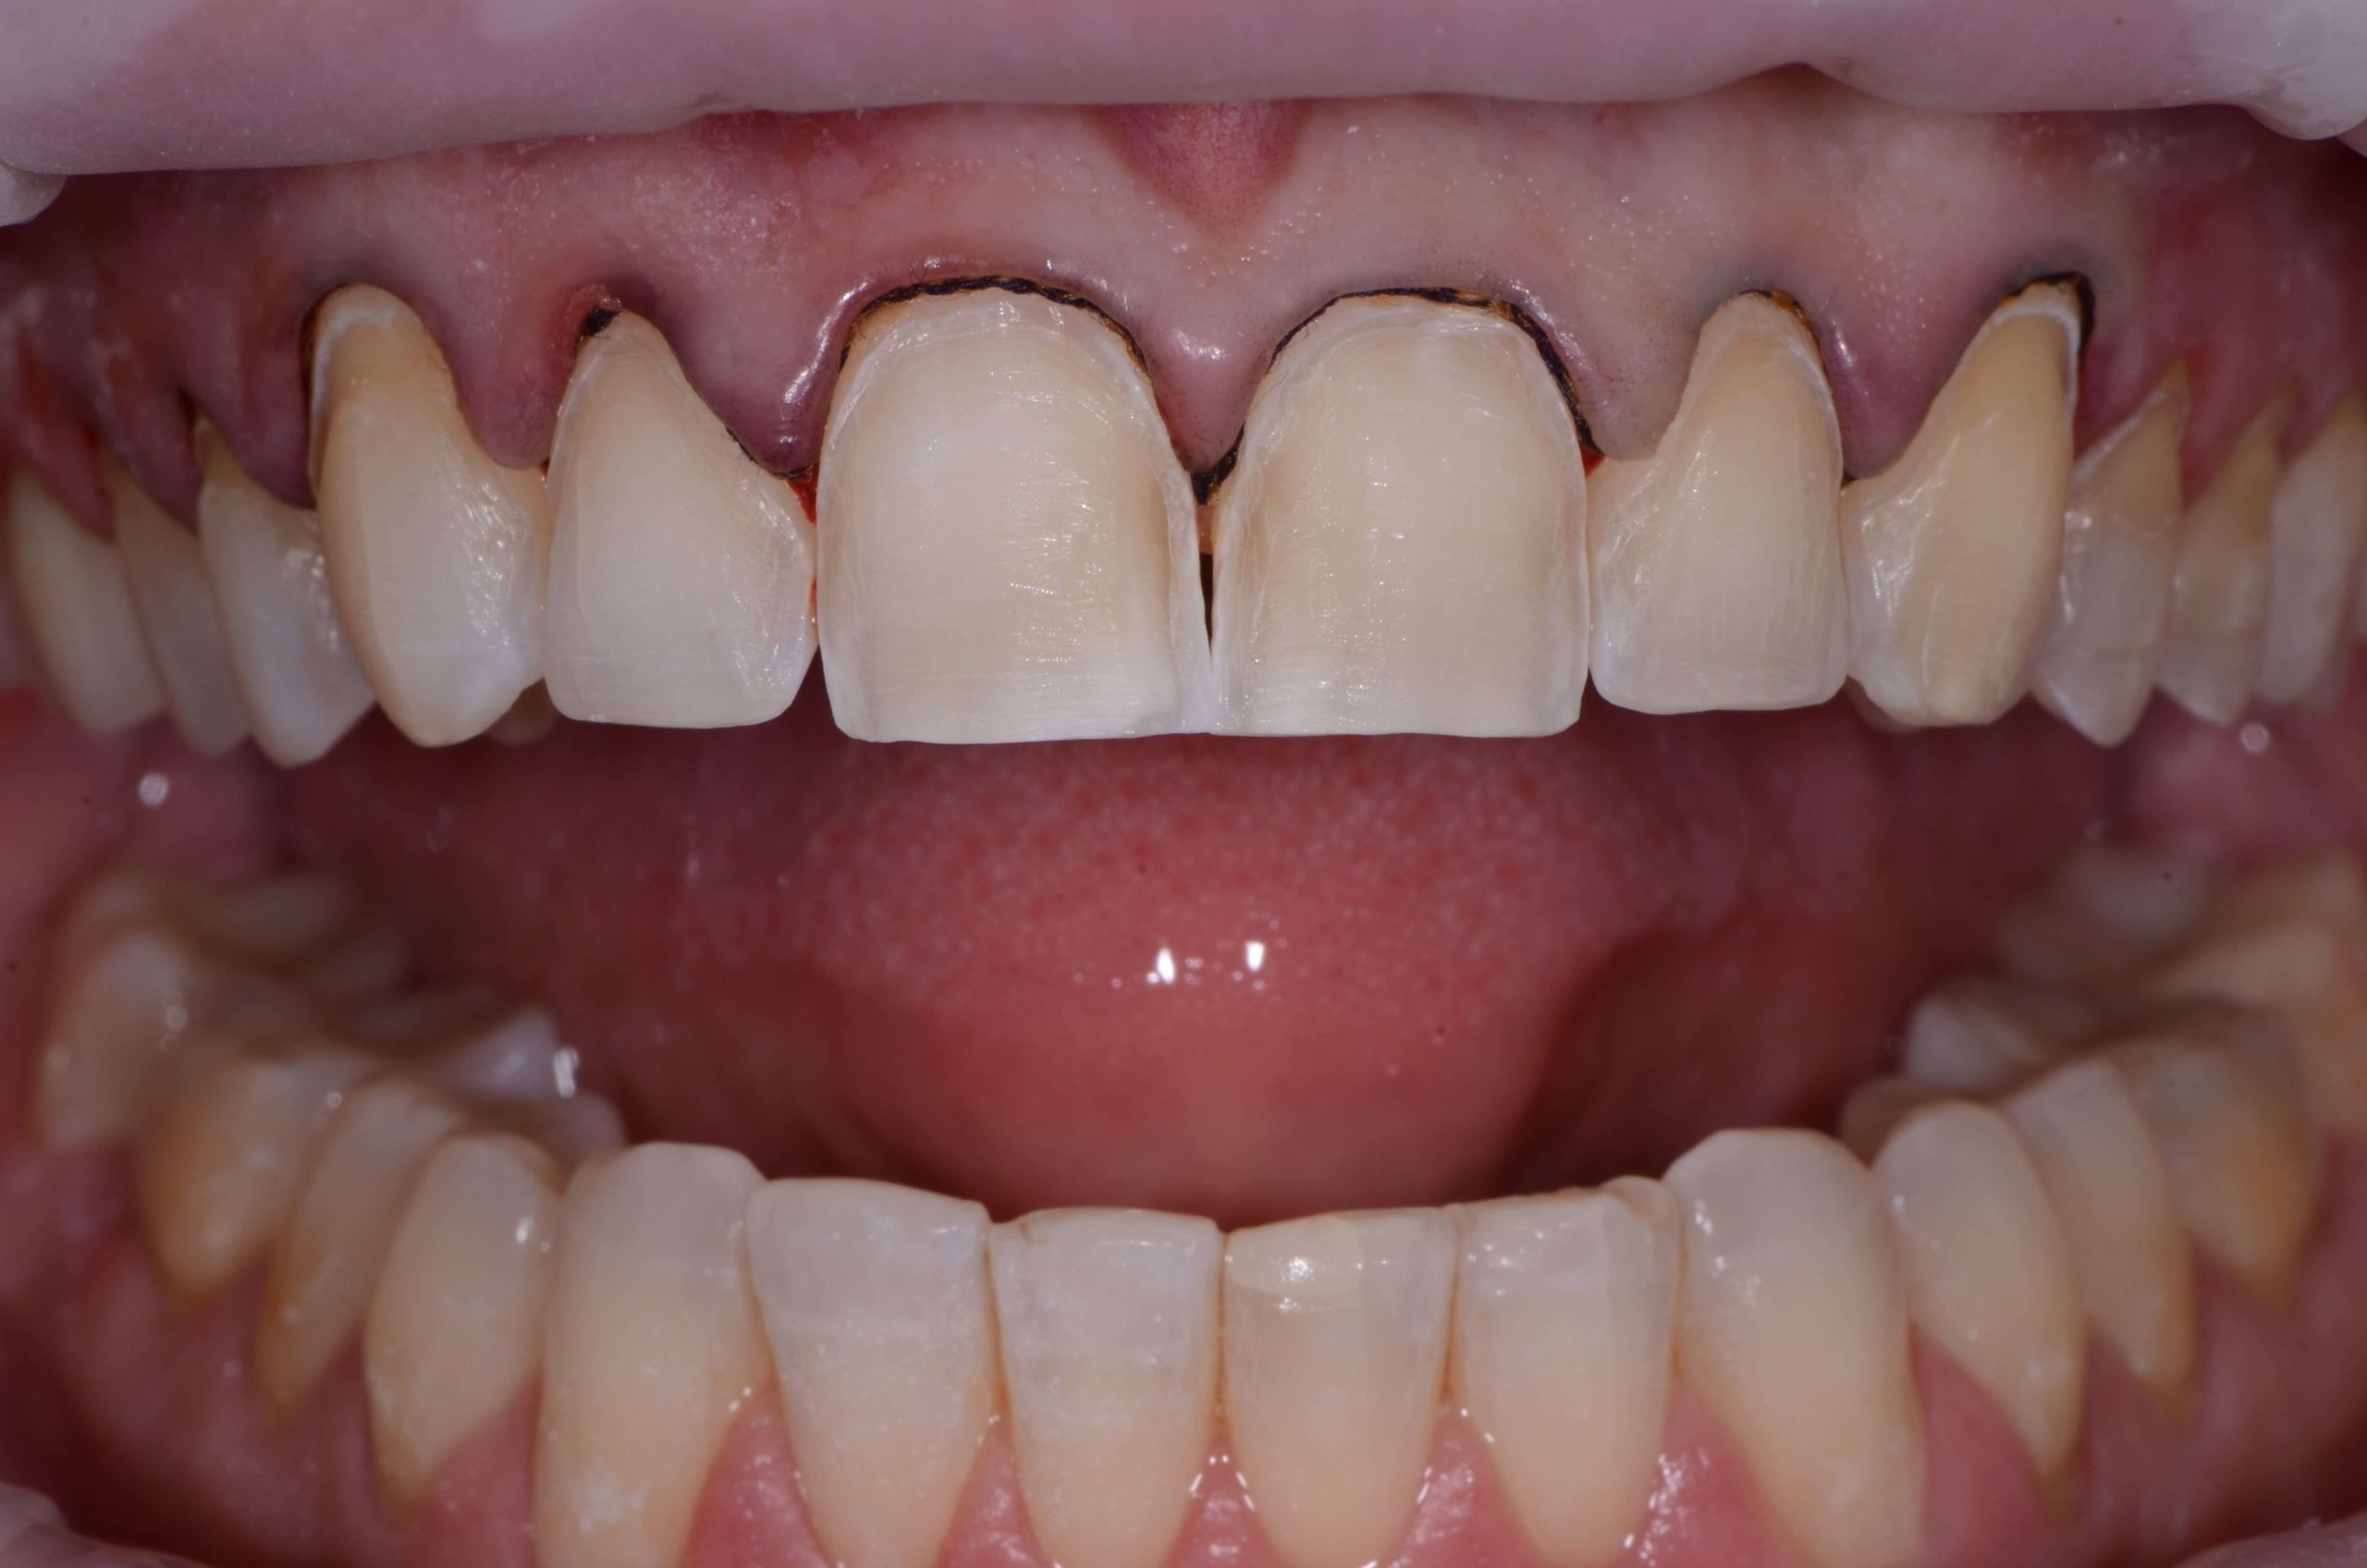
  1. 4. Take pictures of them.

Photographs of the temporary will make it easier for the lab to design the outcome. They will be able to see what you are thinking, able to visualize what you want, AND maybe even more importantly, see what you do not want. With anterior provisionals, I have frequently noted to my ceramist, “Please put the incisal edge in exactly this position vertically and horizontally in the face, then use your artistry to create the tooth that belongs in the face you see in the photographs of the patient before, prepared, and temporized.” 

There were many times when the technician was able to see and create effects that I might have not recognized as being “just the thing that would make these teeth extraordinary.” And don’t forget to show the patient the photograph. 

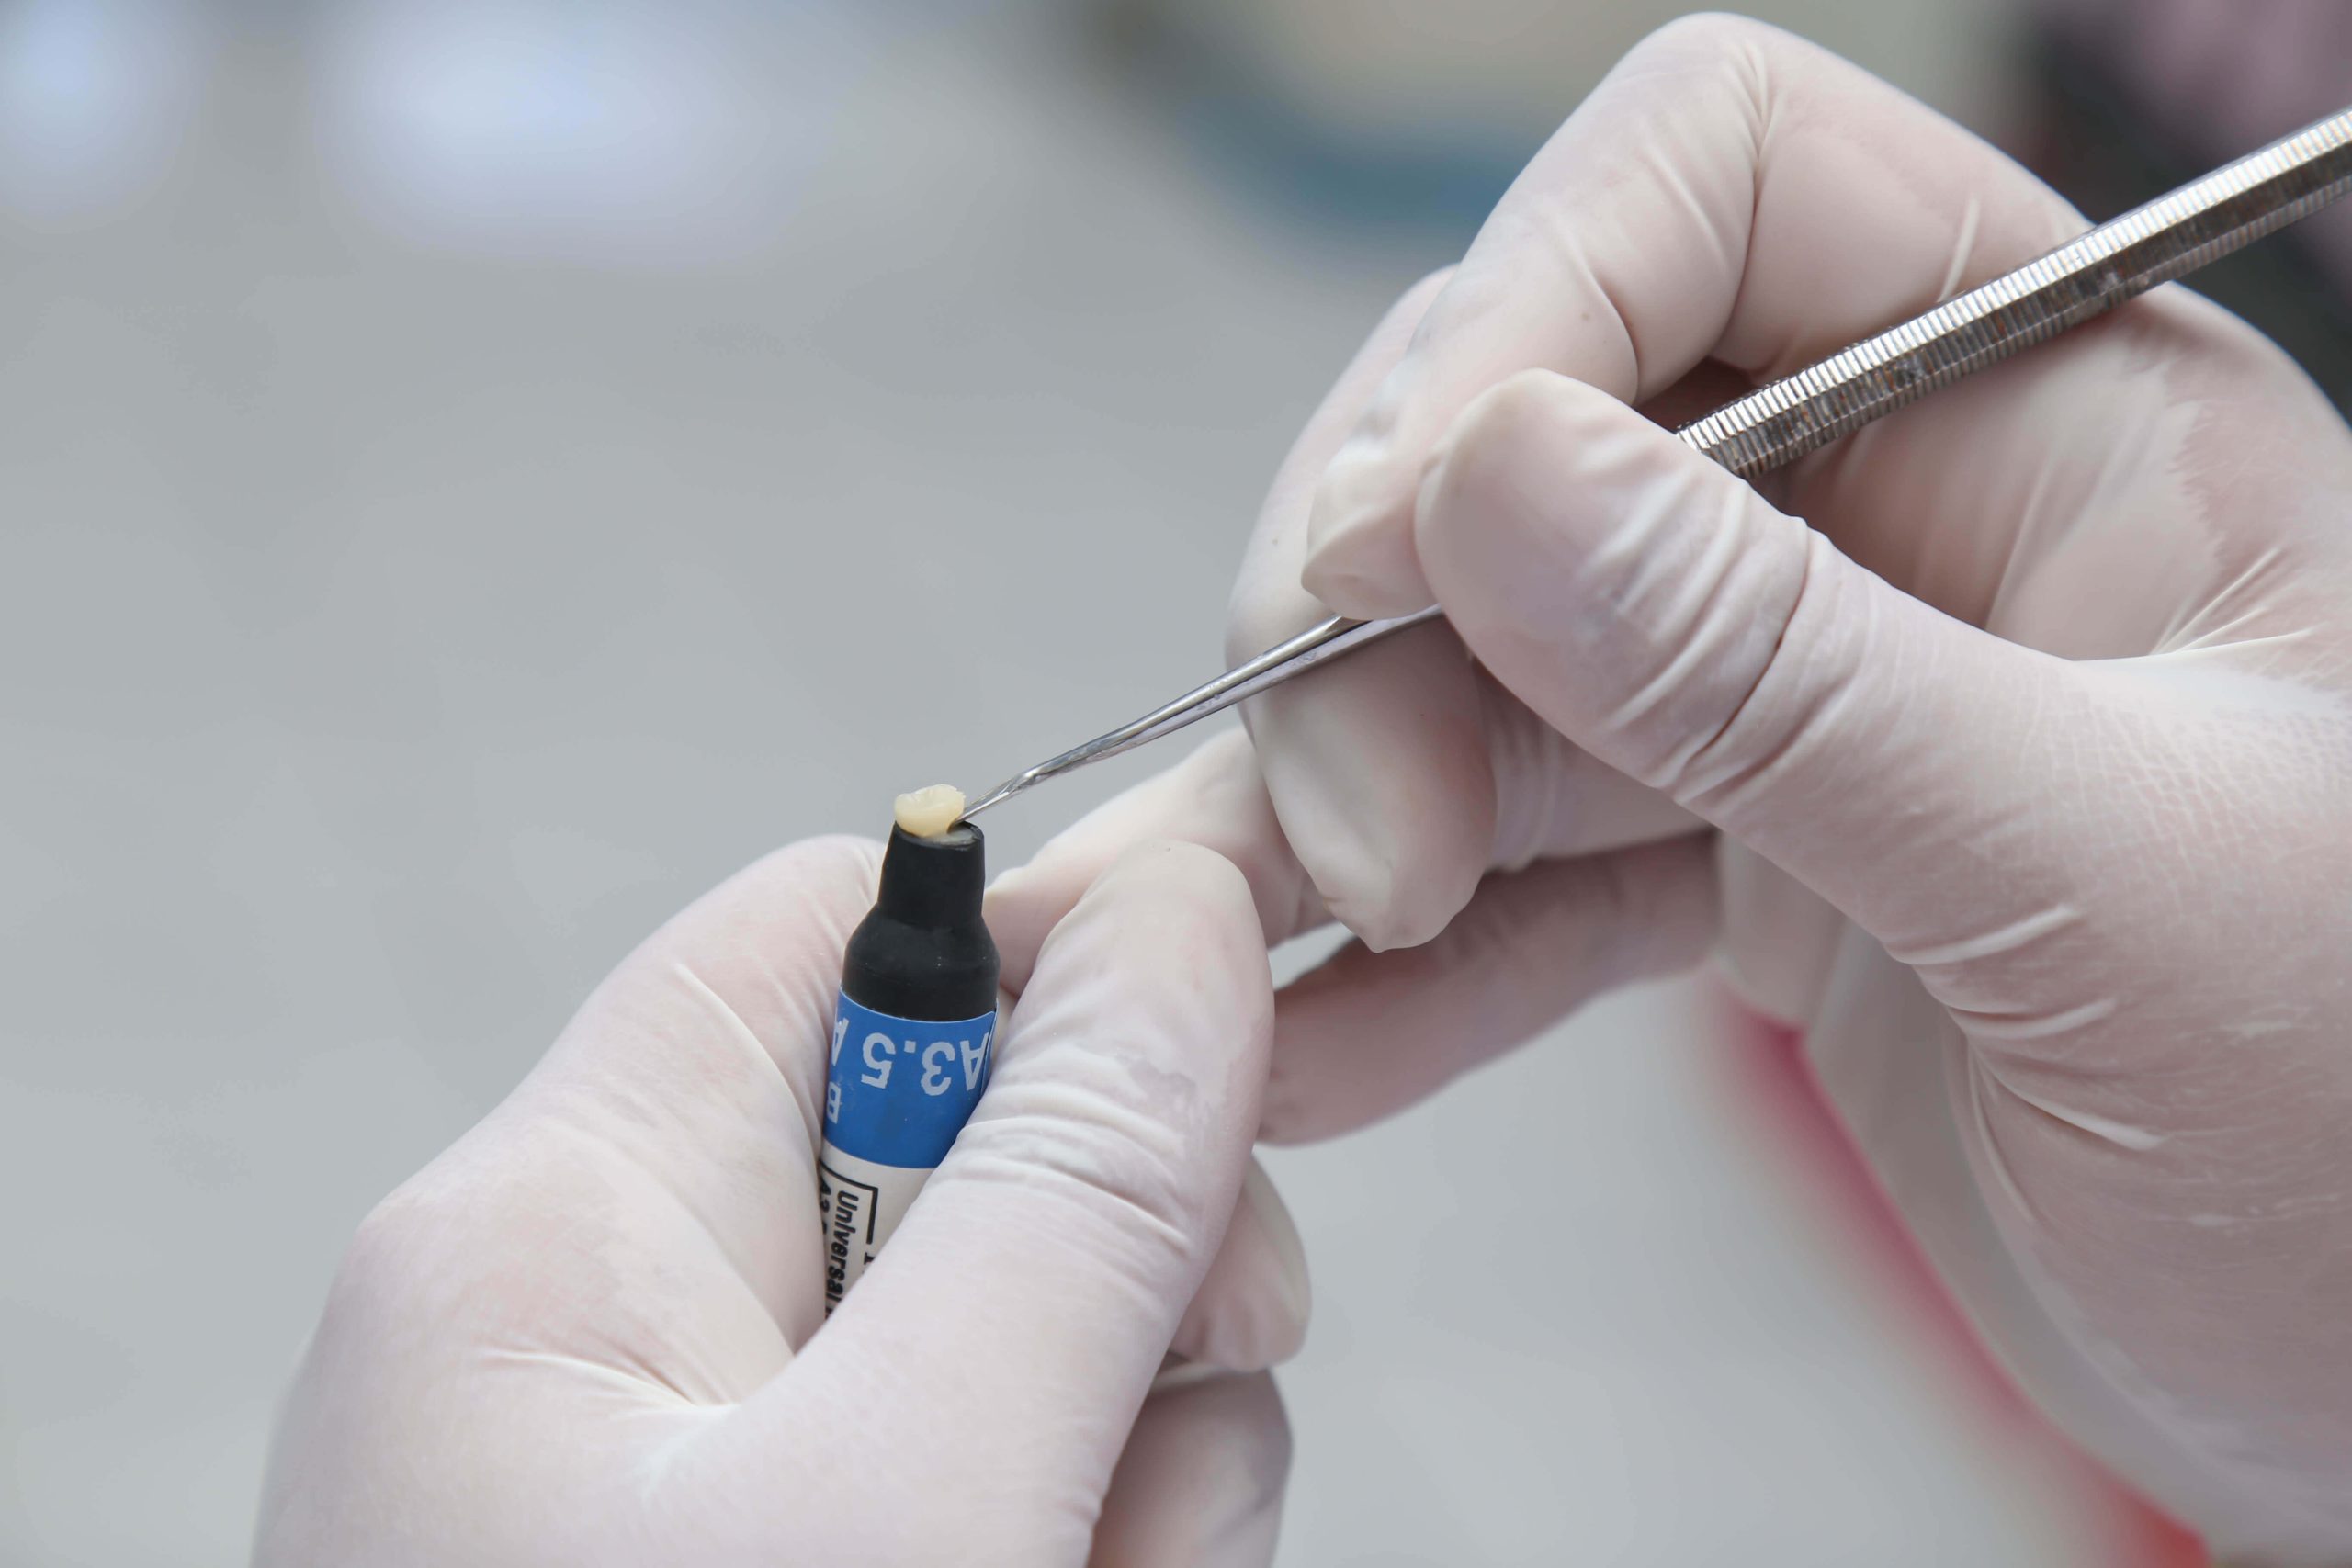
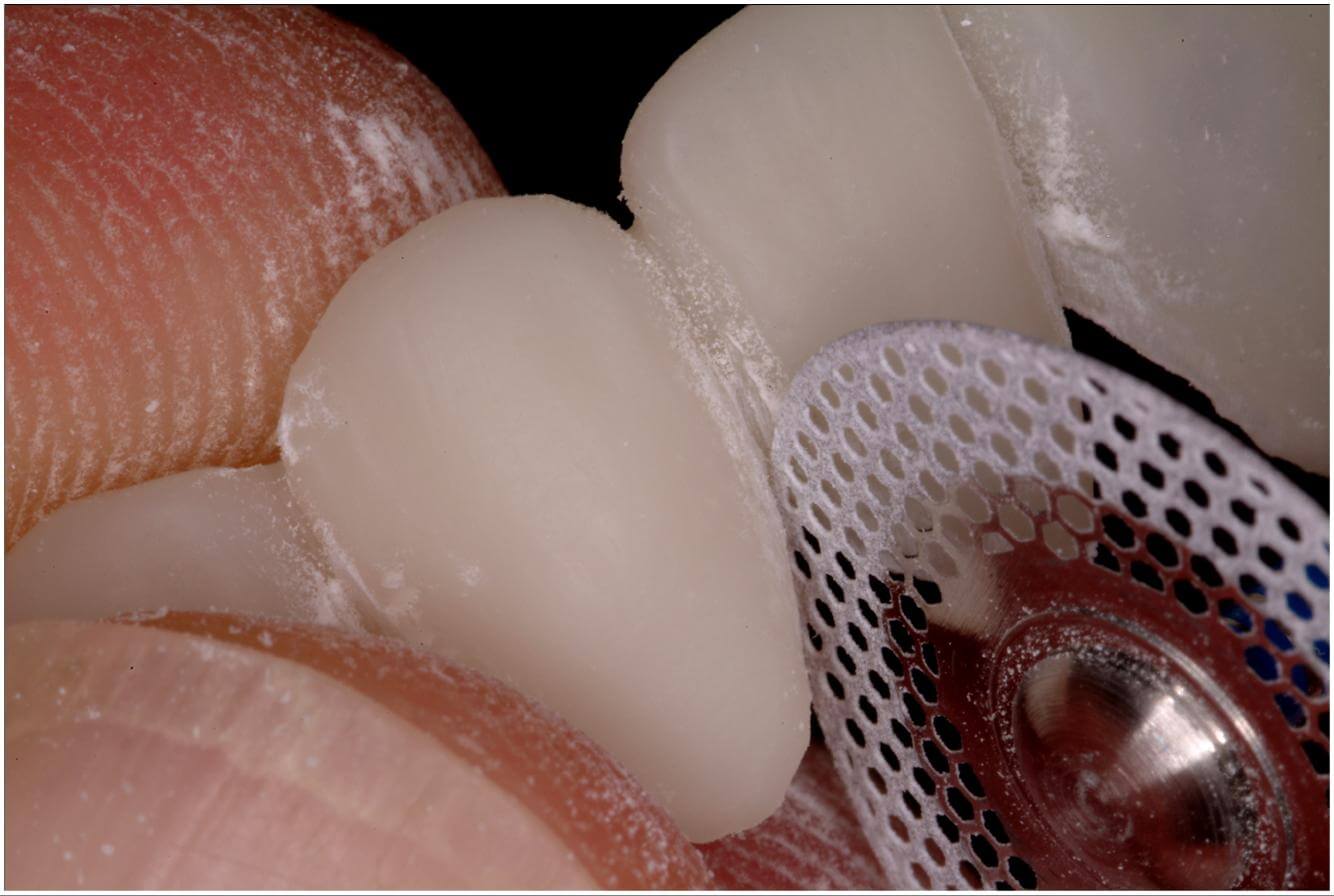
  1. 5. Love the material you make the temporary with.

The better the provisional material is at holding tooth position and functional contact, the less adjustment we’re going to have, so using a high-quality material is important. There are a lot of them out there. I like bis-acryl materials that polymerize with a hard surface, have little or no oxygen inhibited layer, and can be polished easily. The polish is more about feeling smooth than about the shine. Ask you patients how their provisional tooth “feels” when you are done, so they sing your praises. 

  1. 6. Use high-quality core material.

When you use a good core material the prep will be smoother, making it easier to fabricate nice provisionals. Ideal prep form goes a long way toward better provisionals. 

  1. ASK your patient to tell people.

As noted above, when you can elicit an emotional response about the awesomeness of your provisional, ask the patient to tell other people, “….and this is just the TEMPORARY!” 

Related Course

Mastering Treatment Planning

DATE: October 2 2025 @ 8:00 am - October 4 2025 @ 1:30 pm

Location: The Pankey Institute

CE HOURS:

Tuition: $ 4795

Single Occupancy with Ensuite Private Bath (per night): $ 345

 MASTERING TREATMENT PLANNING Course Description In our discussions with participants in both the Essentials and Mastery level courses, we continue to hear the desire to help establish better systems for…

Learn More>

About Author

User Image
Gary DeWood, DDS

FIND A PANKEY DENTIST OR TECHNICIAN

I AM A
I AM INTERESTED IN

VIEW COURSE CALENDAR

Using Glycerin with Resin-Based Temporary Dental Cements 

April 1, 2024 Kelley Brummett DMD

Kelley Brummett, DMD 

Resin-based temporary cements are wonderful due to their translucency and their ease of cleanup after light curing. My favorite is TempoCem from DMG.  

To prevent resin-based temporary cement from bonding to the newly placed composite, some dentists apply Vaseline on the prep before placing the provisional. 

Instead of Vaseline, I use glycerin. We keep glycerin in a little syringe in the room, and we put just a smidge in a little dapping dish so I can coat the top of the prep with it. Since beginning to use glycerin, I have not had difficulty retrieving bonded provisionals. 

If your provisionals come off, just get a new and stronger temporary cement. No! I am just kidding! If the provisional comes loose, it is often because you do not have enough space, so excursive interferences are high. When this happens, I engage with the patient in checking their occlusion, and continue to work out the determinants of their occlusion.  

Figuring these things out while the patient is in a provisional that is retrievable due to the ease of the temporary cement used, helps me continue to make progress on their occlusion before moving forward with the final restoration.  

It is not a failure of cement; it is a growth opportunity for discovery and patient engagement! 

Related Course

Worn Dentition: Direct & Indirect Adhesive Management Through a Non-Invasive Approach

DATE: October 24 2025 @ 8:00 am - October 25 2025 @ 2:30 pm

Location: The Pankey Institute

CE HOURS: 15

Dentist Tuition : $ 2595

Single Occupancy with Ensuite Private Bath (per night): $ 345

Enhance Restorative Outcomes The main goal of this course is to provide, indications and protocols to diagnose and treat severe worn dentition through a new no prep approach increasing the…

Learn More>

About Author

User Image
Kelley Brummett DMD

Dr. Kelley D. Brummett was born and raised in Missouri. She attended the University of Kansas on a full-ride scholarship in springboard diving and received honors for being the Big Eight Diving Champion on the 1 meter springboard in 1988 and in 1992. Dr. Kelley received her BA in communication at the University of Kansas and went on to receive her Bachelor of Science in Nursing. After practicing nursing, Dr Kelley Brummett went on to earn a degree in Dentistry at the Medical College of Georgia. She has continued her education at the Pankey Institute to further her love of learning and her pursuit to provide quality individual care. Dr. Brummett is a Clinical Instructor at Georgia Regents University and is a member of the American Academy of Cosmetic Dentistry. Dr. Brummett and her husband Darin have two children, Sarah and Sam. They have made Newnan their home for the past 9 years. In her free time, she enjoys traveling, reading and playing with her dogs. Dr. Brummett is an active member of the ADA, GDA, AGDA, and an alumni of the Pankey Institute.

FIND A PANKEY DENTIST OR TECHNICIAN

I AM A
I AM INTERESTED IN

VIEW COURSE CALENDAR

Shrink Wrap Provisional Technique for Predictable Veneers: Part 4

August 24, 2018 Lee Ann Brady DMD

Creating amazing provisionals primes the patient for a positive treatment experience and ensures they’ll be content even before the final veneers. Read on for the last post in our four-part shrink wrap provisionals fabrication series:

Checking Occlusion and Polishing Shrink Wrap Provisionals

After cleaning off most of the excess from the provisional with a universal scaler, extra fine mosquito diamond, and a brownie, use the same diamond to open the linguo-gingival embrasures with the intent that the patient should be able to pass floss through them. This also keeps the tissue as healthy as possible for the seat later on.

Now that you’ve done all your flash trim, you should check the protrusive and right and left excursive occlusion, making sure you have even marks and no fremitus. Check intercuspal position to ensure you have no fremitus there as well, either lying back or with the patient in the alert feeding position.

With everything trimmed and ready to go, the last step is simply to polish. You can use the Brasseler Featherlite porcelain polishing system running in a latch handpiece. Utilize the first of three polishers at about 15,000 RMP, then move to the second polisher at about 10,000 RPM. They can be run at a higher speed, but you’ll get way fewer uses out of the polishers. Finally, run the last of the three polishers at about 7,000 RPM.

If you notice a porosity after cleaning out the residue from the polishing, you can use a Venus Diamond flowable that matches the esthetics of the bisacryl exactly. Fill the void by manipulating the side of the explorer to drag away excess and feather it out. Then simply light cure so that food doesn’t pack into the void.

The final step of this shrink wrap technique is to use Dialite polishing paste from Brasseler in an impregnated bristle brush to create a perfectly smooth finish. The entire process of provisionalization should take no more than about fifteen minutes.


The Shrink Wrap Technique is taught in our hands on course Excellence in Bonded Porcelain.

Related Course

E4: Posterior Reconstruction and Completing the Comprehensive Treatment Sequence

DATE: November 7 2024 @ 8:00 am - November 11 2024 @ 2:30 pm

Location: The Pankey Institute

CE HOURS: 44

Dentist Tuition: $ 7300

Single Occupancy with Ensuite Private Bath (per night): $ 290

THIS COURSE IS SOLD OUT The purpose of this course is to help you develop mastery with complex cases involving advanced restorative procedures, precise sequencing and interdisciplinary coordination. Building on…

Learn More>

About Author

User Image
Lee Ann Brady DMD

Dr. Lee Ann Brady is passionate about dentistry, her family and making a difference. She is a general dentist and owns a practice in Glendale, AZ limited to restorative dentistry. Lee’s passion for dental education began as a CE junkie herself, pursuing lots of advanced continuing education focused on Restorative and Occlusion. In 2005, she became a full time resident faculty member for The Pankey Institute, and was promoted to Clinical Director in 2006. Lee joined Spear Education as Executive VP of Education in the fall of 2008 to teach and coordinate the educational curriculum. In June of 2011, she left Spear Education, founded leeannbrady.com and joined the dental practice she now owns as an associate. Today, she teaches at dental meetings and study clubs both nationally and internationally, continues to write for dental journals and her website, sits on the editorial board of the Journal of Cosmetic Dentistry, Inside Dentistry and DentalTown Magazines and is the Director of Education for The Pankey Institute.

FIND A PANKEY DENTIST OR TECHNICIAN

I AM A
I AM INTERESTED IN

VIEW COURSE CALENDAR

Shrink Wrap Provisional Technique for Predictable Veneers: Part 3

August 22, 2018 Lee Ann Brady DMD

Utilizing the shrink wrap technique for predictable veneers necessitates careful attention to materials selection and silicone matrix creation. Once you have created the matrix, cleaned the preps, and fully seated the matrix, you can use a 2 x 2 soaked thoroughly in rubbing alcohol to wipe across and remove the air-inhibited layer.

Cleaning Up the Veneers Preparation

Because of the matrix with the silicone gasket, almost all of the excess matrix material should flake off with a universal scaler. That’s why this technique works perfectly for preps with equigingival or supragingival margins. It works less well if you have a subgingival margin because the gasket separates the silicone right at the level of the existing free gingival margin.

On the lingual, you will have a very thin film of excess material sitting over the unprepared portion of the tooth. You can peel it off using the scaler. These provisionals are not easy to pull off or dislodge from the teeth. That means you don’t have to be cautious. The material will separate as if it has been perforated right where the margin was.

After the use of a universal scaler, you can check all the margins. You’ll realize you have virtually no excess. You can then utilize an extra fine mosquito diamond at 20,000 rpm dry in the speed reduction Brasseler NSK high speed attachment. You should open the facial gingival embrasures so the patient can get floss through them. This will lead to healthy gingival tissues that aren’t inflamed on the day of the seat.

Now switch to a brownie silicone point running dry at 10,000 to 20,000 rpm. A brownie at this speed will cut any kind of resin to create a perfect infinity margin right where the lingual reduction is on the preparations and remove any excess.

What common provisionals technique do you prefer for veneers? To be continued … 


The Shrink Wrap Technique is taught in our hands on course Excellence in Bonded Porcelain.

Related Course

E4: Posterior Reconstruction and Completing the Comprehensive Treatment Sequence

DATE: July 31 2025 @ 8:00 am - August 4 2025 @ 2:30 pm

Location: The Pankey Institute

CE HOURS: 44

Dentist Tuition: $ 7400

Single Occupancy with Ensuite Private Bath (per night): $ 345

The purpose of this course is to help you develop mastery with complex cases involving advanced restorative procedures, precise sequencing and interdisciplinary coordination. Building on the learning in Essentials Three…

Learn More>

About Author

User Image
Lee Ann Brady DMD

Dr. Lee Ann Brady is passionate about dentistry, her family and making a difference. She is a general dentist and owns a practice in Glendale, AZ limited to restorative dentistry. Lee’s passion for dental education began as a CE junkie herself, pursuing lots of advanced continuing education focused on Restorative and Occlusion. In 2005, she became a full time resident faculty member for The Pankey Institute, and was promoted to Clinical Director in 2006. Lee joined Spear Education as Executive VP of Education in the fall of 2008 to teach and coordinate the educational curriculum. In June of 2011, she left Spear Education, founded leeannbrady.com and joined the dental practice she now owns as an associate. Today, she teaches at dental meetings and study clubs both nationally and internationally, continues to write for dental journals and her website, sits on the editorial board of the Journal of Cosmetic Dentistry, Inside Dentistry and DentalTown Magazines and is the Director of Education for The Pankey Institute.

FIND A PANKEY DENTIST OR TECHNICIAN

I AM A
I AM INTERESTED IN

VIEW COURSE CALENDAR

Shrink Wrap Provisional Technique for Predictable Veneers: Part 2

August 20, 2018 Lee Ann Brady DMD

Provisionals are an important part of veneers fabrication that requires just as much care and diligence as the final restoration. After acquiring diagnostic and lab records and fabricating a silicone matrix, the next step is to clean the preps with a dilute solution of 2% chlorhexidine prep scrub. Use a syringe tip with a fuzzy end for optimal brushing.

Cleaning the Veneer Preps and Loading the Matrix

The latter process ensures you start off with clean, bacteria-free preps. Rinse off the chlorhexidine and thoroughly dry the preps. With this technique you should spot-etch utilizing 35% phosphoric acid for a 3mm diameter spot on the facial or labial of the teeth.

Keep the etch far away from the margins and interproximals. Leave it for 30 seconds, rinse off, and vigorously dry the preparations. You can use an air/water syringe because a little contamination is fine.

You should then apply GLUMA from Kulzer to every prep, which is a combination of antimicrobial glutaraldehyde and HEMA that prevents tooth sensitivity. The GLUMA excess is dried with cotton to prevent it from getting in saliva or mucous membranes.

Now that teeth are ready, you can load the silicone matrix with a bisacryl material. Load the matrix by moving back and forth along the incisal edge and adding layers to minimize the incorporation of air bubbles. Fully seat it. One of the tricks with this matrix is the very flat occlusal table so you can apply even pressure. Additionally, adequate thickness of the silicone provides rigidity and accuracy with less trim needed.

Let the material stay in the mouth for the full set time, which is a little over four minutes. At that point, remove the matrix for completely hard bisacryl on the teeth.

To be continued …


The Shrink Wrap Technique is taught in our hands on course Excellence in Bonded Porcelain.

Related Course

The Pankey Assistant’s Experience

DATE: July 11 2024 @ 8:00 am - July 13 2024 @ 3:00 pm

Location: The Pankey Institute

CE HOURS: 17

Regular Tuition: $ 1950

night with private bath: $ 290

This “can’t miss” course will empower Dental Assistants to bring their skills to excellence! During this dynamic hands-on course, led by Pankey clinical team member, Sandra Caicedo, participants will learn…

Learn More>

About Author

User Image
Lee Ann Brady DMD

Dr. Lee Ann Brady is passionate about dentistry, her family and making a difference. She is a general dentist and owns a practice in Glendale, AZ limited to restorative dentistry. Lee’s passion for dental education began as a CE junkie herself, pursuing lots of advanced continuing education focused on Restorative and Occlusion. In 2005, she became a full time resident faculty member for The Pankey Institute, and was promoted to Clinical Director in 2006. Lee joined Spear Education as Executive VP of Education in the fall of 2008 to teach and coordinate the educational curriculum. In June of 2011, she left Spear Education, founded leeannbrady.com and joined the dental practice she now owns as an associate. Today, she teaches at dental meetings and study clubs both nationally and internationally, continues to write for dental journals and her website, sits on the editorial board of the Journal of Cosmetic Dentistry, Inside Dentistry and DentalTown Magazines and is the Director of Education for The Pankey Institute.

FIND A PANKEY DENTIST OR TECHNICIAN

I AM A
I AM INTERESTED IN

VIEW COURSE CALENDAR

Shrink Wrap Provisional Technique for Predictable Veneers: Part 1

August 17, 2018 Lee Ann Brady DMD

Of all the methods commonly used for veneer provisionalization, my favorite has to be the shrink wrap technique. I love it and use it all the time because in my opinion it is the easiest and most predictable method.

The term ‘shrink wrap’ comes from allowing polymerization shrinkage of the material to lock bisacryl onto the preparation. The main advantage of this approach is that it keeps veneer provisionals firmly secured until the final restoration can be placed.

Here’s my take on utilizing this technique in the dental practice:

Predictable Veneers with Shrink Wrap Provisionals

The first step of shrink wrap provisionals is to prepare the teeth. Let’s imagine you are dealing with a patient who experienced trauma such as breaking their teeth in a bicycle accident.

Before beginning the technique, make sure you have all the diagnostic records you need, including all prep records for the lab: facebow, opposing model, final impressions (maybe more than one) with good flash, etc. Once you provisionalize the teeth, it won’t be easy to get access to the preps again.

One of the essential parts of a shrink wrap provisional technique is fabrication of a silicone matrix with a silicone gasket to separate the excess. You should begin with a solid model either of the teeth before they are prepared or of the wax-up. You can carve a 1 mm deep trench into the wax-up by using the cleoid end of a cleoid/discoid.

Put the sharp pointy end right on the free gingival margin of the gingival of the tooth on the model to carve. You can even go a little deeper in the interproximals. Now take that model and fabricate a two stage silicone matrix.

First, create a putty matrix and trim it. Then, load the putty with the light body of the same impression system, reseat on the model, allow it to achieve a full set, and trim. Now you are ready to go to the patient and use lip retractors. Remember to add a little vaseline or lubricant to the lips for comfort.

At this point, I like to use the OptraGate from Ivoclar Vivadent for a latex free retraction device that can handle anything in the anterior. I will have it in during preparation and for impressions so I don’t have to hold the lip out of the way.

To be continued …


The Shrink Wrap Technique is taught in our hands on course Excellence in Bonded Porcelain.

Related Course

E3: Restorative Integration of Form & Function

DATE: October 13 2024 @ 8:00 am - October 17 2024 @ 2:30 pm

Location: The Pankey Institute

CE HOURS: 41

Cost: $ 7200

night with private bath: $ 290

This Course Is Sold Out! Understanding that “form follows function” is critical for knowing how to blend what looks good with what predictably functions well. E3 is the phase of…

Learn More>

About Author

User Image
Lee Ann Brady DMD

Dr. Lee Ann Brady is passionate about dentistry, her family and making a difference. She is a general dentist and owns a practice in Glendale, AZ limited to restorative dentistry. Lee’s passion for dental education began as a CE junkie herself, pursuing lots of advanced continuing education focused on Restorative and Occlusion. In 2005, she became a full time resident faculty member for The Pankey Institute, and was promoted to Clinical Director in 2006. Lee joined Spear Education as Executive VP of Education in the fall of 2008 to teach and coordinate the educational curriculum. In June of 2011, she left Spear Education, founded leeannbrady.com and joined the dental practice she now owns as an associate. Today, she teaches at dental meetings and study clubs both nationally and internationally, continues to write for dental journals and her website, sits on the editorial board of the Journal of Cosmetic Dentistry, Inside Dentistry and DentalTown Magazines and is the Director of Education for The Pankey Institute.

FIND A PANKEY DENTIST OR TECHNICIAN

I AM A
I AM INTERESTED IN

VIEW COURSE CALENDAR

5 Dentists Share Favorite Materials

October 21, 2017 Pankey Gram

Curious what dental materials the Pankey community is currently raving about? 

Sometimes, when you feel bored or uninspired at the practice, you could benefit from trying out new materials. This type of change can simultaneously up your clinical game and get you excited about work again.

Check out the suggestions from 5 Pankey dentists below for inspiration:

Materials Pankey Dentists Love

Dr. Mark Kleive

“My favorite new material is the air abrasion hand piece from Groman Dental – Etchmaster. It’s simple, no big equipment, still a bit of mess, but very precise.”

Dr. Mike Crete 

“My favorite new ‘tool’ in my toolbox is CBCT. In the last two years, I have had a major shift in my diagnostics and treatment planning by using 3D imaging. Although I do not have a scanner in my own office, the specialists that I have a great working relationship with do have them and it has become a great adjunct to our diagnostic and treatment planning process.

I see this technology making huge strides in the coming years and predict it will become the standard of care in dentistry. 2D imaging will become a thing of the past!”

Dr. Lee Ann Brady

“My recent favorite is Cervitec Plus, Chlorhexidine varnish. It is an incredible antimicrobial adjunct for high caries risk patients. It reduces the bacterial count for 3-5 months and is applied at their hygiene visits. It is also great for around temporaries to create fabulous tissue health when seating restorations.”

Dr. Jennifer Davis

“My top two favorite materials lately:

(1) Not a new thing, but it still amazes me. Use of MicroPrime, a Gluma product,  after etching my composite preps. The amount of post-operative sensitivities and/or root canal procedures that come from my office now is amazingly low. Wish I had the foundation for a research study.

(2) I am loving using products to stain provisionals to custom match a tooth to the dentition. I use Protemp as my provisional material most times. They make such limited shades, though. Therefore, I stain with either Cosmodent tints, Creative Color, or Kerr-Kolor in white.”

Dr. Michelle M. Lee

“Not a material, but my mind has been blown with microscopes in the last month from the training I’ve been getting at Penn. It’s just been such a great experience and taken dentistry to the next level in terms of detail, finish, and marginal integrity. I have been loving learning more about this, as well as the integration of microscopes and dentistry with digital workflow! Fun stuff!”

What new or old favorite material are you excited about? We’d love to hear from you in the comments! 

Related Course

Direct Composite: Predictable, Easy and Beautiful

DATE: October 25 2024 @ 8:00 am - October 26 2024 @ 4:00 pm

Location: The Pankey Institute

CE HOURS: 14

Regular Tuition: $ 2195

Single Occupancy with Ensuite Private Bath (per night): $ 290

Achieving Predictable and Stunning Anterior Results Direct composite is something we do every day in our practices. Yet, they can sometimes be frustrating when we don’t get a tight contact…

Learn More>

About Author

User Image
Pankey Gram

FIND A PANKEY DENTIST OR TECHNICIAN

I AM A
I AM INTERESTED IN

VIEW COURSE CALENDAR

Breaking Provisionals: Finding the Flaw in Your Design

October 15, 2017 Lee Ann Brady DMD

The truth can be hard to face: Something is wrong with the design of these provisionals … We may be working on a broken provisional and feel the deep frustration that comes with knowing something went awry.

I challenge you, in these moments, to reframe the ‘problem’ as a mystery to be solved. You are the clinical detective who needs to work backwards a la Sherlock Holmes to figure out ‘whodunit.’

Mystery of the Broken Anterior Provisional

Remaking and adjusting an anterior provisional from the upper right to the upper left canine (for the second time) is a horror story in the making. Before you allow that narrative to take over and call the lab to have them rush the case back, remember to rely on your intuition and technical expertise.

You may not be able to call the lab because you haven’t taken final impressions. Either way, let the provisionals tell you what the flaw in the design is, rather than believe you can run the solution show.

A good first place to look and listen for answers is the occlusion. For example, if the patient reports that they wake up with headaches after you’ve placed the provisionals, you would want to look closely at envelope of fucntion. Is the patient heavy on the centrals and laterals? If so, you can begin the process of adjusting.

Methods of the Dental Detective

As you examine the issue, you may find other clues, such as that the patient is catching on the incisal edge in their return stroke from protrusive. You continue to adjust, beveling edges for a smoother transition. You leave the guidance shared between the canines and centrals, keep it smooth, but even this doesn’t stop the patient from breaking the provisional.

If you’ve ever seen or read a good detective story, you know this isn’t the time to quit. When things seem most opaque, the detective is usually at a breaking point where the parts might finally start to fit together. Once they do this, the flood gates open and they rush toward the explanation.

You will reach this point while adjusting again. In response to what you’ve learned, you begin to shallow the patient’s guidance and share protrusive with the premolars. You decide to shorten lower anteriors and increase overjet by proclining the restoration. Here, you’ve come to the solution. You need to work it out on an articulator perhaps and then go back to the mouth.

The main lesson is that we have the most to learn from cases that don’t go perfectly. Plus, it would get pretty boring if there were no dental mysteries left to solve …

Related Course

Pankey Scholar 15A

DATE: January 16 2025 @ 6:00 pm - January 18 2025 @ 3:00 pm

Location: The Pankey Institute

CE HOURS: 0

Dentist Tuition: $ 3495

Single Occupancy with Ensuite Private Bath (per night): $ 345

“A Pankey Scholar is one who has demonstrated a commitment to apply the principles, practices and philosophy they learned through their journey at The Pankey Institute.”   At its core,…

Learn More>

About Author

User Image
Lee Ann Brady DMD

Dr. Lee Ann Brady is passionate about dentistry, her family and making a difference. She is a general dentist and owns a practice in Glendale, AZ limited to restorative dentistry. Lee’s passion for dental education began as a CE junkie herself, pursuing lots of advanced continuing education focused on Restorative and Occlusion. In 2005, she became a full time resident faculty member for The Pankey Institute, and was promoted to Clinical Director in 2006. Lee joined Spear Education as Executive VP of Education in the fall of 2008 to teach and coordinate the educational curriculum. In June of 2011, she left Spear Education, founded leeannbrady.com and joined the dental practice she now owns as an associate. Today, she teaches at dental meetings and study clubs both nationally and internationally, continues to write for dental journals and her website, sits on the editorial board of the Journal of Cosmetic Dentistry, Inside Dentistry and DentalTown Magazines and is the Director of Education for The Pankey Institute.

FIND A PANKEY DENTIST OR TECHNICIAN

I AM A
I AM INTERESTED IN

VIEW COURSE CALENDAR