Are Your Temporaries a Practice Builder or Simply Temporary? 

April 10, 2024 Gary DeWood, DDS

Gary M. DeWood, DDS, MS 

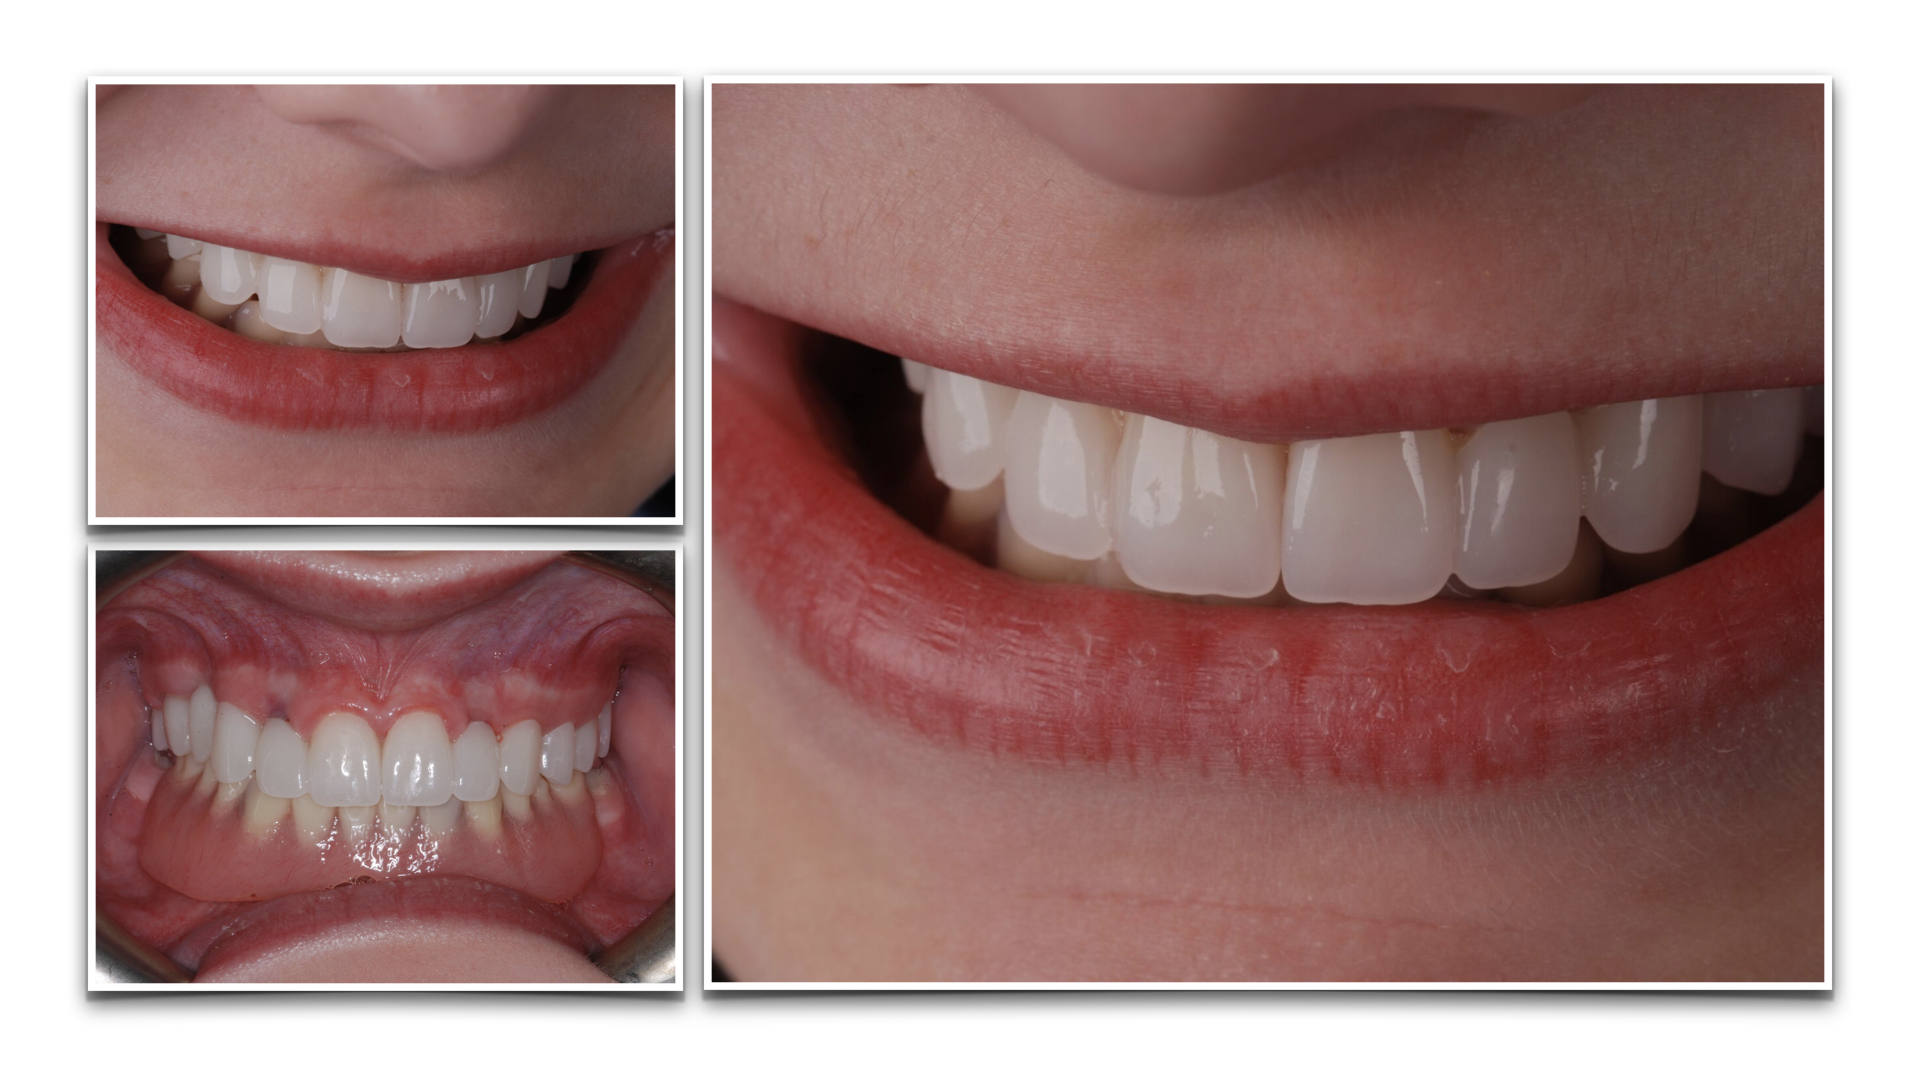
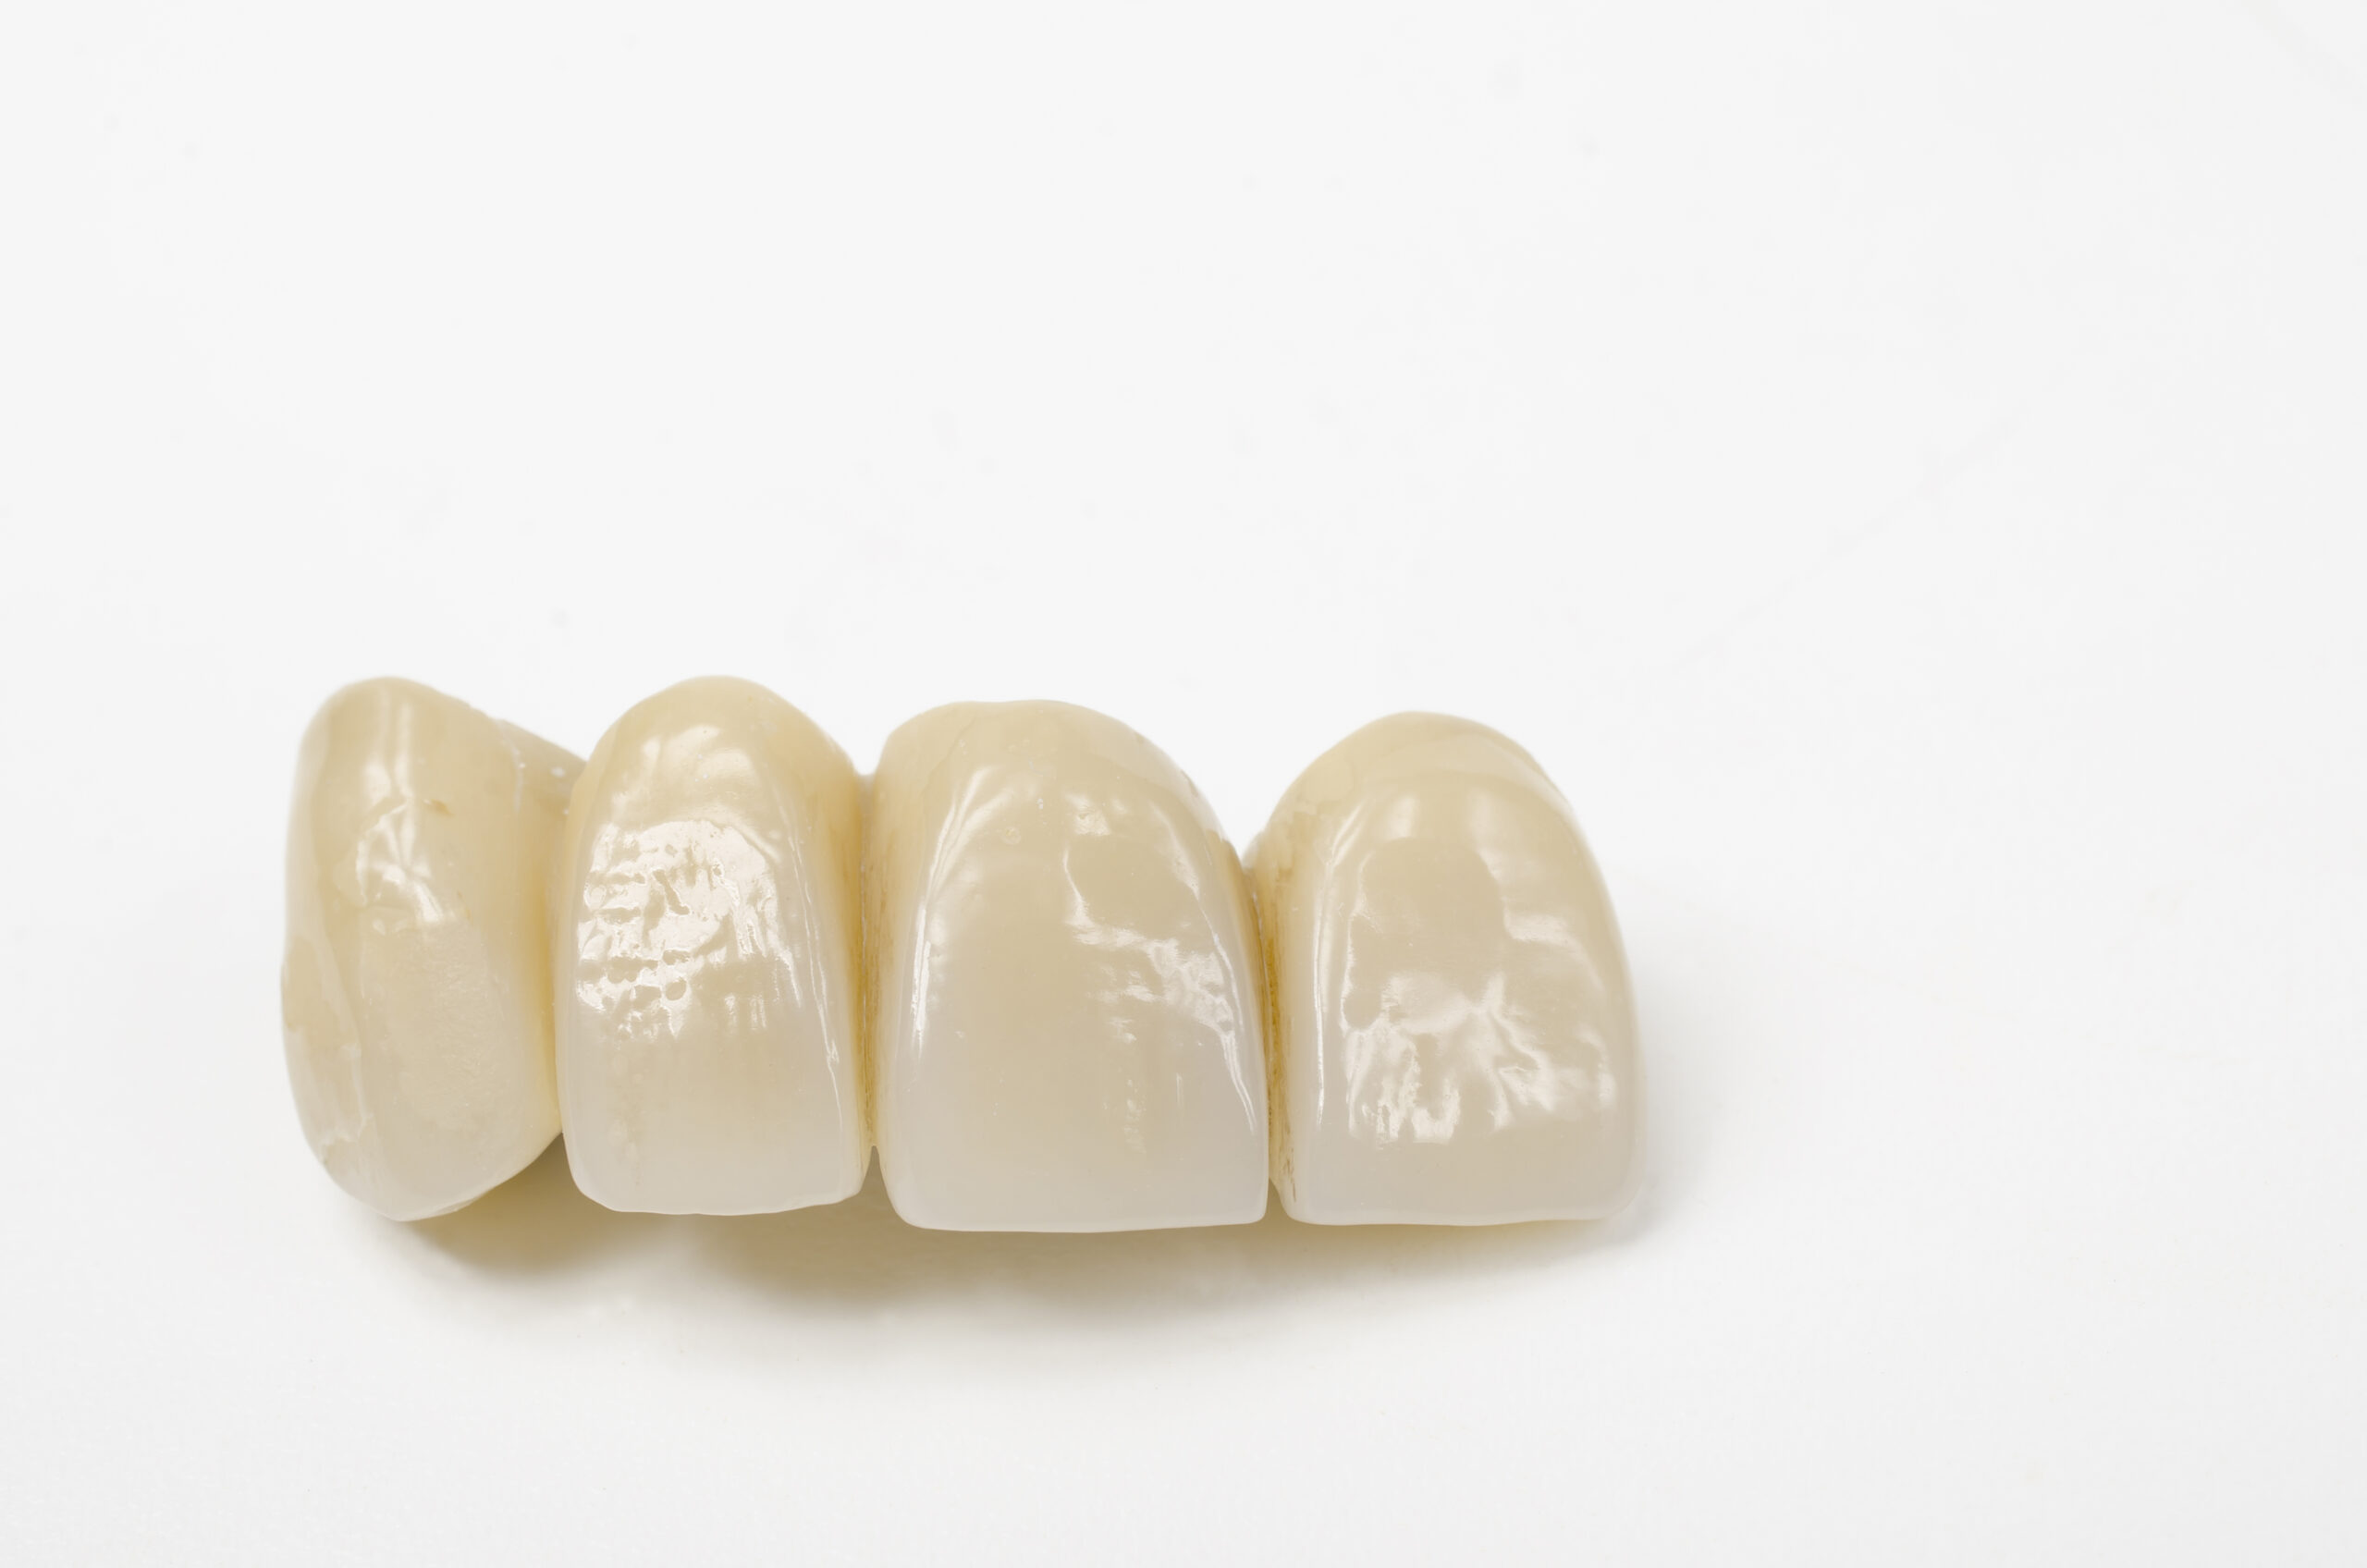
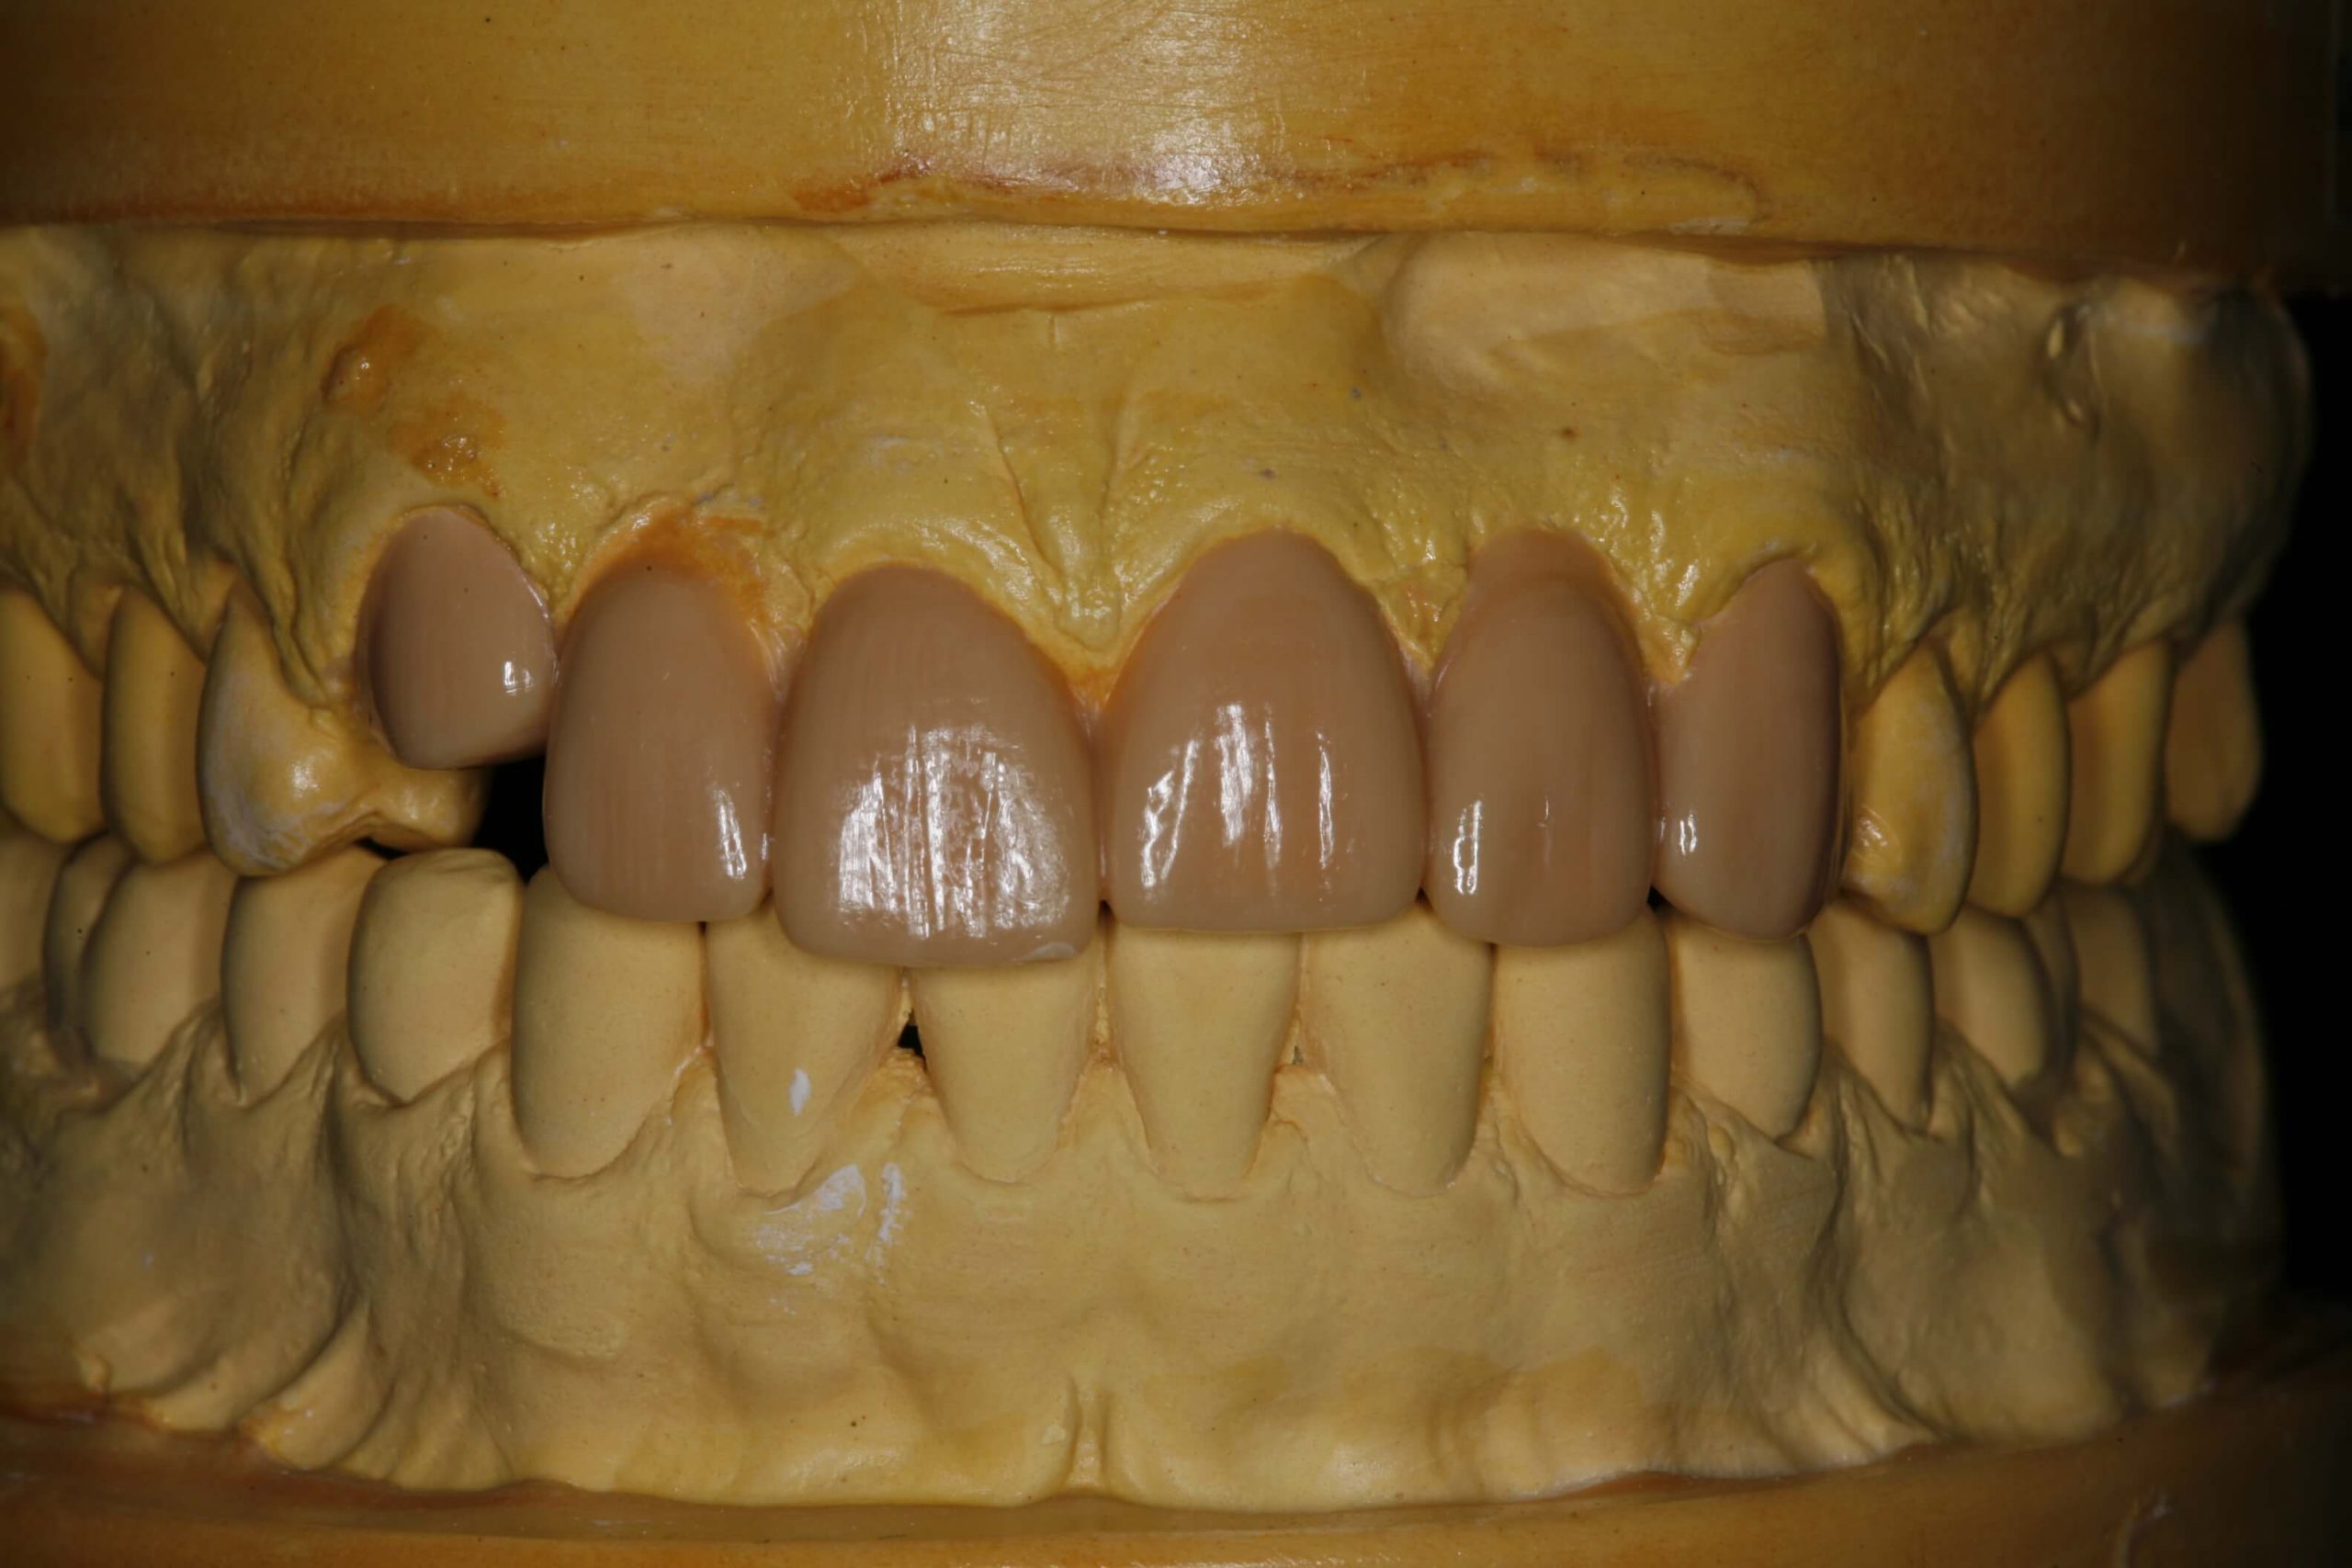
Many dentists believe that provisional restorations don’t really matter. After all, they are not really a stand-in for the final restoration. I would respectfully disagree. I am a proponent of creating functional, durable, and highly esthetic provisional restorations, every time. They have the potential to impact your dental practice a lot more than you might think. Whether you print them, form them, or free-hand them, a GREAT temporary is a great billboard for your practice. 

  1. Make the provisional as Esthetic as the final restoration.

I contend that the more your provisionals look like what you are hoping for when you seat the final restorations, the more people will talk about them, AND you. 

I was able to build a referral restorative practice by creating provisionals that made patients want to come to my practice and specialists want to send people. For much of our career, almost the entire team of the oral surgery office we worked with, and many of the team members from the other specialty practices we worked with, were our patients in Pemberville, Ohio. 

Front teeth or back teeth, when you make them look like teeth, people will like it and they will show and tell other people. “This is just the temporary?!” was not an uncommon question or exclamation from our patients.  

  1. A GREAT guide makes a GREAT provisional restoration.

Your wax-up** cast/model serves as your vision, as your preparation guide fabrication device, and as your provisional former. When the preparation is appropriately reduced for the material selected, the temporary can mimic the restoration. 

** The wax-up might be created with wax then duplicated with impression material and stone to create a cast, or it might be scanned to be duplicated with resin and printed or milled to create a model. 

  1. 3. Use that provisional to highlight the talents of your team members.

You might LOVE to make those provisionals, but if your assistant is equally excited when it comes to recreating nature for the patient to appreciate, then it could be an opportunity for patients to see that your assistant does much more than set-up, clean up, and hand you an instrument. My dental partner, Cheryl, (who is also my wife) and I actively sought out things that could help our patients experience our team as much more than our helpers. 

As we all know, dental assistants are an integral and vital part of what the practice is and are a powerful force in how and why patients ask for dentistry. Assistants who fabricate provisionals have an opportunity to be seen differently, and we were always looking for ways to create partnership with them in our treatment. 

  1. 4. Take pictures of them.

Photographs of the temporary will make it easier for the lab to design the outcome. They will be able to see what you are thinking, able to visualize what you want, AND maybe even more importantly, see what you do not want. With anterior provisionals, I have frequently noted to my ceramist, “Please put the incisal edge in exactly this position vertically and horizontally in the face, then use your artistry to create the tooth that belongs in the face you see in the photographs of the patient before, prepared, and temporized.” 

There were many times when the technician was able to see and create effects that I might have not recognized as being “just the thing that would make these teeth extraordinary.” And don’t forget to show the patient the photograph. 

  1. 5. Love the material you make the temporary with.

The better the provisional material is at holding tooth position and functional contact, the less adjustment we’re going to have, so using a high-quality material is important. There are a lot of them out there. I like bis-acryl materials that polymerize with a hard surface, have little or no oxygen inhibited layer, and can be polished easily. The polish is more about feeling smooth than about the shine. Ask you patients how their provisional tooth “feels” when you are done, so they sing your praises. 

  1. 6. Use high-quality core material.

When you use a good core material the prep will be smoother, making it easier to fabricate nice provisionals. Ideal prep form goes a long way toward better provisionals. 

  1. ASK your patient to tell people.

As noted above, when you can elicit an emotional response about the awesomeness of your provisional, ask the patient to tell other people, “….and this is just the TEMPORARY!” 

Related Course

Mastering Treatment Planning

DATE: October 2 2025 @ 8:00 am - October 4 2025 @ 1:30 pm

Location: The Pankey Institute

CE HOURS:

Tuition: $ 4795

Single Occupancy with Ensuite Private Bath (per night): $ 345

 MASTERING TREATMENT PLANNING Course Description In our discussions with participants in both the Essentials and Mastery level courses, we continue to hear the desire to help establish better systems for…

Learn More>

About Author

User Image
Gary DeWood, DDS

FIND A PANKEY DENTIST OR TECHNICIAN

I AM A
I AM INTERESTED IN

VIEW COURSE CALENDAR

A Tip for Matching the Color of Cement Between an Implant Abutment and Crown

March 8, 2024 Lee Ann Brady

Trying to match the color of the cement between the abutment and the dental implant crown in the anterior can be very frustrating. Here’s a trick that works well for me. 

A while back I was struggling to match the color of the cement between the abutment and an anterior implant crown. I always try-in the abutment and the crown and try to confirm the shade before they are put together. We do this because the laboratory can’t redo the shade once they’ve bonded the crown and the abutment for screw retention without trying to separate the cement, which is difficult. 

Over the years, it was a challenge to replicate the opacity of the cement used to connect the titanium abutment and ceramic crown. I’ve tried using some of the opaquest try-in paste on the market. 

In the case I referred to above, we thought we had it. My lab cemented it together and I put it in. I could see the opacity of the cement through the restoration. So, we had to take it apart and try again. My laboratory technician shared with me a trick that he had learned from one of his other dentist clients. And that was to simply go to CVS, Costco, or Target and buy good old fashioned liquid white out.  

Now, I put a very tiny amount of whiteout on a micro brush and paint it on the inside of the labial surface of the crown on the intaglio surface. Then, I use a bit of translucent try-in paste to seat the crown. 

The whiteout works well because it is basically titanium dioxide and water with preservatives—the same white compound that is in super white sunscreens. In my opinion, it is relatively safe to use, and I can see what the implant will look like when the pieces are cemented together. 

Related Course

Worn Dentition: Direct & Indirect Adhesive Management Through a Non-Invasive Approach

DATE: October 24 2025 @ 8:00 am - October 25 2025 @ 2:30 pm

Location: The Pankey Institute

CE HOURS: 15

Dentist Tuition : $ 2595

Single Occupancy with Ensuite Private Bath (per night): $ 345

Enhance Restorative Outcomes The main goal of this course is to provide, indications and protocols to diagnose and treat severe worn dentition through a new no prep approach increasing the…

Learn More>

About Author

User Image
Lee Ann Brady

FIND A PANKEY DENTIST OR TECHNICIAN

I AM A
I AM INTERESTED IN

VIEW COURSE CALENDAR

Why Use an Essix Retainer Versus a Flipper During Dental Implant Therapy

February 16, 2024 Lee Ann Brady DMD

Why Use an Essix Retainer Versus a Flipper During Dental Implant Therapy 

Lee Ann Brady, DMD 

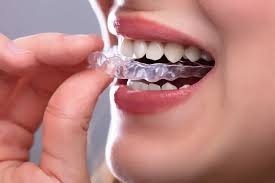
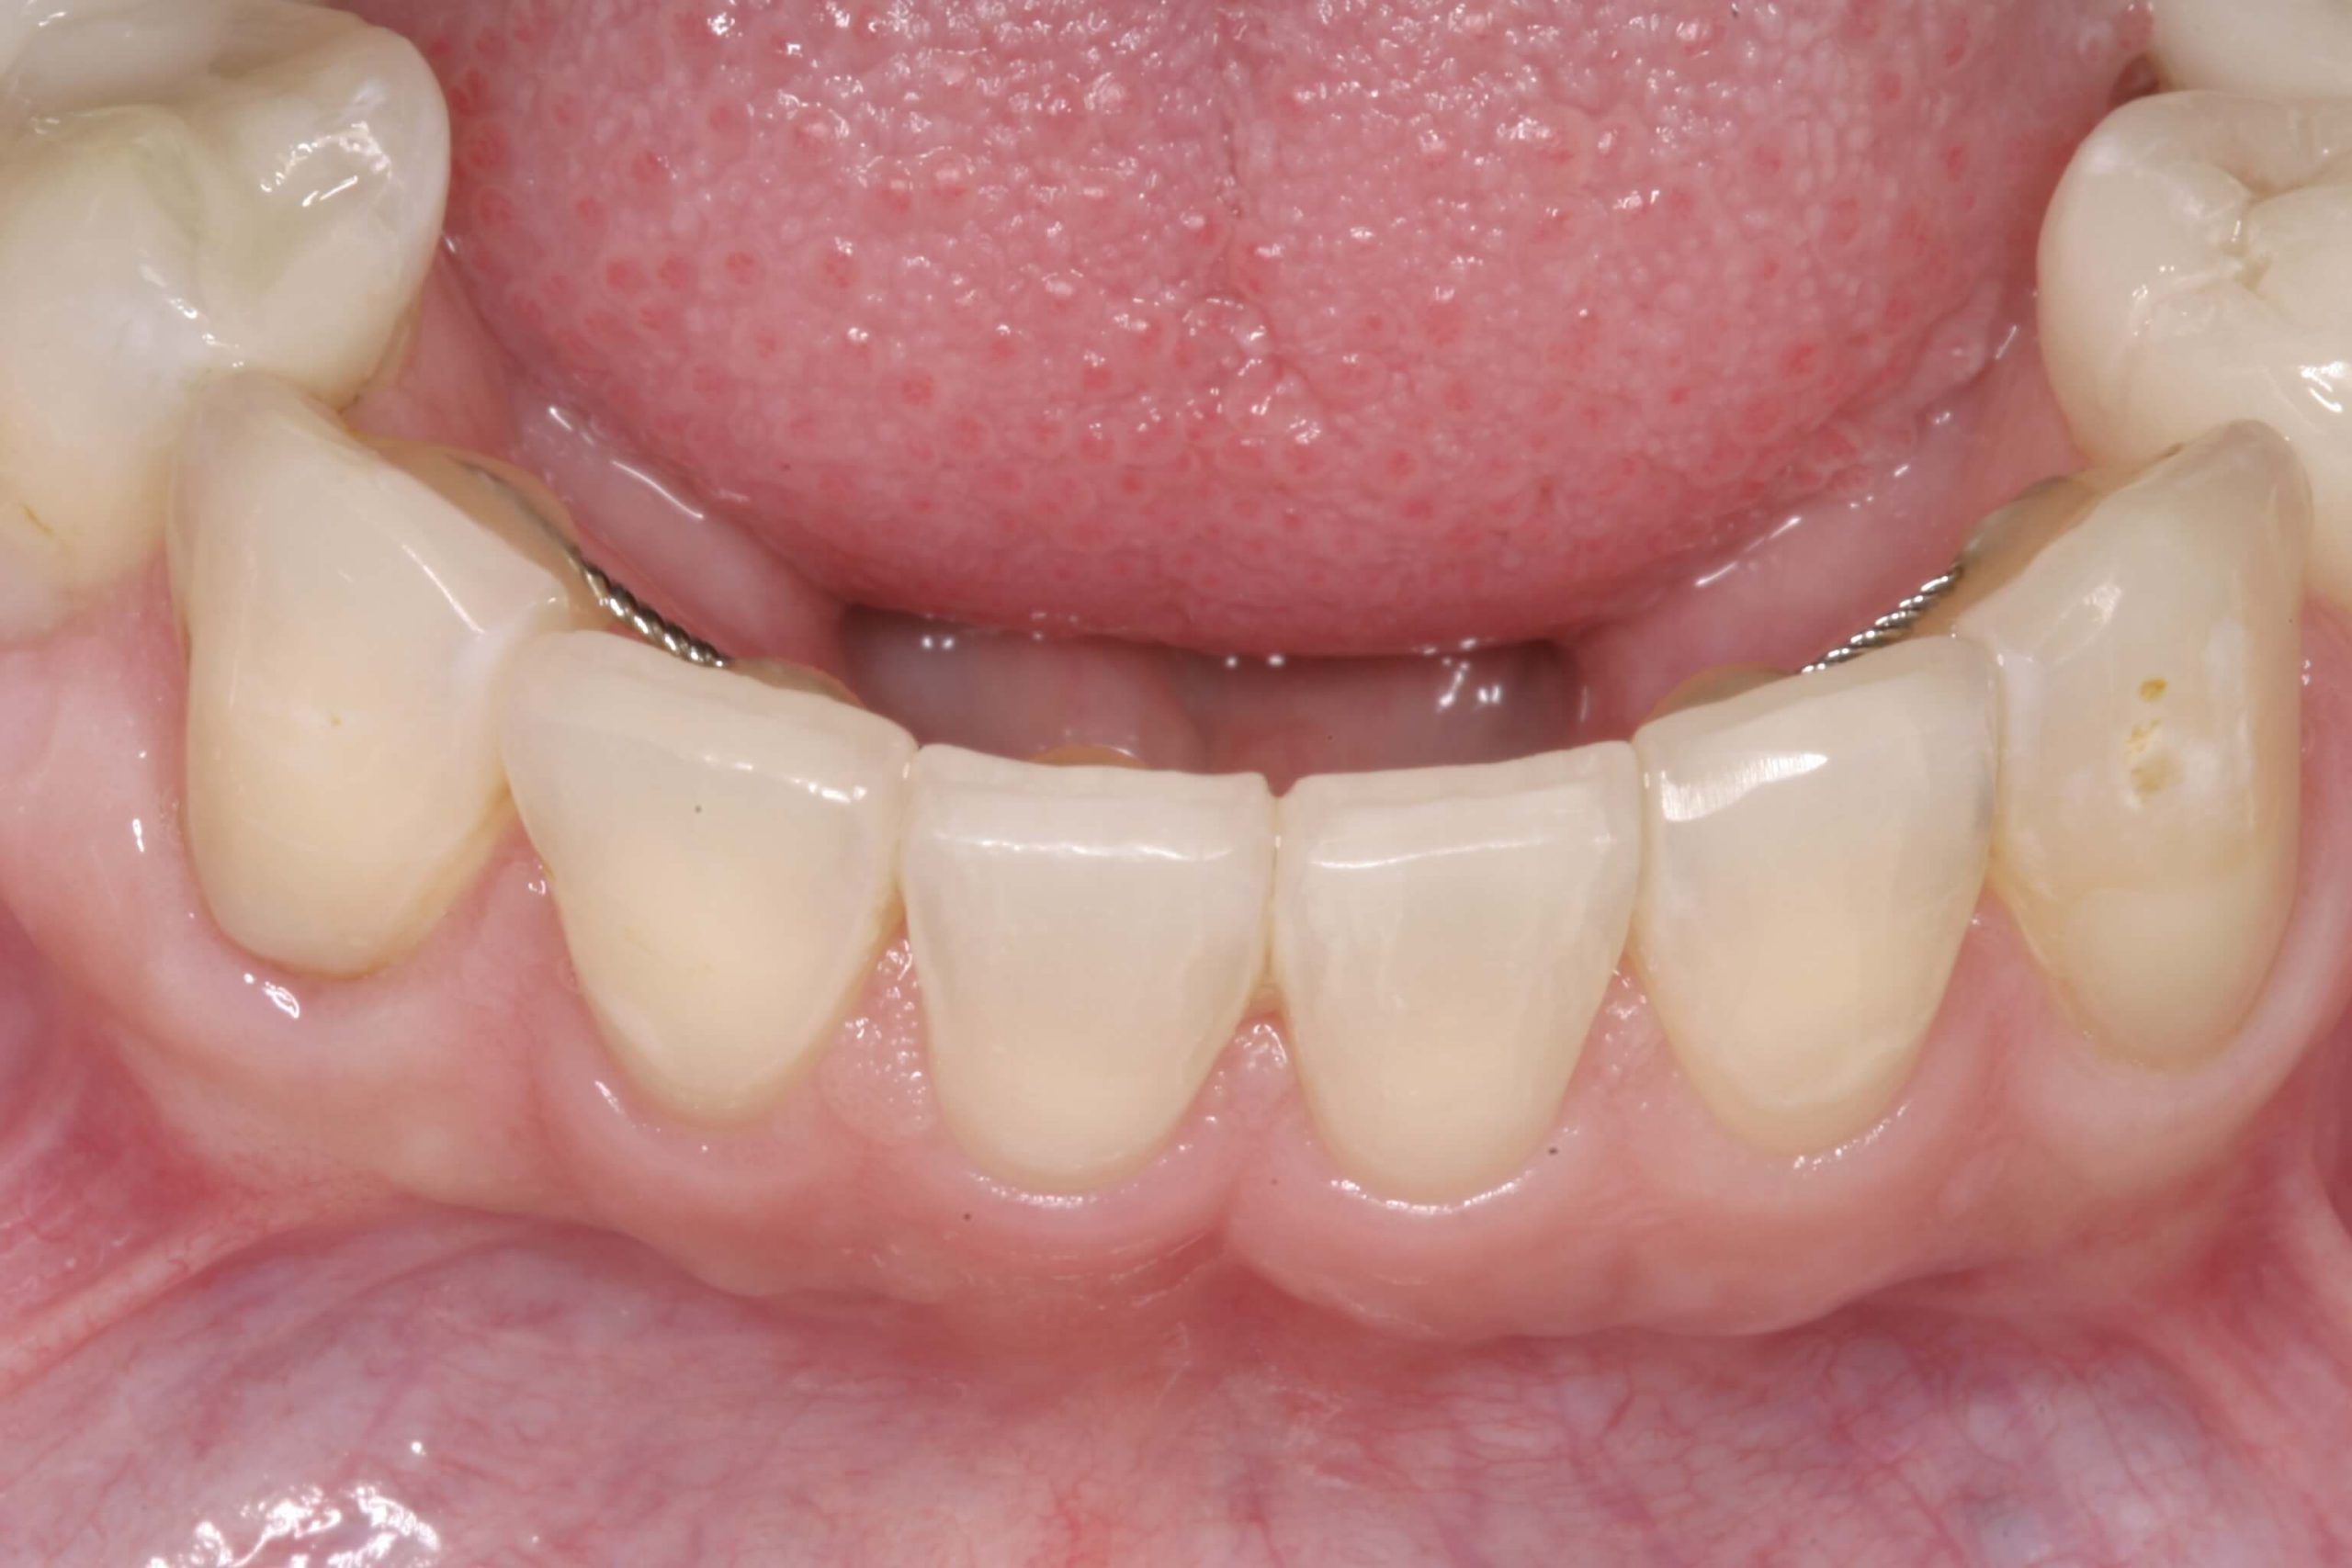
When it comes to choosing a provisional during implant therapy in the anterior aesthetic zone, we have two removable options. One is called a “flipper.” It’s an interim partial denture composed of an acrylic base and a denture tooth. The other is an Essix retainer.  

There is no question that both options are taxing for the patient for the three to five months that the patient is edentulous and must deal with having this removable device to replace the tooth. So, I always tell my patients that they are going to have to manage the provisional for that time, but it’s worth it because, in the end, they have replaced the tooth with an implant with all the benefits of an implant versus an alternative prosthetic solution. 

In my practice, I use Essix retainers in nearly 100% of the cases. Why? Because an Essix retainer is tooth-borne. The pressure is placed on the teeth and not on the surgical site. In the case of a flipper, the prosthesis is primarily tissue-borne with a little pressure placed on the adjacent teeth. We really don’t want any pressure on the surgical site while it is healing. Pressure can induce biological problems in bone grafts and connective tissue, which affect the long-term outcome. From an aesthetic perspective, the most challenging thing about anterior implant aesthetics is replicating the size, shape, and position of the tissues of the alveolar ridge and papilla. I want to do everything I can to eliminate pressure on the healing tissue. 

In my practice, we do Essix retainers that don’t have a full solid tooth in them. Instead, we simply paint flowable on the facial so that there’s zero pressure anywhere around that surgical site after extraction, after grafting, and after implant placement.  

In addition to explaining the improved outcomes associated with using an Essix retainer, I assure my patients that the retainer will be more comfortable to wear than a denture and be easily removed by them for eating, for drinking liquids other than water that are likely to stain the retainer, for teeth cleaning, and for cleaning the prosthesis. When out in public, such as in a restaurant, patients may carefully eat while wearing the Essix retainer.  

Related Course

Worn Dentition: Direct & Indirect Adhesive Management Through a Non-Invasive Approach

DATE: October 24 2025 @ 8:00 am - October 25 2025 @ 2:30 pm

Location: The Pankey Institute

CE HOURS: 15

Dentist Tuition : $ 2595

Single Occupancy with Ensuite Private Bath (per night): $ 345

Enhance Restorative Outcomes The main goal of this course is to provide, indications and protocols to diagnose and treat severe worn dentition through a new no prep approach increasing the…

Learn More>

About Author

User Image
Lee Ann Brady DMD

Dr. Lee Ann Brady is passionate about dentistry, her family and making a difference. She is a general dentist and owns a practice in Glendale, AZ limited to restorative dentistry. Lee’s passion for dental education began as a CE junkie herself, pursuing lots of advanced continuing education focused on Restorative and Occlusion. In 2005, she became a full time resident faculty member for The Pankey Institute, and was promoted to Clinical Director in 2006. Lee joined Spear Education as Executive VP of Education in the fall of 2008 to teach and coordinate the educational curriculum. In June of 2011, she left Spear Education, founded leeannbrady.com and joined the dental practice she now owns as an associate. Today, she teaches at dental meetings and study clubs both nationally and internationally, continues to write for dental journals and her website, sits on the editorial board of the Journal of Cosmetic Dentistry, Inside Dentistry and DentalTown Magazines and is the Director of Education for The Pankey Institute.

FIND A PANKEY DENTIST OR TECHNICIAN

I AM A
I AM INTERESTED IN

VIEW COURSE CALENDAR

The Transition to Digital Dentistry Part 2

January 17, 2024 John Cranham, DDS

When my daughter Kaitlyn (currently in through E2 at Pankey) finished dental school in 2020, I strongly recommended that she learn analog first, then once mastered, make the transition to digital. This lasted about four months. I learned rapidly that this generation sees things in the digital realm far better than we do. She reminded me that “she grew up with a screen in her hand.” 

We began to focus on her learning the concepts of occlusion, esthetics, biology, tooth-by-tooth structural integrity, and visualizing and planning in the virtual (digital world). We quickly learned that, although she could easily visualize things on the computer, the patient is ultimately analog. We began to utilize an analog articulator for her to learn the hand skills of what we would do on the patient. 

A great example of this is equilibration. A “trial equilibration” on a virtual articulator is a 5-minute process that lets us determine if equilibration is an appropriate treatment option. The problem is that, unlike analog, you do not learn the brush strokes that will be required to perform this skill in the mouth. I have performed hundreds if not thousands of equilibrations. I know the brush strokes. For me, once I see on the virtual articulator that I can do the equilibration without too much tooth structure removal, I am ready to go to the mouth. For Kaitlyn, who has very limited equilibration experience, once visualized on the virtual articulator, then it’s time to go back to analog. She mounts the printed models on an analog articulator to perform a traditional trial equilibration. In this way, she learns the brushstrokes of this incredibly important procedure. 

I think it is extremely important that dentists, who are learning to equilibrate intraorally, work on mounted analog models to develop their equilibration skills. 

Returning to the consideration of the financial cost of bringing new technology into your practice—input devices (scanners and CBCTs), output devices (printers and mills), and software to manipulate the data all cost money. Doctors that are going down this road usually like technology and consider the dramatic increases in efficiency to ultimately increase the productivity and profitability of the practice. This is certainly something I have seen. The bottom line is dental stone will go away. We all must make the decision when it is appropriate to make the jump. 

Dr. Lee Ann Brady has invited me to audit all the Pankey Essentials courses over the next year. I am super excited about this. She has asked me to recommend ways to appropriately implement examples of digital technologies and workflows into these core classes. While younger dentists are drawn to digital information, it is important for us to remind them that our patients are ANALOG. We are training dentists to perform complex procedures on patients, not on computers. This requires great study and a commitment to understand timeless concepts, while simultaneously developing the hand skills to accomplish these procedures accurately and use digital workflows to make things more efficient. 

In 2024, The Pankey Institute is also implementing a digital hands-on course for those doctors who would like to make the transition over to virtual articulation and digital workflows—something that I am excited to be part of. Dentistry is in a great transition. I look forward to making sure the concepts that we have all built our practices around do not get lost in the digital world. 

Related Course

Functional Esthetic Excellence Utilizing 100% Digital Workflow

DATE: June 13 2024 @ 8:00 am - June 15 2024 @ 2:00 pm

Location: The Pankey Institute

CE HOURS: 25

Regular Tuition: $ 2995

night with private bath: $ 290

This Course Is Sold Out! Embracing Digital Dentistry This course will introduce each participant to the possibilities of complex case planning utilizing 100% digital workflows. Special emphasis will be placed…

Learn More>

About Author

User Image
John Cranham, DDS

Dr. John Cranham practices in Chesapeake, Virginia focusing on esthetic dentistry, implant dentistry, occlusal reconstruction, TMJ/Facial Pain and solving complex problems with an interdisciplinary focus. He practices with his daughter Kaitlyn, who finished dental school in 2020. He is an honors graduate of The Medical College of Virginia in 1988. He served the school as a part time clinical instructor from 1991-1998 earning the student given part time faculty of the year twice during his stint at the university. After studying form the greats in occlusion (Pete Dawson & The Pankey Institute) and Cosmetic Dentistry (Nash, Dickerson, Hornbrook, Rosental, Spear, Kois) during the 1990’s, Dr. Cranham created a lecture in 1997 called The Cosmetic Occlusal Connection. This one day lecture kept him very busy presenting his workflows on these seemingly diametrically opposed ideas. In 2001 he created Cranham Dental Seminars which provided, both lecture, and intensive hands on opportunities to learn. In 2004 he began lecturing at the The Dawson Academy with his mentor Pete Dawson, which led to the merging of Cranham Dental Seminars with The Dawson Academy in 2007. He became a 1/3 partner and its acting Clinical Director and that held that position until September of 2020. His responsibilities included the standardization of the content & faculty within The Academy, teaching the Lecture Classes all over the world, overseeing the core curriculum, as well as constantly evolving the curriculum to stay up to pace with the ever evolving world of Dentistry. During his 25 years as an educator, he became one of the most sought after speakers in dentistry. To date he has presented over 1650 full days of continuing education all over the world. Today he has partnered with Lee Culp CDT, and their focus is on integrating sound occlusal, esthetic, and sound restorative principles into efficient digital workflows, and ultimately coaching doctors on how to integrate them into their practices. He does this under the new umbrella Cranham Culp Digital Dental. Dr. Cranham has published numerous articles on restorative dentistry and in 2018 released a book The Complete Dentist he co-authored with Pete Dawson. In 2011 He along with Dr. Drew Cobb created The Dawson Diagnostic Wizard treatment planning software that today it is known as the Smile Wizard. Additionally, He has served as a key opinion leader and on advisory boards with numerous dental companies. In 2020 he published a book entitled “The Cornell Effect-A Families Journey Toward Happiness, Fulfillment and Peace”. It is an up from the ashes story about his adopted son, who overcame incredible odds, and ultimately inspired the entire family to be better. In November of 2021 it climbed to #5 on the Amazon best seller list in its category. Of all the things he has done, he believes getting this story down on paper is having the greatest impact.

FIND A PANKEY DENTIST OR TECHNICIAN

I AM A
I AM INTERESTED IN

VIEW COURSE CALENDAR

Planning Where The Pink Should Be

July 8, 2019 Lee Ann Brady DMD

When we identify patients, whose dental esthetics has been negatively impacted by altered passive eruption, our treatment plans are apt to include altering the gingival esthetics. One of the things we are tasked with is determining where we want the tissue to be.

We start by determining if the incisal edge is correctly positioned in the face.

For example, by looking at a lips at rest photograph and a full face image for my patient with altered passive eruption, we can see that the patient’s incisal edges are correctly positioned. If they were not properly positioned, we would next plan the position for the incisal edges.

Tooth proportion becomes the next building block in the planning puzzle. We know that beautiful anterior teeth are usually between 70-80% width to length ratio. This variability allows us to accommodate other clinical considerations, as well as patient preference. As a starting point, I begin with 75% and then look at the other parameters.

If the patient has excessive gingival display, and one of the hoped for outcomes is to minimize the amount of gingiva, we can alter the drawing to increase the length and then evaluate the esthetic result.  On the other hand, if there is excessive sulcus depth, we can place the proposed gingival margin within the confines of the sulcus and assess the esthetic result.


Patient Involvement

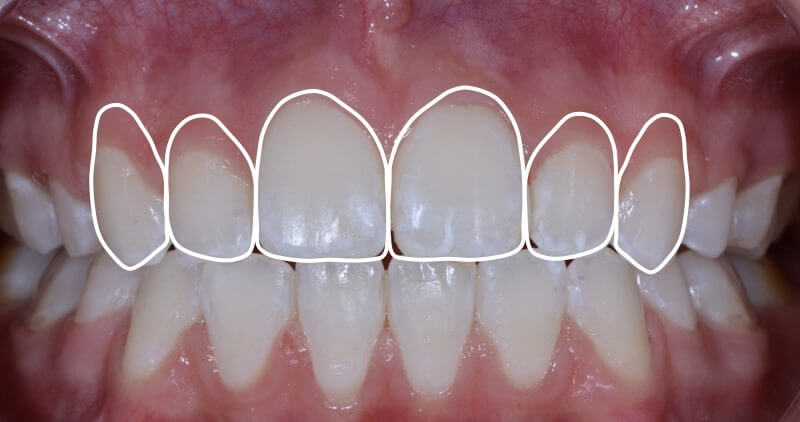
I create template drawings, like the one below, in Keynote on my Mac computer, but drawings also can be done in PowerPoint. I then sit down with my patient, insert a retracted teeth apart patient photo behind the drawing, and together we move the lines until the patient is happy with where the pink will be.


Once we have the final proposal, the next step is to determine the possible treatment options to gain the intended result. The information can easily be transferred to a wax-up or used to create a snap on trial smile.

How to Create and Use Templates

In Keynote or PowerPoint, take a retracted teeth apart photo of a beautiful, near perfect smile. Put it into the presentation software. Blow the image up to 200%. Using the free form drawing tool, trace the outline of the upper six anteriors. Take the photo out and save the presentation as a named template.key or template.ppt file.

When you want to do proposal drawings with your patient, open up the template, insert the patient’s photo and save the file with the patient’s name. You can copy and paste the tooth outlines onto any of the patient’s photos to propose gingival changes. If you pre-draw and save outline templates for various tooth sizes (ratios), you can quickly show options to your patient.

Related Course

Surgically Facilitated Orthodontic Therapy: An Interdisciplinary Approach

DATE: April 26 2024 @ 2:00 pm - April 26 2024 @ 4:00 pm

Location: Online

CE HOURS: 2

Surgically Facilitated Orthodontic Therapy: An Interdisciplinary Approach Patients seeking ideal esthetics may require a more sophisticated diagnosis and treatment plan than what restorative dentistry or conventional orthodontic treatment may offer…

Learn More>

About Author

User Image
Lee Ann Brady DMD

Dr. Lee Ann Brady is passionate about dentistry, her family and making a difference. She is a general dentist and owns a practice in Glendale, AZ limited to restorative dentistry. Lee’s passion for dental education began as a CE junkie herself, pursuing lots of advanced continuing education focused on Restorative and Occlusion. In 2005, she became a full time resident faculty member for The Pankey Institute, and was promoted to Clinical Director in 2006. Lee joined Spear Education as Executive VP of Education in the fall of 2008 to teach and coordinate the educational curriculum. In June of 2011, she left Spear Education, founded leeannbrady.com and joined the dental practice she now owns as an associate. Today, she teaches at dental meetings and study clubs both nationally and internationally, continues to write for dental journals and her website, sits on the editorial board of the Journal of Cosmetic Dentistry, Inside Dentistry and DentalTown Magazines and is the Director of Education for The Pankey Institute.

FIND A PANKEY DENTIST OR TECHNICIAN

I AM A
I AM INTERESTED IN

VIEW COURSE CALENDAR

Fixing the Failed Restoration: Treatment Planning

July 30, 2018 Lee Ann Brady DMD

Replacing a failed restoration starts with a careful examination of the patient’s needs, desires, and current oral health. My patient in this case presented with a six unit anterior bridge, decay, and many esthetic issues. After an esthetic evaluation and comprehensive exam, it was time to move on to treatment planning.

Failed Restoration: Treatment Plan

To treatment plan this case, I relied on an advanced facially-generated treatment planning system for communicating with the rest of the team. Communication is essential to a reliable outcome.

First, a diagnostic work-up was generated. Then, the interdisciplinary team together developed a final treatment plan and sequence, with the incisal edge position of the upper right central as reference.

We chose orthodontic extrusion of the upper teeth to handle proclination in the anterior and the gingival discrepancy. Additionally, we treatment panned the maxillary right canine for over-extrusion by 2 mm. This was done to achieve adequate restorative ferrule through crown lengthening, not to mention re-treatment endodontic therapy with post and core.

We talked about implant therapy, but ultimately it was not a workable solution. Root proximity on the upper right and the gingival tissues meant it wasn’t ideal as a first option. For the final treatment, we decided on placing a six unit anterior bridge. I then discussed the outcome with the patient and she decided conservative therapy for the posterior esthetics of direct composite veneers was best. This enabled us to create consistent contour and shade.

Next up was the lab, which made a pre-orthodontic wax-up based on periodontal surgery and planned tooth movement. I gave them the proper information by using PowerPoint and digital photography with the proposed tooth positions. After this, the post and core endodontic re-treatment was done for the upper right canine.

To be continued…

What’s your approach to treatment planning? 

Related Course

Today’s Top Clinical Tips: 2024

DATE: October 18 2024 @ 12:00 pm - October 18 2024 @ 4:00 pm

Location: Online

CE HOURS: 4

Today’s Top Clinical Tips: 2024 Dentistry is changing at a rapid pace. Being successful and efficient is about staying on top of the newest trends and clinical tips. In this…

Learn More>

About Author

User Image
Lee Ann Brady DMD

Dr. Lee Ann Brady is passionate about dentistry, her family and making a difference. She is a general dentist and owns a practice in Glendale, AZ limited to restorative dentistry. Lee’s passion for dental education began as a CE junkie herself, pursuing lots of advanced continuing education focused on Restorative and Occlusion. In 2005, she became a full time resident faculty member for The Pankey Institute, and was promoted to Clinical Director in 2006. Lee joined Spear Education as Executive VP of Education in the fall of 2008 to teach and coordinate the educational curriculum. In June of 2011, she left Spear Education, founded leeannbrady.com and joined the dental practice she now owns as an associate. Today, she teaches at dental meetings and study clubs both nationally and internationally, continues to write for dental journals and her website, sits on the editorial board of the Journal of Cosmetic Dentistry, Inside Dentistry and DentalTown Magazines and is the Director of Education for The Pankey Institute.

FIND A PANKEY DENTIST OR TECHNICIAN

I AM A
I AM INTERESTED IN

VIEW COURSE CALENDAR

Treating White Spot Lesions

December 29, 2017 Mark Kleive DDS

White and brown spot lesions on the anterior teeth can be very distressing for the patient and a frustration for clinicians. Normally, they are decalcification or deposits on the teeth from fluoride or other minerals.

They do not require restoration. We are hesitant to do this and sacrifice good tooth structure, but esthetically they can really bother patients. They reduce a patient’s confidence in their smile. Recently, I have found a solution to this clinical situation that meets both the patient’s esthetic demands and my desire to be conservative.

Reversing Lesion Color on Anterior Teeth

Icon, from DMG America, is a translucent resin infiltrate that reverses the color of the lesion. It brings the tooth back to its natural color, requires no tooth preparation, and protects the tooth from further decalcification or progression into a carious lesion.

After we isolate with a rubber dam, the tooth is etched with a special etchant included in the kit. The protocol requires a longer etching time then we are accustomed to with other procedures.

After each etching procedure, we rinse and dry the tooth. Then we apply a special drying agent that allows us to evaluate the final result prior to proceeding with the resin.

If the tooth color has not yet been optimized, the etchant is applied again. This can be repeated up to five times. Once we have completed the etching process and confirmed the result with the drying agent, the resin is applied and then cured.

The entire procedure is done without any anesthesia and is very comfortable for the patient. Icon can be used on the facial and also on interproximal areas.

The resin is not visible on an x-ray, so the kit comes with a card to give the patient. This is so that if they see another dental office in the future, they are aware that the interproximal areas will still appear decalcified on an x-ray but have been fully infiltrated with resin.

I really enjoy offering this incredible, conservative esthetic service to my patients.

Related Course

E4: Posterior Reconstruction and Completing the Comprehensive Treatment Sequence

DATE: July 31 2025 @ 8:00 am - August 4 2025 @ 2:30 pm

Location: The Pankey Institute

CE HOURS: 44

Dentist Tuition: $ 7400

Single Occupancy with Ensuite Private Bath (per night): $ 345

The purpose of this course is to help you develop mastery with complex cases involving advanced restorative procedures, precise sequencing and interdisciplinary coordination. Building on the learning in Essentials Three…

Learn More>

About Author

User Image
Mark Kleive DDS

Dr. Mark Kleive earned his D.D.S. degree with distinction from the University of Minnesota School of Dentistry in 1997. Mark has had experience as an associate in a multi-clinic setting and as an owner of 2 different fee-for-service practices. For the last 6 years Mark has practiced in a beautiful area of the country – Asheville, North Carolina, where he lives with his wife Nicki and twin daughters Meighan and Emily. Mark has been passionate about advanced education since graduation. Mark is a Visiting Faculty member with The Pankey Institute and a 2015 inductee into the American College of Dentistry. He leads numerous small group study clubs, lectures nationally and offers his own small group programs. During the last 19 years of practice, Dr. Kleive has made a reputation for himself as a caring, comprehensive oral healthcare provider.

FIND A PANKEY DENTIST OR TECHNICIAN

I AM A
I AM INTERESTED IN

VIEW COURSE CALENDAR

Esthetics & Function: Incisal Edge Bevels

December 10, 2017 Lee Ann Brady DMD

There are three critical components to the incisal edge anatomy of anterior teeth. Understanding the function and esthetics of the pitch and two bevels is essential to creating an ideal patient result.

How can a clinician re-create the full anatomic form of the tooth in ceramics and composite? 

In my last blog on this topic, I discussed the dimensions, characterization, esthetics, restorative approach and challenge of mimicking ‘pitch‘ esthetics. Now, I’ll delve into mastering the bevels to create superior restorative results. Combining an esthetic pitch with functional bevels will ensure a smooth composite or ceramic outcome.

Components of Incisal Edge Anatomy Function and Esthetics: Bevels

The two bevels can be found on alternately the labial and the lingual of the transition zone between the pitch and these surfaces. They are often called the leading edge and the trailing edge.

Bevels

Dimensions: The bevels on both sides have a variable width. They can be between less than a millimeter to multiple millimeters long.

Characterization: The bevels lengthen in patients who grind their teeth in an excursive pathway pattern. Patients who parafunction edge to edge might eliminate the bevel. This makes it easier to shear enamel off on the labial or lingual side of the tooth. It also could result in chipping the edge enamel.

Function: The bevel is a transition zone to create smooth functional movement passing from excursive movements onto the pitch. Intercuspal stops on lower incisors are often on or gingival to the bevel.

Whether you are finalizing an equilibration, the occlusion on composites, or ceramics, perfecting anterior guidance is all about both pitch and bevel surfaces. These critical components are a great example of marrying form and function in your technique.

What is your restorative approach for recreating incisal edge anatomy? We’d love to hear from you in the comments! 

Related Course

E1: Aesthetic & Functional Treatment Planning at the Chicago Midwinter Dental Meeting

DATE: February 20 2025 @ 7:00 am - February 22 2025 @ 8:00 pm

Location: Chicago Midwinter Meeting

CE HOURS:

Transform your experience of practicing dentistry, increase predictability, profitability and fulfillment. The Essentials Series is the Key, and Aesthetic and Functional Treatment Planning is where your journey begins.  Following a system of…

Learn More>

About Author

User Image
Lee Ann Brady DMD

Dr. Lee Ann Brady is passionate about dentistry, her family and making a difference. She is a general dentist and owns a practice in Glendale, AZ limited to restorative dentistry. Lee’s passion for dental education began as a CE junkie herself, pursuing lots of advanced continuing education focused on Restorative and Occlusion. In 2005, she became a full time resident faculty member for The Pankey Institute, and was promoted to Clinical Director in 2006. Lee joined Spear Education as Executive VP of Education in the fall of 2008 to teach and coordinate the educational curriculum. In June of 2011, she left Spear Education, founded leeannbrady.com and joined the dental practice she now owns as an associate. Today, she teaches at dental meetings and study clubs both nationally and internationally, continues to write for dental journals and her website, sits on the editorial board of the Journal of Cosmetic Dentistry, Inside Dentistry and DentalTown Magazines and is the Director of Education for The Pankey Institute.

FIND A PANKEY DENTIST OR TECHNICIAN

I AM A
I AM INTERESTED IN

VIEW COURSE CALENDAR

Esthetics & Function: Incisal Edge Pitch

December 8, 2017 Lee Ann Brady DMD

The incisal edge anatomy of anterior teeth is quite complex. This complexity is fundamental to the esthetics of the tooth, as well as the function of incisors. How do we re-create the full anatomic form of the tooth in ceramics and composite? 

Components of Incisal Edge Anatomy Function and Esthetics: Pitch

When the full anatomic form is not precisely recreated, this can lead to esthetic and functional challenges. To successfully mimic this form, the clinician can rely on three components of incisal edges (from a lateral perspective): 1 pitch and 2 bevels.

We can visualize the pitch as the flat top of the incisal edge.

Pitch

Dimensions: Labio-lingual width of at least 1mm that increases from attrition or parafunction in edge to edge position.

Characterization: Pitch is not always parallel to the horizon and its relative position is dependent on the inclination of the incisor. Incisors are inclined just a little bit further to the labial at the incisal edge and the pitch has an upward slant toward the lingual.

Esthetics: The tooth shape and inclination results in an incisal edge esthetic of thinner enamel at the labio-incisal junction. It also creates the highly desirable visual translucence. Leveling the pitch to the horizon can change light reflection which is critical to esthetics of the tooth.

Restorative Approach: Often in ceramics we create a pitch that is level to the horizon and has decreased width of the pitch. This can compromise the esthetics of the translucency, but that can be gained back using stains.

Challenge: The challenge with this shape change in ceramics is that patients often sit in edge to edge position during parafunction. Insufficient pitch width may result in the patient experiencing functional challenges, not finding a comfortable spot to rest and increased parafunctional movement.

I’ll expand on understanding the two bevels in my next incisal edge anatomy blog …

What aspects of incisal edge anatomy do you find most challenging? Let us know in the comments!


Related Course

Direct Composite: Predictable, Easy and Beautiful

DATE: October 25 2024 @ 8:00 am - October 26 2024 @ 4:00 pm

Location: The Pankey Institute

CE HOURS: 14

Regular Tuition: $ 2195

Single Occupancy with Ensuite Private Bath (per night): $ 290

Achieving Predictable and Stunning Anterior Results Direct composite is something we do every day in our practices. Yet, they can sometimes be frustrating when we don’t get a tight contact…

Learn More>

About Author

User Image
Lee Ann Brady DMD

Dr. Lee Ann Brady is passionate about dentistry, her family and making a difference. She is a general dentist and owns a practice in Glendale, AZ limited to restorative dentistry. Lee’s passion for dental education began as a CE junkie herself, pursuing lots of advanced continuing education focused on Restorative and Occlusion. In 2005, she became a full time resident faculty member for The Pankey Institute, and was promoted to Clinical Director in 2006. Lee joined Spear Education as Executive VP of Education in the fall of 2008 to teach and coordinate the educational curriculum. In June of 2011, she left Spear Education, founded leeannbrady.com and joined the dental practice she now owns as an associate. Today, she teaches at dental meetings and study clubs both nationally and internationally, continues to write for dental journals and her website, sits on the editorial board of the Journal of Cosmetic Dentistry, Inside Dentistry and DentalTown Magazines and is the Director of Education for The Pankey Institute.

FIND A PANKEY DENTIST OR TECHNICIAN

I AM A
I AM INTERESTED IN

VIEW COURSE CALENDAR

The Technique for the Carolina Bridge

December 2, 2017 Harald Heymann

The Carolina bridge is an all-porcelain bonded pontic that can be used as an interim prosthesis and for many other valuable purposes.

In my last blog, I discussed why I love the Carolina bridge and its many applications as a restorative alternative. Now, I’ll provide an overview of the design and how to begin a case using the bridge.

Carolina Bridge Design

The design of the Carolina bridge bypasses problems found in Maryland bridges and adhesion bridges. The all-porcelain Carolina bridge is very esthetic because there is no metal substructure. There is also incredible light penetration.

Maryland bridges, on the other hand, are not esthetic due to the the graying created by metal wings. All-porcelain pontics, such as the Carolina bridge, often can be used when tooth anatomy comes before or restricts the prep and placement of a Maryland-type bridge. Also, it is easier to repair the proximal resin composite retaining connectors of Carolina bridges.

Carolina Bridge Case Technique

A case that illustrates a Carolina bridge technique is one where an adolescent patient presented with a missing maxillary right lateral incisor. A team consisting of a periodontist, an orthodontist, an endodontist, and a restorative dentist determined that a dental implant would be the best treatment once the patient reaches maturity.

The team decided to orthodontically submerge the endodontically treated root to best preserve the bony site for implant placement. They selected a Carolina bridge as the best interim prosthesis because the occlusal relationship was favorable and there was sufficient crown length of the abutment teeth.

At the first appointment, shade selection was determined and an elastomeric impression was made of the anterior segment. A working case, an impression of the opposing arch, and a bite registration were created. An all-porcelain pontic was fabricated of feldspathic porcelain by the laboratory. At the second appointment, the involved abutment teeth were fully cleaned and rinsed.

The pontic was trial positioned to assess the shade accuracy and the adaptation of the pontic to the residual ridge. Once the accuracy of the shade and fit was verified, the pontic was readied for cementation.

A silane coupling agent was placed on the etched proximal surfaces of the porcelain pontic to improve the bond strength. Preparation of the abutment teeth was done by lightly roughening the proximal surfaces with a coarse, flame-shaped diamond stone. At this point, the pontic was ready for bonding into the edentulous space.

Dr. Heymann will be a featured lecturer at the Pankey 2018 Annual Meeting in Nashville, TN.

Related Course

Mastering Business Essentials

DATE: August 7 2025 @ 8:00 am - August 15 2025 @ 12:00 pm

Location: The Pankey Institute

CE HOURS: 22

Regular Tuition: $ 3295

Single Bed with Ensuite Bath: $ 345

The Blueprint for Running a Practice with Long-Term Growth Dr. Pankey’s original philosophy encouraged dental professionals to be proficient in 3 specific areas: technical mastery, behavioral excellence and business savvy….

Learn More>

About Author

User Image
Harald Heymann

Dr. Heymann is particularly active in the clinical research of esthetic restorative materials and participates in a dental practice devoted largely to esthetic dentistry. He is a member of the Academy of Operative Dentistry, the International Association of Dental Research, and is past-president and a fellow of the American Academy of Esthetic Dentistry. He is also a fellow in the International College of Dentists, the American College of Dentists, and the Academy of Dental Materials. He also serves as a consultant to the ADA. The author of more than 190 scientific publications, Dr. Heymann is co-senior editor of Sturdevant's Art and Science of Operative Dentistry and the editor-in-chief of the Journal of Esthetic and Restorative Dentistry. He has given more than 1,400 lectures on various aspects of esthetic dentistry worldwide and has received the Gordon J. Christensen Award for excellence as a CE speaker. Dr. Heymann graduated from the University of North Carolina School of Dentistry. He is past chair and graduate program director of the department of operative dentistry and currently is the Thomas P. Hinman Distinguished Professor of Operative Dentistry at the UNC School of Dentistry

FIND A PANKEY DENTIST OR TECHNICIAN

I AM A
I AM INTERESTED IN

VIEW COURSE CALENDAR