Caring for a Dental Leaf Gauge

February 21, 2024 Lee Ann Brady

Caring for a Dental Leaf Gauge 

Lee Ann Brady, DMD 

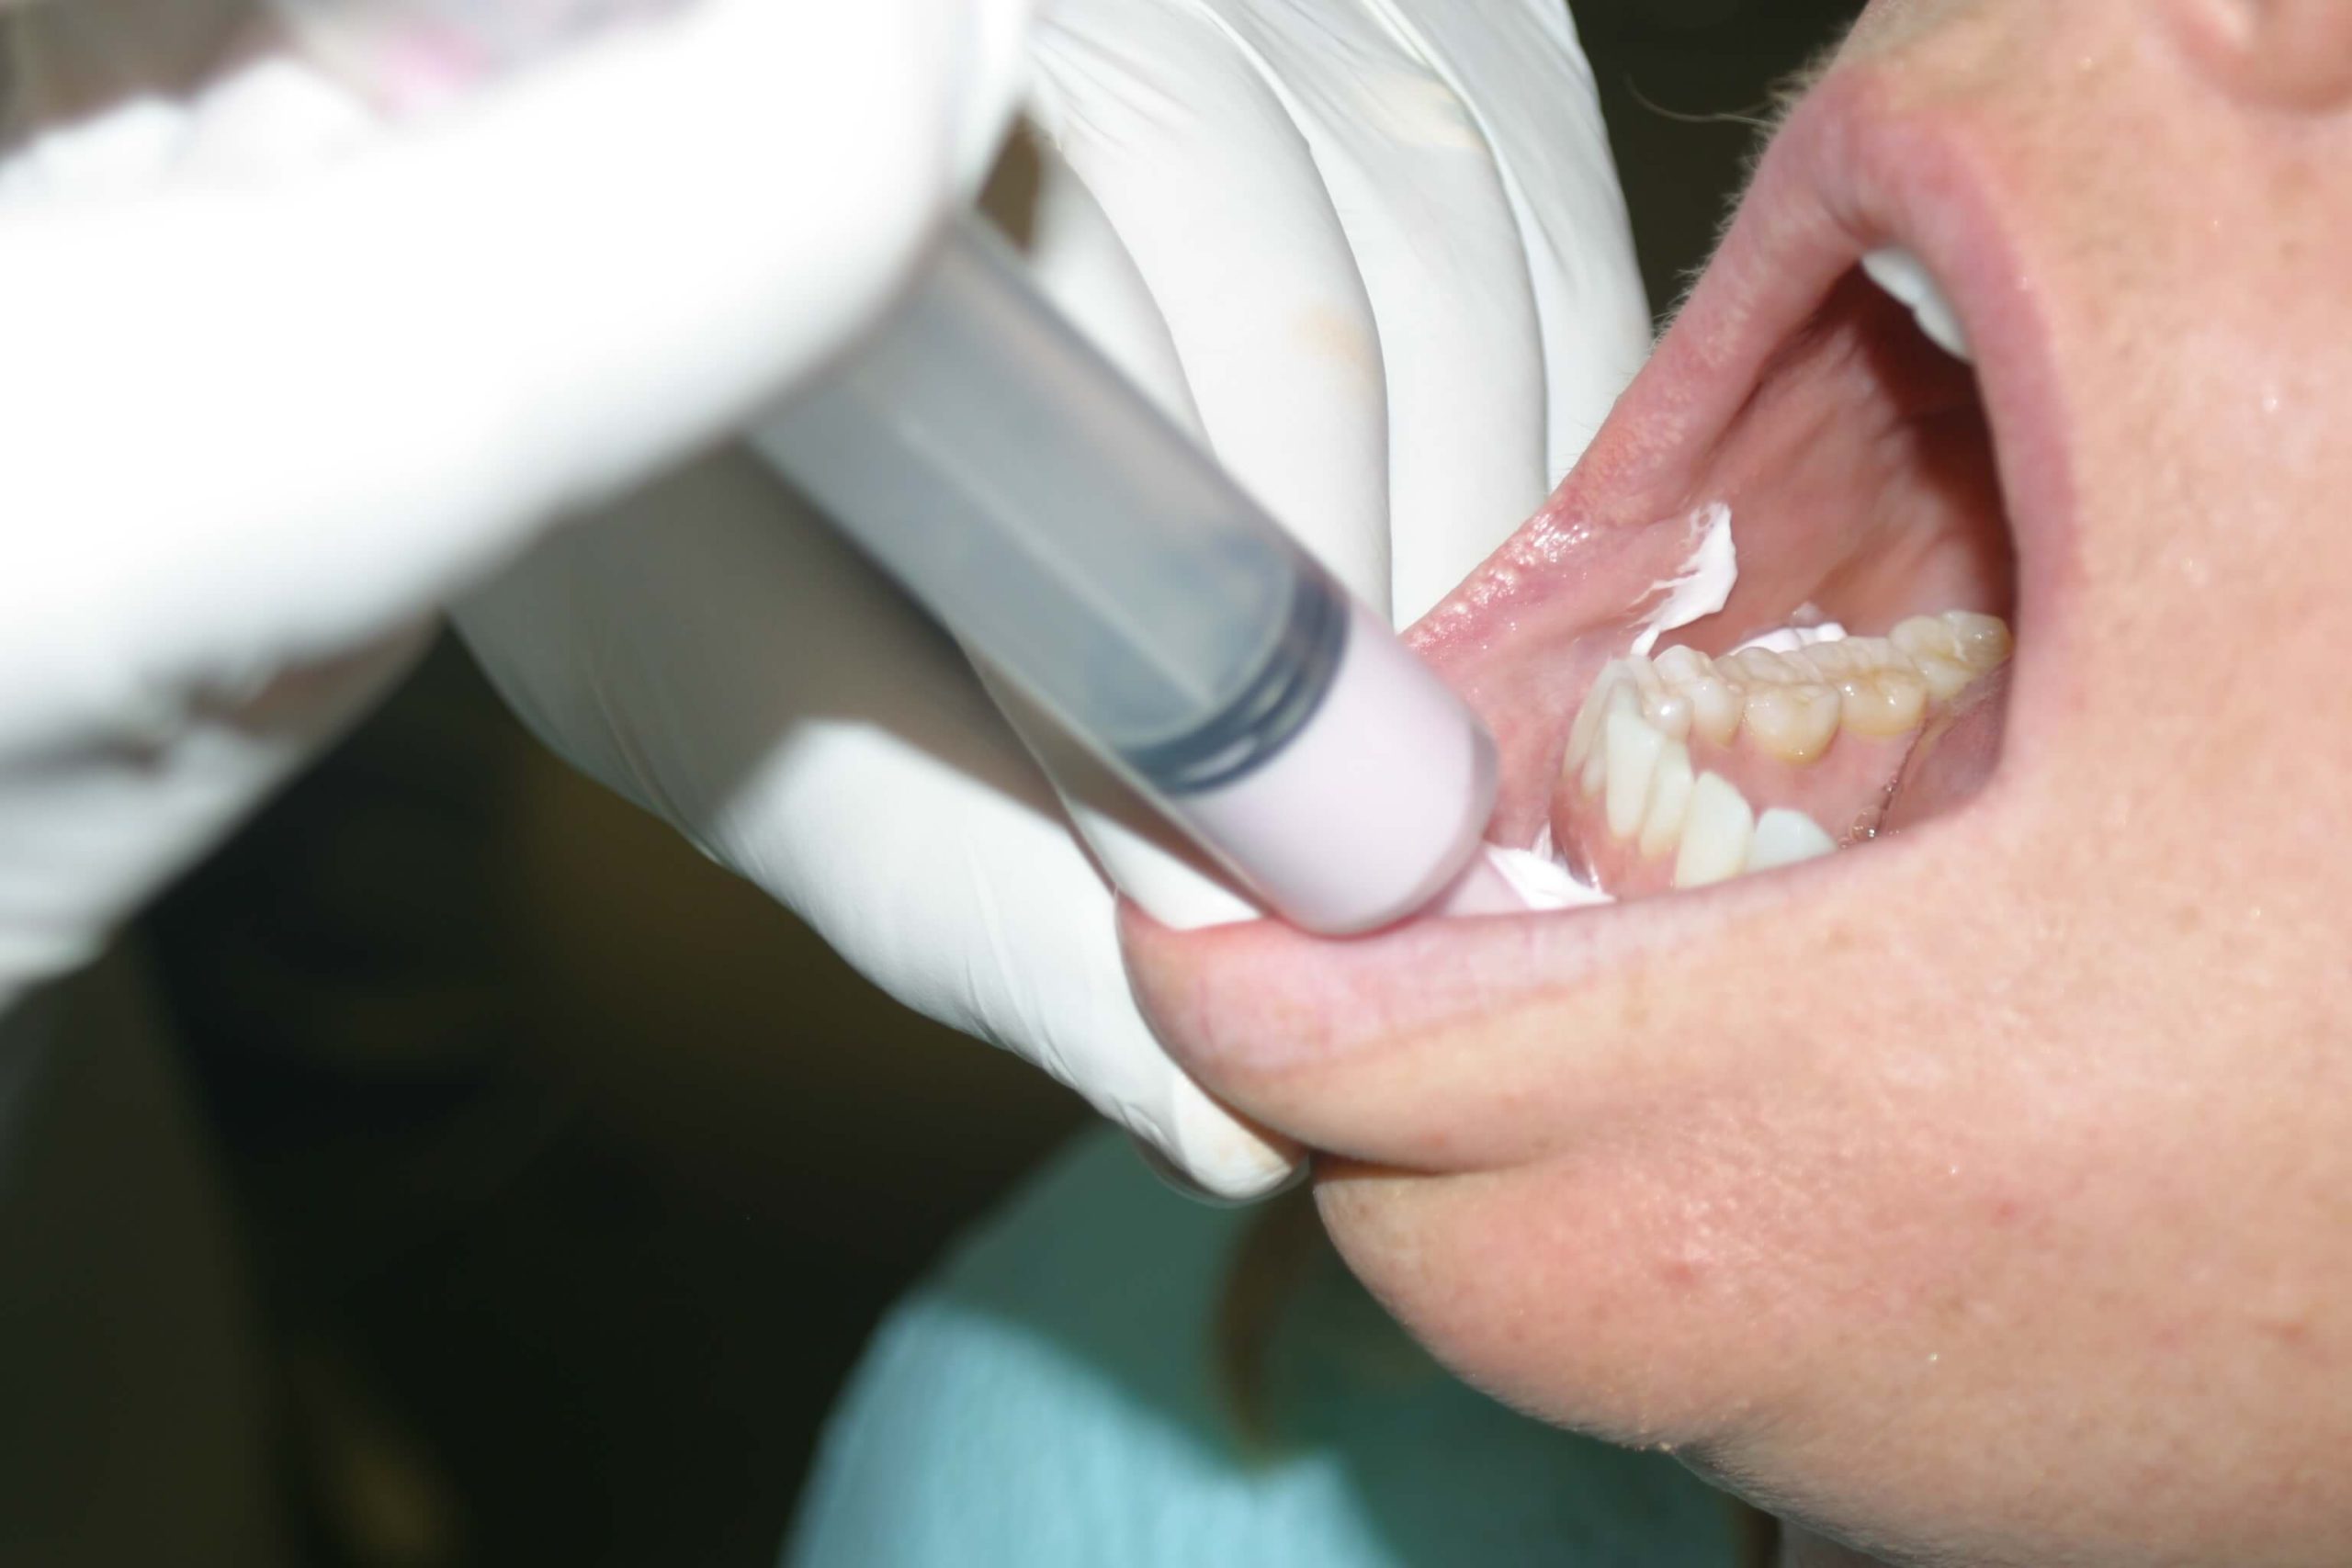
In the Pankey Essentials courses, we use dental leaf gauges to train dentists in how to feel for the first point of occlusal contact, as a method for occlusal deprogramming, and as a tool for articulating models on an articulator in centric relation. Dental leaf gauges not only assist us in diagnosis and treatment planning but also in enabling our patients to discover the nature of their occlusion as we help them understand how malocclusion can manifest in TMD symptoms, parafunction, tooth damage, and more. 

In our Essentials 1 course, I am sometimes asked how to take care of leaf gauges, so I thought I would share my answer.  

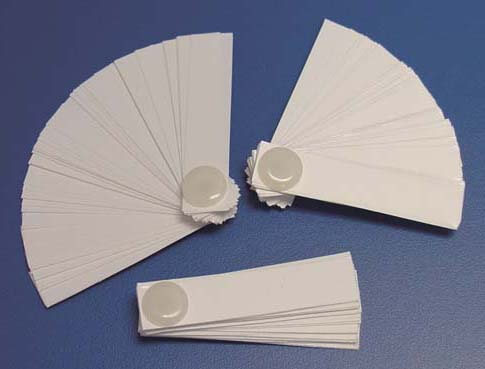
Although they don’t last forever, dental leaf gauges do last a long time and you can autoclave them between uses. When you sterilize them, the leaves become sticky, so I separate them like a hand of cards before putting the gauge in the autoclave bag and separate them again when I take them out of the bag just before going to the mouth. 

Over time, with use, a leaf gauge will start to look a little beat up. I’m looking at one now. The Teflon screw that holds it together has turned color from going through the autoclave. I can see some ink stains from Madame Butterfly silk. It’s at the point where I think it looks too grungy to keep using. Although it might continue functioning for quite some time, I’m going to toss it and use a new one. After all, they are relatively low cost with a high return on investment.  

I’ve never seen a dental leaf gauge break after many trips through the autoclave. I tested cold sterilizing one and discovered the chemistry in the ultrasonic cleaner started to make the leaves brittle and they came out stickier than when autoclaved. So, my preference (and the protocol in my practice) is to bag them and put them through the autoclave. 

Related Course

TMD & Orofacial Pain: Managing Complex Patients

DATE: January 29 2025 @ 8:00 am - February 2 2025 @ 1:00 pm

Location: The Pankey Institute

CE HOURS: 37

Dentist Tuition: $ 7200

Single Occupancy with Ensuite Private Bath (per night): $ 345

TMD patients present with a wide range of concerns and symptoms from tension headaches and muscle challenges to significant joint inflammation and breakdown. Accurate thorough diagnosis is the first step…

Learn More>

About Author

User Image
Lee Ann Brady

FIND A PANKEY DENTIST OR TECHNICIAN

I AM A
I AM INTERESTED IN

VIEW COURSE CALENDAR

Exquisite Alginate Impressions

August 26, 2017 Jeff Baggett DDS

Improving the quality of alginate impressions for diagnostic models requires a fine-tuned technique based on specific materials. These materials are used in conjunction with clever steps that lead to a minimization of voids and bubbles.

Dr. Baggett explains his exact procedure for achieving drastically improved alginate impressions. With these recommendations, you’ll find your confidence and efficiency soaring. Impressions are one part of the treatment puzzle that must be as precise as possible to avoid problems down the road.

How to Improve Alginate Impressions for Diagnostic Models

At my practice, we still use alginate impressions as our main impression material for diagnostic models. I generally take them. A very helpful tip to improve the quality of your impressions is to use a 35 ml monoject plastic syringe (from your local dental supplier) and Ivoclar Accudent XD Pre-Sure Tip applicators (Ivoclar Reorder number 67891 Soft Flex Tips).  

By placing the flexible tips on the end of the 35 ml plastic syringes, you are able to squirt excess alginate loaded into the syringe onto the teeth at a 90 degree angle starting at the distals of the second molars. You can do this instead of wiping alginate on the teeth with your fingers before you seat the alginate loaded tray.

This technique results in a lot less bubbles and minimizes the chance for voids distal to the most posterior teeth. The flexible tips are autoclavable, the monoject syringes can be cold sterilized, and petroleum jelly can be applied to the rubber plungers so they can be used again.   

This tip – combined with the use of 1-inch medical tape along the posteriors of our maxillary trays as a post-dam seal – has improved the impressions taken at my practice tremendously.

What aspect of impressions do you find the most challenging and why? We’d love to hear from you in the comments!


Related Course

E1: Aesthetic & Functional Treatment Planning

DATE: May 1 2025 @ 8:00 am - May 4 2025 @ 2:30 pm

Location: The Pankey Institute

CE HOURS: 39

Dentist Tuition: $ 6800

Single Occupancy with Ensuite Private Bath (Per Night): $ 345

Transform your experience of practicing dentistry, increase predictability, profitability and fulfillment. The Essentials Series is the Key, and Aesthetic and Functional Treatment Planning is where your journey begins.  Following a system of…

Learn More>

About Author

User Image
Jeff Baggett DDS

Dr. Jeff D. Baggett attended Oklahoma State University where he received his undergraduate degree and attended professional school at the University of Oklahoma College of Dentistry. After obtaining his Doctorate of Dental Surgery degree, Dr. Baggett received postgraduate training at the L.D. Pankey Institute, recognized worldwide for its excellence in advanced technical dentistry. He was accredited as a Pankey Scholar. Practicing for over 30 years, Dr. Baggett is also a visiting faculty member at the L.D. Pankey Institute. He lectures various dental study clubs and dental meetings. He is a guest speaker of the Victim's Impact Panel Against Drunk Driving. A published author, Dr. Baggett wrote sections in the book Photoshop CS3 and PowerPoint 2007 for the Dental Professional. Dr. Baggett is also the team dentist for the Oklahoma City Thunder with his partner, Dr. Lembke. An esteemed member of the dental community, Dr. Baggett is a member of many professional organizations including the American Dental Association, the Oklahoma Dental Association, the Oklahoma County Dental Society, the Southwest Academy of Restorative Dentistry, the McGarry Study Club, the University Oklahoma College of Dentistry Alumni Association and the Oklahoma State University Alumni Association. He also served on the Board of Directors of the Oklahoma County Dental Society.

FIND A PANKEY DENTIST OR TECHNICIAN

I AM A
I AM INTERESTED IN

VIEW COURSE CALENDAR

Setting Condylar Guidance

July 13, 2017 Lee Ann Brady DMD

One Easy Method That Will Increase Restoration Accuracy by Customizing An Articulator to the Actual Angle of the Eminence

When we rely too heavily on ‘assumptions’ to determine the angle of the eminence during a restoration, we risk creating a faulty end result for a significant amount of patients.

About 80-85% of patients will not present an issue. You can set the angle of the condylar path on the articulator, basing your efforts on a design assumption that most patients have an eminence with a steeper angle. The lab creates posterior disclusion on the articulator and there is equal or greater disclusion.

Problems arise when you end up with a patient who falls into one of two eminence categories.

Two Types of Patients Who Need Customization to the Angle of the Eminence

For 15-20% of the patients you treat, customization is necessary. These patients often fall into two categories:

  1. Eminence is flatter than the assumption.

The restorations did not touch on the articulator, yet you’ll have to remove posterior differences chairside in these patients.

  1. Eminence is steeper than the assumption.

These patients tend to experience less chewing efficiency. They complain that bits of snack food pack onto their restorations. This packing occurs on the occlusal table.

In both cases, a solution is needed. Creating posterior excursive disclusion or interferences relies on how well the angle of the eminence works with the angle of the anterior guidance. To achieve great results for patients outside the norm, there are two options.

How a Photograph Can Enable Restoration Customization

Accuracy is the ultimate goal for final restorations. Many dentists who find themselves dealing with a patient in the less common eminence percentile decide to take a protrusive bite record. My advice is to choose an alternative option that requires less effort.

The easier way also uses a semi-adjustable articulator. You still customize the articulator to match the patient’s actual angle of eminence. But instead of the protrusive bite record, send the lab an end-to-end retracted photograph.

For this image:

  • The incisors should rest on the incisal edges.
  • The second molars should be visible and in focus.

The lab can use this image to create posterior disclusion. They simply dial the condylar setting to match the photograph and use a sharpie to record it on the model.

What method do you prefer for customizing the articulator? We’d love to hear from you in the comments!


Related Course

E3: Restorative Integration of Form & Function

DATE: October 5 2025 @ 8:00 am - October 9 2025 @ 2:30 pm

Location: The Pankey Institute

CE HOURS: 41

Dentist Tuition: $ 7400

Single Occupancy with Ensuite Private Bath (per night): $ 345

Understanding that “form follows function” is critical for knowing how to blend what looks good with what predictably functions well. E3 is the phase of your Essentials journey in which…

Learn More>

About Author

User Image
Lee Ann Brady DMD

Dr. Lee Ann Brady is passionate about dentistry, her family and making a difference. She is a general dentist and owns a practice in Glendale, AZ limited to restorative dentistry. Lee’s passion for dental education began as a CE junkie herself, pursuing lots of advanced continuing education focused on Restorative and Occlusion. In 2005, she became a full time resident faculty member for The Pankey Institute, and was promoted to Clinical Director in 2006. Lee joined Spear Education as Executive VP of Education in the fall of 2008 to teach and coordinate the educational curriculum. In June of 2011, she left Spear Education, founded leeannbrady.com and joined the dental practice she now owns as an associate. Today, she teaches at dental meetings and study clubs both nationally and internationally, continues to write for dental journals and her website, sits on the editorial board of the Journal of Cosmetic Dentistry, Inside Dentistry and DentalTown Magazines and is the Director of Education for The Pankey Institute.

FIND A PANKEY DENTIST OR TECHNICIAN

I AM A
I AM INTERESTED IN

VIEW COURSE CALENDAR