A Tip for Matching the Color of Cement Between an Implant Abutment and Crown

March 8, 2024 Lee Ann Brady

Trying to match the color of the cement between the abutment and the dental implant crown in the anterior can be very frustrating. Here’s a trick that works well for me. 

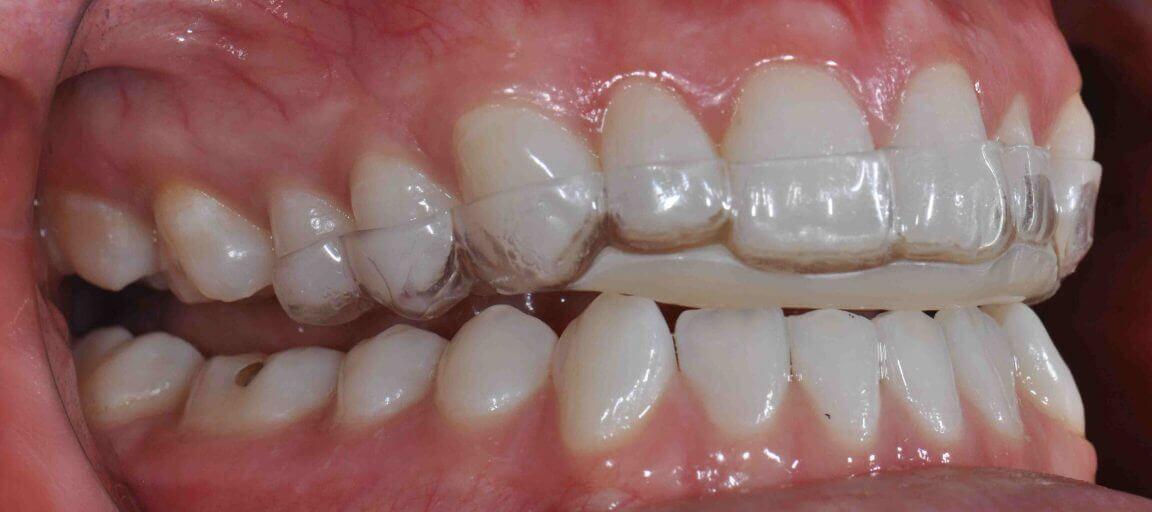
A while back I was struggling to match the color of the cement between the abutment and an anterior implant crown. I always try-in the abutment and the crown and try to confirm the shade before they are put together. We do this because the laboratory can’t redo the shade once they’ve bonded the crown and the abutment for screw retention without trying to separate the cement, which is difficult. 

Over the years, it was a challenge to replicate the opacity of the cement used to connect the titanium abutment and ceramic crown. I’ve tried using some of the opaquest try-in paste on the market. 

In the case I referred to above, we thought we had it. My lab cemented it together and I put it in. I could see the opacity of the cement through the restoration. So, we had to take it apart and try again. My laboratory technician shared with me a trick that he had learned from one of his other dentist clients. And that was to simply go to CVS, Costco, or Target and buy good old fashioned liquid white out.  

Now, I put a very tiny amount of whiteout on a micro brush and paint it on the inside of the labial surface of the crown on the intaglio surface. Then, I use a bit of translucent try-in paste to seat the crown. 

The whiteout works well because it is basically titanium dioxide and water with preservatives—the same white compound that is in super white sunscreens. In my opinion, it is relatively safe to use, and I can see what the implant will look like when the pieces are cemented together. 

Related Course

Worn Dentition: Direct & Indirect Adhesive Management Through a Non-Invasive Approach

DATE: October 24 2025 @ 8:00 am - October 25 2025 @ 2:30 pm

Location: The Pankey Institute

CE HOURS: 15

Dentist Tuition : $ 2595

Single Occupancy with Ensuite Private Bath (per night): $ 345

Enhance Restorative Outcomes The main goal of this course is to provide, indications and protocols to diagnose and treat severe worn dentition through a new no prep approach increasing the…

Learn More>

About Author

User Image
Lee Ann Brady

FIND A PANKEY DENTIST OR TECHNICIAN

I AM A
I AM INTERESTED IN

VIEW COURSE CALENDAR

The Risks of Anterior-Only Appliances

April 30, 2021 Lee Ann Brady DMD

I was at the Ontario Dental Society meeting giving a presentation on occlusion, and I was asked one of the most common questions I receive when discussing anterior-only appliances: “What about tooth movement, either eruption or intrusion? Isn’t that a risk with these devices?” The answer is, yes there are risks, as with everything we do. Let’s consider the risks and how we can minimize and avoid them.

There are many types of anterior-only appliances, temporary and long term. Popular temporary anterior bite splint appliances are QuickSplint® and the Best-Bite™ Discluder from WhipMix®. NTI-tss Plus™ from NDX® National Dentex Labs is designed as a permanent anterior only and then there are the Kois Deprogrammer, Spear style deprogrammer, Lucia jigs, regular deprogrammers, Dawson B-Splints and so on. They are designed so that when the patient bites in MIP, they only touch on the front. When the patient goes into any excursive position (right, left, forward or back), they can only touch in the anterior—plastic to plastic or teeth to plastic.

We love anterior-only appliances because of their efficiency and effectiveness in eliminating posterior contact and allowing TMJ muscles to optimally relax. But we do worry about tooth movement, so how do we evaluate the risk and how do we minimize it?

There are a couple of pieces to this puzzle. We know that super eruption of the back teeth may occur if the appliance is worn more than ten hours a day, consistently over many days, even weeks, in a row. This means the risk is minimal with nighttime wear only for eight hours a night. Since we do not want patients to wear these types of appliances 24 hours a day, a patient in acute pain might be best helped with an anterior-only appliance for nighttime and a different type of appliance for daytime.

There is also a risk of lower tooth intrusion. There are two ways to deal with that. One is to make sure they have contact from canine to canine to distribute forces. Another is to make the upper anterior discluder against an appliance on the bottom that is called “a slider.” This is essentially a thicker version of an Essix retainer on the bottom to distribute the forces. I have made these appliances for many years and have not observed a problem in my own practice. I had one patient with significant deprogramming who could only touch on her first point of contact, but that was not due to tooth movement. It was because of total elimination of her masticatory muscle memory.

If you are concerned about tooth movement, I recommend making the upper discluder on a full arch Essix and then put the patient in a full arch lower Essix (lower slider) that will distribute the forces. That will prevent the problem of super eruption and should significantly minimize potential for intrusion, even though you only have midpoint contact. This is a great way to moderate the risks of tooth movement for patients who are going to wear an anterior-only appliance long term.

I would like to add, that any time you put a patient on appliance therapy, you need to see them for post-op appointments. You need to verify the appliance is working—that their signs and symptoms are going away or minimizing. And, you need to check their occlusion and mandibular position. So, I always plan multiple follow up appointments and include those in the appliance therapy fee. Even when the patient and I think everything is going great and they are wearing their appliance only at night long term, I ask them to bring their appliance to every Hygiene appointment for professional cleaning. This reminds us to ask how things are going with their appliance and gives me the opportunity to check their occlusion and make sure there are no negative consequences of the therapy. I also tell my patients to call if they notice any change in their bite. “We need to have you come in and check that right away.”

Related Course

Functional Esthetic Excellence – Utilizing 100% Digital Workflow

DATE: May 8 2025 @ 8:00 am - May 10 2025 @ 2:00 pm

Location: The Pankey Institute

CE HOURS: 25

Dentist Tuition: $ 3195

Single Occupancy with Ensuite Private Bath (per night): $ 345

Embracing Digital Dentistry This course will introduce each participant to the possibilities of complex case planning utilizing 100% digital workflows. Special emphasis will be placed on understanding how software can…

Learn More>

About Author

User Image
Lee Ann Brady DMD

Dr. Lee Ann Brady is passionate about dentistry, her family and making a difference. She is a general dentist and owns a practice in Glendale, AZ limited to restorative dentistry. Lee’s passion for dental education began as a CE junkie herself, pursuing lots of advanced continuing education focused on Restorative and Occlusion. In 2005, she became a full time resident faculty member for The Pankey Institute, and was promoted to Clinical Director in 2006. Lee joined Spear Education as Executive VP of Education in the fall of 2008 to teach and coordinate the educational curriculum. In June of 2011, she left Spear Education, founded leeannbrady.com and joined the dental practice she now owns as an associate. Today, she teaches at dental meetings and study clubs both nationally and internationally, continues to write for dental journals and her website, sits on the editorial board of the Journal of Cosmetic Dentistry, Inside Dentistry and DentalTown Magazines and is the Director of Education for The Pankey Institute.

FIND A PANKEY DENTIST OR TECHNICIAN

I AM A
I AM INTERESTED IN

VIEW COURSE CALENDAR