Making the Case for Composite Warmers 

October 12, 2024 Lee Ann Brady

By Lee Ann Brady 

Many dentists warm composite by placing it on top of the operatory light, but I wonder what the patient is thinking when you reach for it on top of the light.  

Some dentists have water heated in one of the green bowls from the lab. I wouldn’t do that either because I wouldn’t know the precise temperature and water intrusion could occur into the composite syringe or compule. 

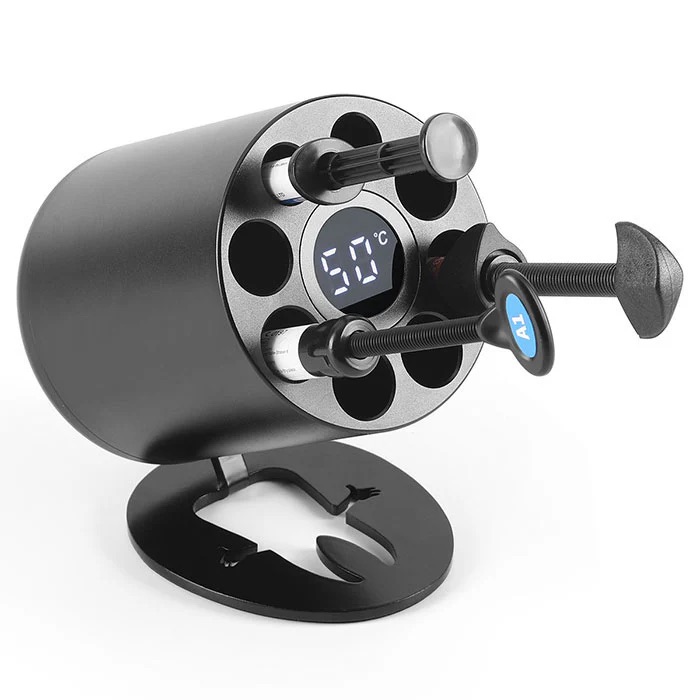
Composite warmers are not a big expense in a dental practice. I have one in every one of our operatories. The warmers come with two interchangeable top pieces. One is designed for syringes, and one is designed for compules. They warm composite to a specific temperature. 

When you heat composite, there’s no permanent change to the chemistry. As composite is warmed, its viscosity is reduced but as soon as the composite cools, it goes right back to its original viscosity. Studies show that the reduction in viscosity results in better marginal adaptation because it is more flowable, softer for sculpting, and much easier for us to push it against the margins. We also get a greater depth of cure because composite polymerizes more effectively at reduced viscosity. This reduces the shrinkage of the material and increases the longevity of our restorations.  

Note: If you leave a composite warmer on with composite in it for days on end, the warming will evaporate some of monomer and the composite will become brittle and crumbly. So, have your assistant load the composite you plan to use for the day at the beginning of the day or at the beginning of the appointment. You can turn the warmer on when you are delivering anesthetic, and it will be warm when you are ready to use it. We’ve developed the habit of turning off the warmer at the end of each appointment. 

About Author

User Image
Lee Ann Brady

FIND A PANKEY DENTIST OR TECHNICIAN

I AM A
I AM INTERESTED IN

VIEW COURSE CALENDAR

State-of-the-Art Hygiene Therapy  

August 10, 2024 Stephen Malone DMD

By Stephen K. Malone, DMD and Michael Costa, DDS, MHS 

We all know that the instrumentation options for dental hygiene services have come a long way since the first dental hygienist scaled teeth in 1906.   Early in the 20th century, the only technology a hygienist had was a set of sharp metal instruments and a spinning brush of gritty pumice. In the 1950s, ultrasonic technology was invented which helped disrupt calculus, but hygienists still had to follow up with scalers and polishers. Similarly, since the days of first scientific articles regarding oral micro-organisms in the 1870’s, our knowledge has increased exponentially regarding the role of oral biofilm not only in oral diseases, but whole-body health.   

In 2021 our office staff attended continuing education courses with legendary periodontist, Dr. Sam Low. Dr. Low introduced our practice to new technology that would help elevate our hygiene practice by improving biofilm removal, increasing patient ownership of personal oral hygiene practices, decreasing damage to root surfaces and restorations, and providing a gentler patient experience.   

The instrumentation is provided though a unit called a Prophylaxis Master – which is a combination of two different treatment modalities.  The hygienist first uses the Airflow unit to remove soft biofilm and young calculus.  The airflow handpiece delivers a combination of water, air and fine erythritol powder to lift and suction away the biofilm as well as stains.  Once the biofilm, young calculus and surface stains are removed, the hygienist moves to the integrated Piezo scaler to gently emulsify the remaining calculus. There are several different tips for both units to access deep pockets and implant surfaces safely. 

Scientific research has demonstrated this system is the gentlest and most efficient way to eliminate bacteria around cosmetic work and titanium implants, on enamel and root surfaces, and even on soft tissues. 

The GBT Protocol 

To get the most out of our investment, we implemented the “GBT” protocol, which is recommended by EMS, the company that manufactures the Prophylaxis Master. The 8-step GBT protocol is as follows:  

  1. Assess the teeth, gingiva, periodontal tissues, and any implants and peri-implant tissues. 
  2. Use disclosing solution to identify areas of biofilm accumulation. The color will also guide the hygienist to remove the biofilm with Airflow handpiece, after which calculus is easier to detect. 
  3. Show the patient the colored biofilm to raise awareness. Spend time educating the patient and emphasizing the importance of prevention. 
  4. Removal of biofilm, early calculus and stains with the Airflow. Airflow Plus powder is safe to use on teeth, root surfaces, gums, tongue, and palate. It can also be used to clean dental implants, restorations, orthodontic appliances, and clear aligners. 
  5. Use Airflow Plus powder with the Perioflow® nozzle to remove biofilm in >4 to 9mm pockets, root furcations, and on implants. 
  6. Remove the remaining calculus, using the minimally invasive EMS PIEZON® PS instrument supra and subgingivally in up to 10mm pockets and clean >10mm pockets with a mini curette. Use the EMS PIEZON® PI MAX instrument around implants up to 3mm subgingivally and on restorations. 
  7. After checking to make sure all biofilm and calculus has been removed, diagnosing for caries, and applying fluoride for a fresh and smooth feeling. 
  8. Schedule the patient’s recall visit based on risk assessment. 

What Our Patients Love About It  

  • Patients trust the thoroughness of the therapy because they can see the disclosed biofilm before it is removed and its absence after it is removed.  
  • The therapy is more comfortable than traditional methods. The water is warmed, and there is minimal root surface sensitivity compared to traditional hand and ultrasonic instrumentation.  
  • This technology gently reaches into places where traditional instruments couldn’t remove stains and tartar.  
  • The education patients receive from our hygienists highlights the value of the therapy.  
  • We have found that this is a superior stain and calculus removing technology.  
  • The erythritol powder that is mixed with warm water is pleasant tasting.  

 What Our Hygienists Love About It  

  • Less hand instrumentation means less body fatigue.  
  • There is superior stain removal and visual evidence that the biofilm is completely removed.  
  • Patients don’t complain about sensitivity or “poking.”  

 What Doctors Love About It 

  • Patients are happier.  
  • Hygienists are happier.  
  • It eliminates patient complaints about hygienists who are either “too aggressive” or “not aggressive enough” with instrumentation.  
  • It prevents damage to cosmetic and implant restorations, as well as root and enamel surfaces.  

Note: We are not paid to promote EMS or Guided Biofilm Therapy. We honestly think this is the best way we can efficiently, comfortably, and thoroughly provide the comprehensive care our patients deserve—and we thought we should share our great experience 

Related Course

Mastering Dental Photography: From Start to Finish

DATE: October 29 2026 @ 8:00 am - October 31 2026 @ 12:00 pm

Location: The Pankey Institute

CE HOURS: 19

Regular Tuition: $ 2995

Single Occupancy with Ensuite Private Bath (per night): $ 355

Dental photography is an indispensable tool for a high level practice. We will review camera set-up and what settings to use for each photo. All photos from diagnostic series, portraits,…

Learn More>

About Author

User Image
Stephen Malone DMD

Dr. Stephen Malone received his Doctorate of Dental Medicine Degree from the University of Louisville in 1994 and has practiced dentistry in Knoxville for nearly 20 years. He participates in multiple dental study clubs and professional organizations, where he has taken a leadership role. Among the continuing education programs he has attended, The Pankey Institute for Advanced Dental Education is noteworthy. He was the youngest dentist to earn the status of Pankey Scholar at this world-renowned post-doctoral educational institution, and he is now a member of its Visiting Faculty.

FIND A PANKEY DENTIST OR TECHNICIAN

I AM A
I AM INTERESTED IN

VIEW COURSE CALENDAR

Using X-Floss for Dental Implant Care 

June 3, 2024 Lee Ann Brady DMD

By Lee Ann Brady, DMD 

Cleaning the larger gingival embrasures around a posterior dental implant can be a challenge for patients. In my practice, posterior implant patients are some of the individuals we give X-Floss samples to try at home.  

X-Floss is a dental floss made by iDontix® that is designed to make flossing easier for individuals with bridges, braces, implants, or larger-than-normal gingival embrasures. It resembles yarn, has a thick texture, and has a hard end, making it easy to push under orthodontic wires, bridges, or in embrasure spaces. It effectively cleans larger spaces while remaining gentle on the gums. The soft material minimizes the risk of injury during flossing, even in subgingival areas, and it is conveniently available on Amazon and in drugstores.  

There are two varieties. Green X-Floss from is too thick for some spaces. Blue X-Floss Lite is less thick and just right for some spaces. You and your hygienist may want to give samples of both to your patients to try. Some of your patients are likely to more effectively and consistently floss once they are using this type of floss.  

Related Course

Integrative Dental Medicine: Creating Healthier Patients & Practices

DATE: June 27 2025 @ 8:00 am - June 28 2025 @ 4:00 pm

Location: The Pankey Institute

CE HOURS: 10

Regular Tuition: $ 2995

Single Occupancy with Ensuite Private Bath (per night): $ 345

We face a severe health crisis, that is a much larger pandemic than Covid-19! Our western lifestyle affects periodontal & periapical oral disease, vascular disease, breathing disordered sleep, GERD, dental…

Learn More>

About Author

User Image
Lee Ann Brady DMD

Dr. Lee Ann Brady is passionate about dentistry, her family and making a difference. She is a general dentist and owns a practice in Glendale, AZ limited to restorative dentistry. Lee’s passion for dental education began as a CE junkie herself, pursuing lots of advanced continuing education focused on Restorative and Occlusion. In 2005, she became a full time resident faculty member for The Pankey Institute, and was promoted to Clinical Director in 2006. Lee joined Spear Education as Executive VP of Education in the fall of 2008 to teach and coordinate the educational curriculum. In June of 2011, she left Spear Education, founded leeannbrady.com and joined the dental practice she now owns as an associate. Today, she teaches at dental meetings and study clubs both nationally and internationally, continues to write for dental journals and her website, sits on the editorial board of the Journal of Cosmetic Dentistry, Inside Dentistry and DentalTown Magazines and is the Director of Education for The Pankey Institute.

FIND A PANKEY DENTIST OR TECHNICIAN

I AM A
I AM INTERESTED IN

VIEW COURSE CALENDAR

Retooling an Implant Supported Hybrid Denture 

May 20, 2024 Lee Ann Brady DMD

By Lee Ann Brady, DMD 

A patient chipped a tooth on her lower hybrid denture and loosened an implant screw. The denture had been placed 18 years ago, so she had an old titanium bar with denture teeth and pink acrylic. That day, I put the screw back in and smoothed out where the tooth was chipped. During this visit we had a great conversation about the future of her hybrid denture. 

I have had a similar conversation with several patients in recent months. They have the original, traditional bar retained hybrid denture that is nearing the end of its lifespan. And so, what are the options? 

  1. If the bar is in great shape, new denture teeth and a new denture base can be milled and placed over the existing titanium bar. 
  1. Alternatively, we can get rid of the bar and go to something that is all zirconia. 

If there is a preference for the first option, the first requirement is to make sure the titanium bar is in good condition. After 18 years, we would take it off and have the laboratory examine it under microscopy.  

If converting to all-zirconia and the patient has had upper and lower dentures, we must consider if one arch can be converted without converting the second arch. A zirconia arch is going to wear an opposing original denture fast if there is parafunction, and the zirconia arch is likely to fracture the opposing original prosthetic teeth. 

We have options today we can think about with our patients, but many have in their minds that when they got their hybrid dentures years ago, the dentures would last. All the time, energy, and dollars to freshen up or replace their denture is a big deal to them. Shifting their mindset from “I thought I was done investing in dentistry” to “My denture is at the end of its lifespan” is a big hurdle. So, the earlier we can start those conversations before they need to invest, the easier they can transition their minds to accept care with grace when the time comes. 

When your bar retained hybrid denture patients visit for perio maintenance and your exams, inform them of the lifespan of their denture is at most 20 years and set expectations for discussing the best available options at some point in the future.  

Related Course

Mastering Dental Photography: From Start to Finish

DATE: October 29 2026 @ 8:00 am - October 31 2026 @ 12:00 pm

Location: The Pankey Institute

CE HOURS: 19

Regular Tuition: $ 2995

Single Occupancy with Ensuite Private Bath (per night): $ 355

Dental photography is an indispensable tool for a high level practice. We will review camera set-up and what settings to use for each photo. All photos from diagnostic series, portraits,…

Learn More>

About Author

User Image
Lee Ann Brady DMD

Dr. Lee Ann Brady is passionate about dentistry, her family and making a difference. She is a general dentist and owns a practice in Glendale, AZ limited to restorative dentistry. Lee’s passion for dental education began as a CE junkie herself, pursuing lots of advanced continuing education focused on Restorative and Occlusion. In 2005, she became a full time resident faculty member for The Pankey Institute, and was promoted to Clinical Director in 2006. Lee joined Spear Education as Executive VP of Education in the fall of 2008 to teach and coordinate the educational curriculum. In June of 2011, she left Spear Education, founded leeannbrady.com and joined the dental practice she now owns as an associate. Today, she teaches at dental meetings and study clubs both nationally and internationally, continues to write for dental journals and her website, sits on the editorial board of the Journal of Cosmetic Dentistry, Inside Dentistry and DentalTown Magazines and is the Director of Education for The Pankey Institute.

FIND A PANKEY DENTIST OR TECHNICIAN

I AM A
I AM INTERESTED IN

VIEW COURSE CALENDAR

Having an In-House Lab Benefits Patients

April 26, 2024 Stephen Malone DMD

Stephen Malone, DMD 

Our Knoxville, Tennessee, dental practice has grown to where we now have four dentists, as well as four hygienists, six dental assistants, two patient coordinators, a practice manager with two front-office patient care specialists, and one more primary partner in our dental practice—Bob Cutshaw. Bob is a master lab technician with over 40 years of experience and owner of Cutshaw Labs. He has been a partner in care with me for nearly 25 years and collaborates with our doctors on all dental restorations requiring lab work. 

Recently, I was thinking again about how grateful I am for my association with Bob and for the many benefits of having his lab located downstairs within our practice facility. Perhaps, having a lab in-house is something other dentists might aspire to eventually have in their own private practice. 

Bob is involved in care planning just as much as I and the other dentists. We can sit side by side to collaborate on treatment using a combination of digital 3D modeling and analog articulated models and wax-ups. 

For patients with complex needs, he routinely comes into the operatory or the consultation room to meet with patients. As he explains his involvement in their care and how the highest quality materials and latest techniques will be used, they become fascinated in the laboratory methods and technologies. Some request a tour of the lab and want to watch some of the process. 

We use digital designs for all prosthetics. Bob’s professional-grade 3D printers work all day long for predictable, efficient fabrication of custom restorations. Then he hand-paints and glazes the crowns and prosthetics for optimal natural aesthetics. Because he is involved in planning our most complex cases that involve implant supported hybrid denture, he is deeply invested in the details that allow the finished product to be delivered with ease. 

Having his lab in-house allows us to rapidly fix issues that arise, for example, alterations to a restoration when it doesn’t quite fit right or has a slightly incorrect shade. Instead of waiting for days or weeks to deliver back and forth a restoration to an outside lab, we make the changes here on the same day. 

For Patients undergoing clear aligner treatment, we manufacture our clear aligners in-house. If a patient loses or damages a tray, it is immediately replaced so the patient doesn’t lose precious time in treatment. The same goes for our occlusal splints, night guards, sports mouth guards, and Essix retainers. 

One of the branding traits of our practice that has earned us our high reputation is the in-house laboratory. Without a doubt, having this lab just downstairs is a major way in which we enhance the quality of care we provide to our patients. 

Related Course

Mastering Dental Photography: From Start to Finish

DATE: October 29 2026 @ 8:00 am - October 31 2026 @ 12:00 pm

Location: The Pankey Institute

CE HOURS: 19

Regular Tuition: $ 2995

Single Occupancy with Ensuite Private Bath (per night): $ 355

Dental photography is an indispensable tool for a high level practice. We will review camera set-up and what settings to use for each photo. All photos from diagnostic series, portraits,…

Learn More>

About Author

User Image
Stephen Malone DMD

Dr. Stephen Malone received his Doctorate of Dental Medicine Degree from the University of Louisville in 1994 and has practiced dentistry in Knoxville for nearly 20 years. He participates in multiple dental study clubs and professional organizations, where he has taken a leadership role. Among the continuing education programs he has attended, The Pankey Institute for Advanced Dental Education is noteworthy. He was the youngest dentist to earn the status of Pankey Scholar at this world-renowned post-doctoral educational institution, and he is now a member of its Visiting Faculty.

FIND A PANKEY DENTIST OR TECHNICIAN

I AM A
I AM INTERESTED IN

VIEW COURSE CALENDAR

Dental Photography Part 2: Deciding Between Saving Images as JPEG or RAW 

March 20, 2024 Charlie Ward, DDS

Charlie Ward, DDS

In this article, I’ll share how I save my Dental DSLR photos and choose between the file formats of RAW versus JPEG. There are specific reasons why we might need one format or the other, or perhaps both. I’ll also share how I store and protect my ever-growing collection of images. 

The Difference Between RAW and JPEG Format 

We have a choice when we’re shooting with our DSLR about how we want to save our files. On the menu of our camera, we see that we can choose between RAW and JPEG, and the quality of JPEG. When RAW is selected, all data that hits the camera sensor is saved. A JPEG is a processed image resulting in a compressed (smaller) file size.  

The data stored in RAW images can be 3 to 4 times more than in JPEG images, depending on the quality of JPEG you select on the camera menu. The processor in your DSLR camera will remove data from a JPEG image that it perceives to be imperceptible to the human eye. The greatly smaller size of JPEGS makes them universally preferred, not only for storage but for quick upload, download, and opening for viewing online. I routinely shoot high-quality JPEGs for diagnostics and routine lab communication.  

(If you are wondering what JPEG stands for, it’s for Joint Photographic Experts Group. Once JPEG images are in your computer, they can be saved as different file formats ending in different extensions such as .eps, .pdf, .jpg, .jpeg, .bmp, .tif, and .tiff.) 

If I take an image in both RAW and JPEG format, at first glance, the JPEG and RAW images may look the same, but on closer inspection, I may see that the stain on a tooth’s enamel or surrounding skin tones appear lighter in the RAW image. The camera itself has processed the image and determined that some of that data is unnecessary.  

When to Shoot RAW Images 

For most of what dentists do with our DSLR cameras, JPEGS are fine. There are three situations when we should choose to shoot RAW images. 

  1. When we want to edit images like a professional photographer. 
  1. When we shoot images for accreditation for the American Academy of Cosmetic Dentistry. The Academy requires images in raw format so they can tell that the images have not been edited.  
  1. When we are using a digital shade matching system like eLab or Matisse that requires RAW input. 

Why Shoot Both Versions When You Want RAW 

If you are storing CBCT and RAW images on your server, a lot of data can accumulate quickly. I shoot JPEG versions of the images I shoot in RAW format so I can delete the RAW files from my server when they are no longer needed and still have a case record with the JPEG files. 

Storage Tip: In my practice, we download the patient’s or the day’s images from the SD card on to our server in a patient folder. We have one main folder and within it a subfolder for each letter of the alphabet. Inside each alphabet letter’s folder is another subfolder labeled with the patient’s name for each patient whose last name begins with that alphabet letter. Inside each patient’s folder are appropriate subfolders, labeled for example, “Name-Prep-Date.” 


About Author

Default Avatar
Charlie Ward, DDS

FIND A PANKEY DENTIST OR TECHNICIAN

I AM A
I AM INTERESTED IN

VIEW COURSE CALENDAR

Dental Photography Part 1: What Photography Equipment Should I Buy? 

March 15, 2024 Charlie Ward, DDS

Charlie Ward, DDS  

Whether you want to use a digital SLR camera for documentation, patient education, lab communication, making presentations at dental events, dental publications, or accreditation in the American Academy of Cosmetic Dentistry, you have choices to consider in multiple price ranges.  

Dentists can spend $1,800 and get a good system for documenting cases, patient education and lab communication. Dentists can easily spend $3,800 or more on a setup to equip themselves to take higher quality images. 

Camera Body: Most dentists shoot with a Nikon or Cannon DSLR camera. These are comparable brands. My experience is with Canon but my lab technician uses Nikon and gets wonderful results. I am shooting with the Canon EOS 90D. The comparable Nikon is the D7500. More entry-level models are the Nikon 3500 and the Canon Rebel T8i. 

Lenses: We can get a third-party Sigma 105mm or a Tokina 105mm lens that gives us decent quality, or we can purchase the Canon 100mm or Nikon 105mm version at twice the price. When I upgraded to the finer Canon lens, I noticed a huge difference in image quality. I recommend an upgraded lens for the highest-quality images you need for accreditation. 

Flashes: The ring flash is a great entry-level option and significantly less expensive but there are limitations to what you can do to control your light. I’ve been using a dual point flash for some time. I can pull a flash off and shoot from a different angle. By changing where the light is coming from, I can accentuate the angle lines for more depth and visual clarity.  

Sometimes, I’ll take one of my flashes off, hold it on the opposite side of what I am shooting, and shoot the flash back into the lens of the camera. When I do this, I get an ethereal-appearing image or an image with a white background. I appreciate the versatility of using the dual point system.  

For my best-looking images and portraits, I’ll use softboxes. This gives smoother, more diffuse light and a beautiful appearance. These are necessary for everyday dentistry but make a huge difference in showcasing aesthetic cases.  


Consider the Long Term: When dentists invest in cameras and lenses, they typically use them for a long time. If you are on the fence about how much you want to invest, my own experience might be helpful. I honestly wish that I had upgraded sooner than I did with the Canon EOS 90D and the Canon 100mm lens. After taking photos for 12 years, the upgraded equipment has only increased the joy I have for photography and pushed me to take more pictures! 

Related Course

Mastering Business Essentials

DATE: August 7 2025 @ 8:00 am - August 9 2025 @ 12:00 pm

Location: The Pankey Institute

CE HOURS: 22

Regular Tuition: $ 3295

Single Bed with Ensuite Bath: $ 345

The Blueprint for Running a Practice with Long-Term Growth Dr. Pankey’s original philosophy encouraged dental professionals to be proficient in 3 specific areas: technical mastery, behavioral excellence and business savvy….

Learn More>

About Author

Default Avatar
Charlie Ward, DDS

FIND A PANKEY DENTIST OR TECHNICIAN

I AM A
I AM INTERESTED IN

VIEW COURSE CALENDAR

The Effect of Rubber Dam Isolation on Bond Strength to Enamel 

March 13, 2024 Christopher Mazzola, DDS

Christopher Mazzola, DDS 

This is an example of a clinical study that can help us in our everyday practice of dentistry. Although the findings do not surprise us, keeping the findings in mind will guide us in decisions we make when performing treatments our patients are counting on to be long lasting. 

Dr. Markus Blatz is co-founder and past President of the International Academy for Adhesive Dentistry (IAAD) and Chairman of the Department of Preventive and Restorative Sciences and Assistant Dean for Digital Innovation and Professional Development at the University of Pennsylvania School of Dental Medicine in Philadelphia. He and a research team from the University of Coimbra, in Portugal, studied the effect of rubber dam isolation on bond strength to enamel. Their goal was to test two hypotheses. 

Hypothesis 1: Rubber dam isolation improves sheer bond strength independent of the adhesive system used. 

Hypothesis 2: A highly filled 3-step etch and rinse adhesive will provide higher bond strength values than an isopropyl-based universal adhesive. 

For their tests, they used OptiBond FL from Kerr for the 3-step etch and rinse adhesive and Prime & Bond Universal Adhesive for the isopropyl-based universal adhesive. 

The mesial, distal, lingual, and vestibular enamel surfaces of thirty human third molars were prepared (total n = 120 surfaces). A custom splint was made to fit a volunteer’s maxilla, holding the specimens in place in the oral cavity. Four composite resin cylinders were bonded to each tooth with one of two bonding agents (OptiBond FL and Prime & Bond) with or without rubber dam isolation. Shear bond strength was tested in a universal testing machine and failure modes were assessed. 

Both hypotheses were supported by the results reported in the Journal of Esthetic and Restorative Dentistry in November of 2022. 

  • With the rubber dam in place, both of the adhesives performed better than without the rubber dam in place, resulting in approximately twice as much shear bond strength with the rubber dam. 
  • The 3-step OptiBond FL system resulted in a more resilient bond than the Prime & Bond Universal adhesive. The OptiBond FL group with rubber dam presented the highest mean bond strength values. Fracture modes for specimens bonded without rubber dam isolation were adhesive and cohesive within enamel, while rubber dam experimental groups revealed only cohesive fractures. 

For the benefit of our patients, we shouldn’t cut corners that will impact the longevity of a restoration. My thoughts are that whenever we have basic pure enamel bonding it should be under a rubber dam, using a total etch, 3-step adhesive system. But considering dentin likes to be moist, we may need to make other clinical judgments.  

Related Course

Mastering Dental Photography: From Start to Finish

DATE: October 29 2026 @ 8:00 am - October 31 2026 @ 12:00 pm

Location: The Pankey Institute

CE HOURS: 19

Regular Tuition: $ 2995

Single Occupancy with Ensuite Private Bath (per night): $ 355

Dental photography is an indispensable tool for a high level practice. We will review camera set-up and what settings to use for each photo. All photos from diagnostic series, portraits,…

Learn More>

About Author

Default Avatar
Christopher Mazzola, DDS

FIND A PANKEY DENTIST OR TECHNICIAN

I AM A
I AM INTERESTED IN

VIEW COURSE CALENDAR

How Ivoclean Works 

March 1, 2024 Lee Ann Brady

How Ivoclean Works 

Lee Ann Brady, DMD 

Saliva on the inside of restoration surfaces greatly reduces the bond strength between the porcelain and the cement but during the intraoral try-in process, it is inevitable that there will be saliva contamination. 

Most dentists I know use Ivoclean from Ivoclar to clean their indirect restorations after try-in. It is an incredible material for removing saliva and other contaminants that the restoration is exposed to during the intraoral try-in process.  

We trust Ivoclean to fully remove resin or traditional cements, as well as saliva and red blood cells to produce a super pristine surface.  

Did you ever wonder how Ivoclean works to get rid of saliva and all the other debris that gets on the inside of a ceramic restoration or metal base?  

Intraoral contaminants contain lots of phosphates. Ivoclean contains suspended zirconia particles that have an affinity for phosphates. The zirconia particles pull towards them the phosphate-laden particles, so when you rinse off the Ivoclean, the intraoral debris is rinsed away leaving a clean surface. 

Note: We don’t want to expose zirconia restorations to something that contains phosphates or includes phosphoric on the label because there is a strong attraction at an elemental level between zirconia and phosphate particles. To neutralize the ionic bond between saliva phosphates and zirconia, we need an alkaline solution such as potassium hydroxide (KOH). This is the active ingredient in products such as ZirClean from BISCO. 

Related Course

Mastering Dental Photography: From Start to Finish

DATE: October 29 2026 @ 8:00 am - October 31 2026 @ 12:00 pm

Location: The Pankey Institute

CE HOURS: 19

Regular Tuition: $ 2995

Single Occupancy with Ensuite Private Bath (per night): $ 355

Dental photography is an indispensable tool for a high level practice. We will review camera set-up and what settings to use for each photo. All photos from diagnostic series, portraits,…

Learn More>

About Author

User Image
Lee Ann Brady

FIND A PANKEY DENTIST OR TECHNICIAN

I AM A
I AM INTERESTED IN

VIEW COURSE CALENDAR

Why Use an Essix Retainer Versus a Flipper During Dental Implant Therapy

February 16, 2024 Lee Ann Brady DMD

Why Use an Essix Retainer Versus a Flipper During Dental Implant Therapy 

Lee Ann Brady, DMD 

When it comes to choosing a provisional during implant therapy in the anterior aesthetic zone, we have two removable options. One is called a “flipper.” It’s an interim partial denture composed of an acrylic base and a denture tooth. The other is an Essix retainer.  

There is no question that both options are taxing for the patient for the three to five months that the patient is edentulous and must deal with having this removable device to replace the tooth. So, I always tell my patients that they are going to have to manage the provisional for that time, but it’s worth it because, in the end, they have replaced the tooth with an implant with all the benefits of an implant versus an alternative prosthetic solution. 

In my practice, I use Essix retainers in nearly 100% of the cases. Why? Because an Essix retainer is tooth-borne. The pressure is placed on the teeth and not on the surgical site. In the case of a flipper, the prosthesis is primarily tissue-borne with a little pressure placed on the adjacent teeth. We really don’t want any pressure on the surgical site while it is healing. Pressure can induce biological problems in bone grafts and connective tissue, which affect the long-term outcome. From an aesthetic perspective, the most challenging thing about anterior implant aesthetics is replicating the size, shape, and position of the tissues of the alveolar ridge and papilla. I want to do everything I can to eliminate pressure on the healing tissue. 

In my practice, we do Essix retainers that don’t have a full solid tooth in them. Instead, we simply paint flowable on the facial so that there’s zero pressure anywhere around that surgical site after extraction, after grafting, and after implant placement.  

In addition to explaining the improved outcomes associated with using an Essix retainer, I assure my patients that the retainer will be more comfortable to wear than a denture and be easily removed by them for eating, for drinking liquids other than water that are likely to stain the retainer, for teeth cleaning, and for cleaning the prosthesis. When out in public, such as in a restaurant, patients may carefully eat while wearing the Essix retainer.  

Related Course

Mastering Dental Photography: From Start to Finish

DATE: October 29 2026 @ 8:00 am - October 31 2026 @ 12:00 pm

Location: The Pankey Institute

CE HOURS: 19

Regular Tuition: $ 2995

Single Occupancy with Ensuite Private Bath (per night): $ 355

Dental photography is an indispensable tool for a high level practice. We will review camera set-up and what settings to use for each photo. All photos from diagnostic series, portraits,…

Learn More>

About Author

User Image
Lee Ann Brady DMD

Dr. Lee Ann Brady is passionate about dentistry, her family and making a difference. She is a general dentist and owns a practice in Glendale, AZ limited to restorative dentistry. Lee’s passion for dental education began as a CE junkie herself, pursuing lots of advanced continuing education focused on Restorative and Occlusion. In 2005, she became a full time resident faculty member for The Pankey Institute, and was promoted to Clinical Director in 2006. Lee joined Spear Education as Executive VP of Education in the fall of 2008 to teach and coordinate the educational curriculum. In June of 2011, she left Spear Education, founded leeannbrady.com and joined the dental practice she now owns as an associate. Today, she teaches at dental meetings and study clubs both nationally and internationally, continues to write for dental journals and her website, sits on the editorial board of the Journal of Cosmetic Dentistry, Inside Dentistry and DentalTown Magazines and is the Director of Education for The Pankey Institute.

FIND A PANKEY DENTIST OR TECHNICIAN

I AM A
I AM INTERESTED IN

VIEW COURSE CALENDAR